

Springboot 整合与文件配置


哈喽~大家好,这篇看看Springboot 整合与文件配置。
🥇个人主页:个人主页
🥈 系列专栏:【Java框架】
🥉与这篇相关的文章:
【JAVAEE框架】MyBatis与Spring的整合(上) 【JAVAEE框架】MyBatis与Spring的整合(上)_程序猿追的博客-CSDN博客 【JAVAEE框架】浅谈 AOP 及代码实现 【JAVAEE框架】浅谈 AOP 及代码实现_程序猿追的博客-CSDN博客 【JAVAEE框架】浅谈 Spring 框架的两大核心思想 AOP 与 IOP 【JAVAEE框架】浅谈 Spring 框架的两大核心思想 AOP 与 IOP_程序猿追的博客-CSDN博客
目录
一、前言
1、先来看看pom文件
2、parent
3、spring-boot-starter-web
4、spring-boot-starter-test
二、配置文件格式
1、application文件配置
2、static目录
3、template目录
三、SpringBoot整合
1、yml 配置
2、实体类
3、控制层
4、service 层
5、dao 层
6、mapper.xml文件
一、前言
前篇文字大家已经感受了
SpringBoot起步项目,回过头看看SpringBoot主要作用是什么,就是简化Spring的搭建过程和开发过程。原始
Spring环境搭建和开发存在以下问题
配置繁琐
依赖设置繁琐
SpringBoot程序优点恰巧就是针对Spring的缺点
自动配置。这个是用来解决
Spring程序配置繁琐的问题起步依赖。这个是用来解决
Spring程序依赖设置繁琐的问题辅助功能(内置服务器,...)。我们在启动
SpringBoot程序时既没有使用本地的tomcat也没有使用tomcat插件,而是使用SpringBoot内置的服务器。
接下来我们来说一下 SpringBoot 的起步依赖
1、先来看看pom文件
4.0.0
org.springframework.boot spring-boot-starter-parent 2.7.4 com.itxzw day03_SpringBoot01 0.0.1-SNAPSHOT day03_SpringBoot01 day03_SpringBoot01
1.8
org.springframework.boot spring-boot-starter-web mysql mysql-connector-java runtime org.projectlombok lombok true org.springframework.boot spring-boot-starter-test test com.alibaba druid-spring-boot-starter 1.2.11 org.mybatis.spring.boot mybatis-spring-boot-starter 2.2.2 com.baomidou mybatis-plus-boot-starter 3.5.0
org.springframework.boot spring-boot-maven-plugin org.projectlombok lombok 2、parent
parent 作用 定义了一个父标签spring-boot-dependencies,这个里边定义了依赖的版本,也正是因为继承了这个依赖,所以我们在写依赖时才不需要写版本号 使用默认编码格式为 UTF-8 定义了 Java 编译版本为 1.8 定义了针对 application.properties 和 application.yml 的资源过滤,包括通过 profile 定义的不同环境的配置文件,例如 application-dev.properties 和 application-dev.yml 执行打包操作的配置 自动化的资源过滤 自动化的插件配置
3、spring-boot-starter-web
spring-boot-starter-web是一个依赖库,Spring Boot 是在 Spring 的基础上创建的一个开原框架,它提供了 spring-boot-starter-web (web场景启动器)来为web开发予以支持。spring-boot-starter-web 为什么提供了嵌入的Servlet容器以及SpringMVC提供了大量自动配置,可以适用于大多数web开发场景。
只要我们在Spring Boot 项目中的 pom.xml 中引入了spring-boot-starter-web依赖,即使不进行任何配置,也可以使用Spring MVC 进行 Web 开发。
4、spring-boot-starter-test
支持常规的测试依赖,包括JUnit、Hamcrest、Mockito以及spring-test模块。
更详细的可以看看这位大佬的,[SpringBoot 之Spring Boot Starter依赖包及作用 - 方东信 - 博客园]
在dependencies里面发现了有的依赖有版本号,有些却没有,这是为什么呢?
在 Spring提供的场景启动器是以 spring-boot-starter-** 这样的形式(xx就是要引入的依赖名,不需要版本号(自动装配))
eg:
这个redis的依赖
org.springframework.boot spring-boot-starter-data-redis
按ctrl点击 spring-boot-starter-data-redis 进去,发现里面有
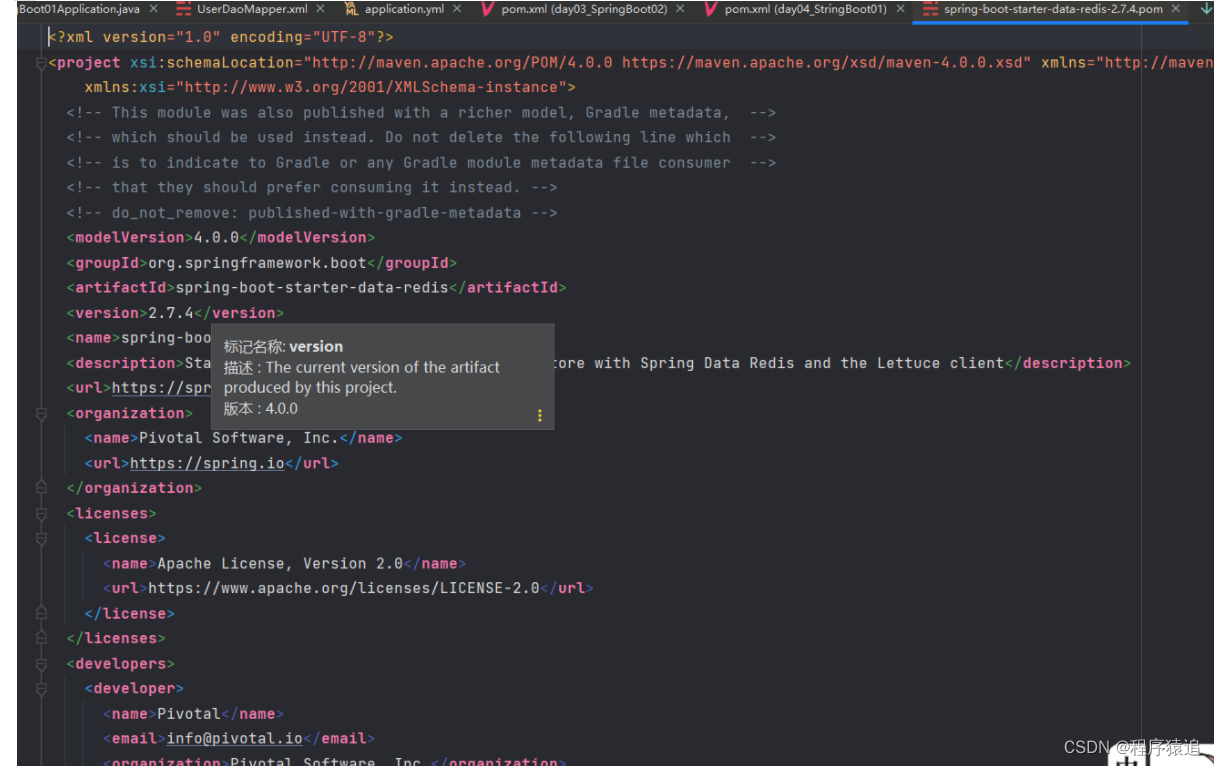
而第三方框架场景启动器是以 **-spring-boot-starter 这样的形式
eg:
com.alibaba druid-spring-boot-starter 1.2.11
二、配置文件格式
1、application文件配置
我们现在启动服务器默认的端口号是 8080,访问路径可以书写为
http://localhost:8080/books/1
在线上环境我们还是希望将端口号改为 80,这样在访问的时候就可以不写端口号了,如下
http://localhost/books/1
而 SpringBoot 程序如何修改呢?SpringBoot 提供了多种属性配置方式
application.properties
server.port=80
而 SpringBoot 程序如何修改呢?SpringBoot 提供了多种属性配置方式
application.properties
server.port=80
application.yml
server:port: 81
application.yaml
server:port: 82
注意:SpringBoot 程序的配置文件名必须是 application ,只是后缀名不同而已。
2、static目录
static目录 static目录是用来保存静态文件的目录, 比如HTML, JS, CSS, 图片等, 是不需要服务器进行数据绑定的页面. static目录下的文件, SpringBoot帮我们做了静态路径自动解析. 比如: 我写了一个/static/hello.html 在浏览器上访问: localhost/hello.html 即可访问到。
3、template目录
template目录 template目录是用来保存动态模版文件的目录, 比如Freemarker, JSP, Thymeleaf等需要服务器动态渲染数据的文件. 由于页面渲染需要服务器中的数据, 所以该文件必须经过Controller控制器进行Model数据绑定后, 由服务器进行跳转. 所以直接访问是无意义的, 也访问不到.
比如: 我写了一个/templates/hello.ftl 在浏览器上访问: localhost/hello.ftl是访问不到的, 需要访问Controller的路径, 才能访问到页面 (由Controller进行跳转, 也就说明数据已经绑定成功)
三、SpringBoot整合
1、yml 配置
server:port: 8080spring:datasource:driver-class-name: com.mysql.cj.jdbc.Driverurl: jdbc:mysql://localhost:3306/db1?useUnicode=true&characterEncoding=utf8&useSSL=true&serverTimezone=Asia/Shanghaiusername: rootpassword: 123456type: com.alibaba.druid.pool.DruidDataSourcemybatis-plus:configuration:cache-enabled: truejdbc-type-for-null: nullauto-mapping-behavior: fulltype-aliases-package: com.itxzw.*.modelmapper-locations: classpath:mapper/*.xml
2、实体类
SmbmsUser 与 UserCondition
package com.itxzw.user.model;import lombok.AllArgsConstructor;
import lombok.Data;
import lombok.NoArgsConstructor;
import lombok.ToString;
import org.springframework.format.annotation.DateTimeFormat;import java.util.Date;@Data
@ToString
@AllArgsConstructor
@NoArgsConstructor// 用户实体类
public class SmbmsUser {private String id;private String usercode;private String username;private String userpassword;private long gender;
//    @JSONField(format = "yyyy-MM-dd")
//    @DateTimeFormat(pattern = "yyyy-MM-dd")private Date birthday;private String phone;private String address;private String userrole;private String createdby;private Date creationdate;private String modifyby;private Date modifydate;}
package com.itxzw.user.model;import lombok.AllArgsConstructor;
import lombok.Data;
import lombok.NoArgsConstructor;
import lombok.ToString;@Data
@ToString
@AllArgsConstructor
@NoArgsConstructor// 对用户操作的实体类
public class UserCondition {private String id;private String usercode;private String username;private String userpassword;private String un;private String gender;private String userrole;private String createdby;}3、控制层
@Controller
@RequestMapping("/user")
public class UserAction{@Autowiredprivate IUserService userService;public IUserService getUserService() {return userService;}public void setUserService(IUserService userService) {this.userService = userService;}// 查看所有用户信息@RequestMapping("/userList")@ResponseBodypublic List userList(){UserCondition coon = new UserCondition();List userListByCondition = userService.userListCondition(coon);return userListByCondition;}// 查看所有用户信息,做跳转@RequestMapping("/userView")public String userView(Model model){return "userlist";}} 这里的 访问 /userView 请求,return 跳转到 template 目录下的 名叫 userlist 这个的文件
4、service 层
@Service
public class UserService implements IUserService {@Autowiredprivate IUserDao userDao;public IUserDao getUserDao() {return userDao;}public void setUserDao(IUserDao userDao) {this.userDao = userDao;}public List userListCondition(UserCondition conn) {return userDao.userListCondition(conn);}}
5、dao 层
@Mapper
public interface IUserDao {// 查询所有用户信息public List userListCondition(UserCondition conn);} 6、mapper.xml文件
或者这里可以不用 xml,直接用mybatis plus (mybatis plus 篇下篇更新)。
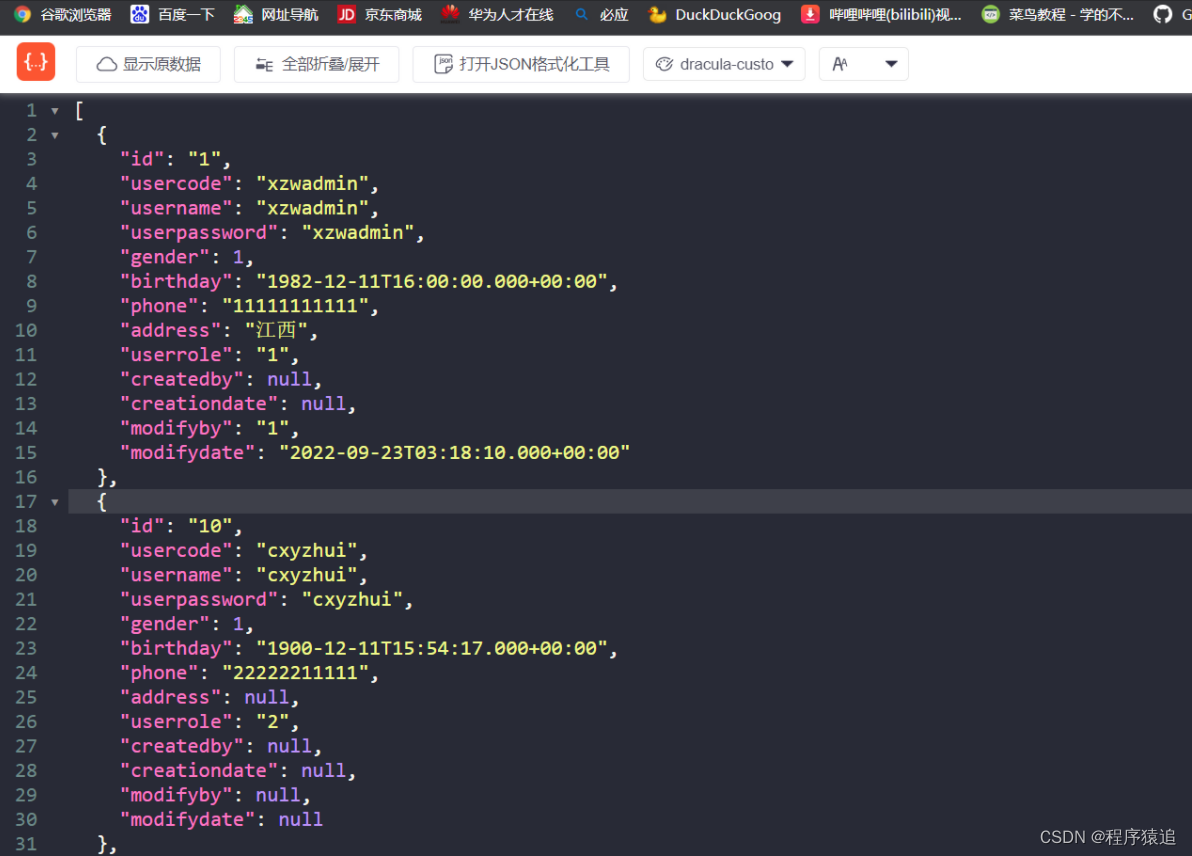
访问地址 : http://localhost:8080/user/userList

扩:前几天有小伙伴问浏览器是什么插件?
答:csdn 官方的浏览器助手

不积跬步无以至千里,趁年轻,使劲拼,给未来的自己一个交代!向着明天更好的自己前进吧!

上一篇:NR/5G - PUSCH repetition次数
下一篇:k3s 离线部署指南