

Spring Security认证之登录表单配置
本文内容来自王松老师的《深入浅出Spring Security》,自己在学习的时候为了加深理解顺手抄录的,有时候还会写一些自己的想法。
自定义登录页面
文接上篇,这一篇学习如何自定义登录表单。我们创建一个Spring Boot项目之后,还是一样引入Spring Security和Web的基本依赖:
org.springframework.boot spring-boot-starter-web org.springframework.boot spring-boot-starter-security 项目创建好之后,我们配置用来登录的用户名和密码:
spring.security.user.name=tlh
spring.security.user.password=123456
spring.security.user.roles=admin,users
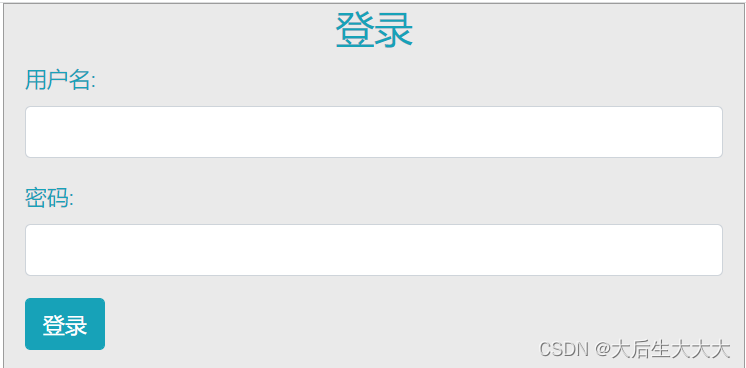
接下来我们我们在resources/static目录下创建有个loging.thml页面。这个就是我们之定义的登录页面:
登录
这个login.html中的核心内容就是一个登录表单,登录表单的三个地方需要注意:
- form的action是/doLogin,表示表单提交到/doLogin接口
- 用户名的输入框的name属性为uname
- 用户密码的输入框的name属性为password
login.html配置好之后我们来定义两个测试接口,作为受保护的资源。等我们登录成功之后我们就可以访问到受保护的资源。接口定义如下:
/*** @author tlh* @date 2022/11/15 21:25*/
@RestController
public class HelloController {@RequestMapping("/index")public String index() {return "login success";}@RequestMapping("/hello")public String hello() {return "hello spring security";}
}
最后在提供一个Spring Security的配置类:
*** @author tlh* @date 2022/11/16 21:11*/
@Configuration
public class SpringSecurityConfig extends WebSecurityConfigurerAdapter {@Overrideprotected void configure(HttpSecurity http) throws Exception {http.authorizeRequests() //表示开启权限配置.anyRequest().authenticated() //表示所有的请求都需要认证之后才能访问.and() //返回HttpSecurity对象.formLogin()  //采用表单登录的方式认证.loginPage("/login.html") //配置登录页面.loginProcessingUrl("/doLogin") //配置登录接口.defaultSuccessUrl("/index") //登录认证成功之后跳转的地址.failureUrl("/login.html")  //登录认证失败的时候跳转的地址.usernameParameter("uname")  //登录表单提交时用户名的参数名称.passwordParameter("passwd")  //登录表单提交时密码的参数名称.permitAll() //表示登录相关的页面接口不做拦截直接通过。.and()  //返回HttpSecurity对象.csrf().disable();  //禁用CSRF防御机制}
}
这里需要注意的是loginProcessingUrl、usernameParameter、passwordParameter需要和login.html中登录表单的配置一致。
配置完成之后,我们启动Spring Boot项目,在浏览器中输入:http://localhost:8080/index ,会自动跳转到:http://localhost:8080/login.html 。输入正确的账号和密码就能访问到我们index接口了。
登录成功之后的页面:
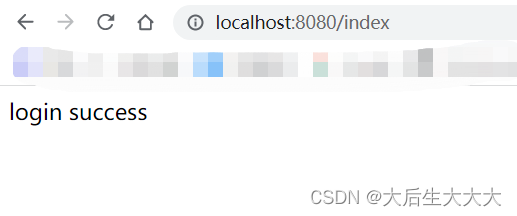
经过上面的配置我们已经自定义了一个登录页面了,用户登录成功之后就能访问受保护的资源了。
详细配置
前面讲的配置比较粗糙,这里还有一些比较详细的配置我们一起来学习下。登录成功之后,除了defaultSuccessUrl可以实现登录成功之后的跳转之外,successForwardUrl也能实现相同的功能。代码如下:
/*** @author tlh* @date 2022/11/16 21:11*/
@Configuration
public class SpringSecurityConfig extends WebSecurityConfigurerAdapter {@Overrideprotected void configure(HttpSecurity http) throws Exception {http.authorizeRequests().anyRequest().authenticated().and().formLogin().loginPage("/login.html").loginProcessingUrl("/doLogin").successForwardUrl("/index").failureUrl("/login.html").usernameParameter("uname").passwordParameter("passwd").permitAll().and().csrf().disable();}
}
defaultSuccessUrl和successForwardUrl两者不同的地方在于:
- defaultSuccessUrl表示等用户登录成功之后,会自动重定向到登录之前的地址上去。比如:用户在没有认证登录前访问的是/index,用户会被自动重定向到登录页面,用户输入正确的账号和密码之后又会被重定向到/index地址上。
- successForwardUrl不会考虑之前的用户访问的什么地址,只要用户登录成功就会通过服务端跳转到successForwardUrl所指定的页面。
- defaultSuccessUrl还有一个重载的方法,如果第二个参数传入true,就能实现和successForwardUrl相同的效果。即不考虑用户之前访问的地址,只要成功就会重定向到defaultSuccessUrl指定的地址。两者不同的地方在于defaultSuccessUrl是通过重定向试下你的跳转(客户端跳转),而successForwardUrl则是通过服务端实现跳转的。
无论是defaultSuccessUrl还是successForwardUrl,最终都是通过AuthenticationSuccessHandler的实例来实现的:
public interface AuthenticationSuccessHandler {default void onAuthenticationSuccess(HttpServletRequest request, HttpServletResponse response, FilterChain chain,Authentication authentication) throws IOException, ServletException {onAuthenticationSuccess(request, response, authentication);chain.doFilter(request, response);}void onAuthenticationSuccess(HttpServletRequest request, HttpServletResponse response,Authentication authentication) throws IOException, ServletException;
}
AuthenticationSuccessHandler的默认实现类有三个:ForwardAuthenticationSuccessHandler、SavedRequestAwareAuthenticationSuccessHandler、SimpleUrlAuthenticationSuccessHandler。

不管是ForwardAuthenticationSuccessHandler还是SavedRequestAwareAuthenticationSuccessHandler或者是SimpleUrlAuthenticationSuccessHandler都是来实现页面跳转的。现在更加流行的是前后端分离的开发模式了,更多时候后端返回的是Json数据。下面我们通过自定义AuthenticationSuccessHandler来实现登录成功之后返回Json字符串。我们发现在配置 defaultSuccessUrl和successForwardUrl的时候其实是间接配置AuthenticationSuccessHandler的实例,那我们就直接自己实现AuthenticationSuccessHandler的实例。代码如下:
/*** @author tlh* @date 2022/11/16 21:11*/
@Configuration
public class SpringSecurityConfig extends WebSecurityConfigurerAdapter {@Overrideprotected void configure(HttpSecurity http) throws Exception {http.authorizeRequests().anyRequest().authenticated().and().formLogin().loginPage("/login.html").loginProcessingUrl("/doLogin").successHandler(getAuthenticationSuccessHandler()).failureUrl("/login.html").usernameParameter("uname").passwordParameter("passwd").permitAll().and().csrf().disable();}AuthenticationSuccessHandler getAuthenticationSuccessHandler() {return new AuthenticationSuccessHandler() {@Overridepublic void onAuthenticationSuccess(HttpServletRequest request, HttpServletResponse response, Authentication authentication) throws IOException, ServletException {response.setContentType("application/json;charset=utf-8");Map respMap = new HashMap<>(2);respMap.put("code", "200");respMap.put("msg", "登录成功");ObjectMapper objectMapper = new ObjectMapper();String jsonStr = objectMapper.writeValueAsString(respMap);response.getWriter().write(jsonStr);}};}
}
重启项目登录成功之后就能看到服务器返回的Json字符串:
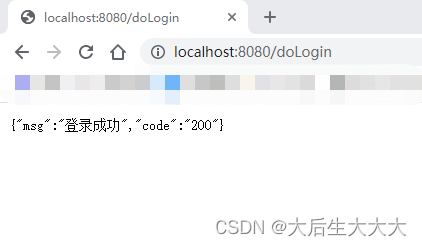
小结
上面是登录页面自定义和登录认证成功之后的讲解。其实登录认证失败和登出的逻辑非常类似,有兴趣的小伙伴可以自己看看api来实现。实现关键词:AuthenticationFailureHandler和logoutSuccessHandler
上一篇:写悲伤的句子
下一篇:雨中感受的图片和句子