

Unity3D赛车游戏+脚本基础
前言
游戏对象实例化
Scenes游戏场景
GameObject游戏对象
Component组件
Component使用方法
预制体
Unity事件函数
Instantiate():实例化对象
什么是Time.deltaTime
Transform的移动,旋转和缩放
实战:赛车游戏
运行演示
具体步骤
游戏打包流程
前言
本章主要介绍Unity的基础开发流程以及涉及到的概念。这个过程需要我们学会编写一些游戏脚本,在这讲的过程中我们会完成一个赛车小游戏,因此,在讲述这些基本概念和流程的时候,会同时涉及到一点脚本的开发基础.
游戏对象实例化
Scenes游戏场景
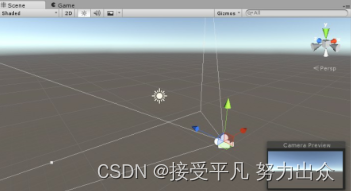
- 游戏场景里存储着游戏的环境(诸如游戏模型,地形,UI等),如右图,Unity默认新建的Scene必然有一个摄像机(用于提供渲染视角)和一个光源(提供光照)
GameObject游戏对象
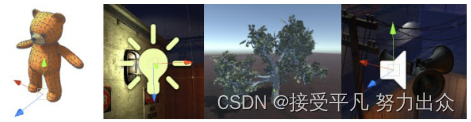
- 游戏中所有的对象都是GameObject,从模型,光照,摄像机,粒子特效,无一例外。
- 可是单纯的GO并不能做任何事情,所以,我们需要给一个GO添加属性,让它可以"进化"成游戏角色,模型或者特效等等。
- 这些属性在Unity中,我们称之为Component(组件)
- GO默认有一个无法移除的Component:Transform(变换),用于定义位置,缩放和旋转角度。
- 组合不同的Component(组件),你可以让GO进化成想要的物体。
- 你可以把GO想象成一个容器,你往里面添加不同的佐料(Component),他们共同作用变成了一道菜。
- Unity内部提供了一些常用的Component.
- 如果你想要添加自定义的Cmponent,需要自己写脚本实现
Component组件
每一个GO都默认有个Transform组件
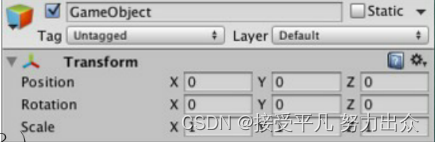
- Position(位置 在哪里?)
- Rotation(旋转 朝南还是朝北?)
- Scale(缩放 大还是小?)
一个Camera(摄像机)默认添加的Component
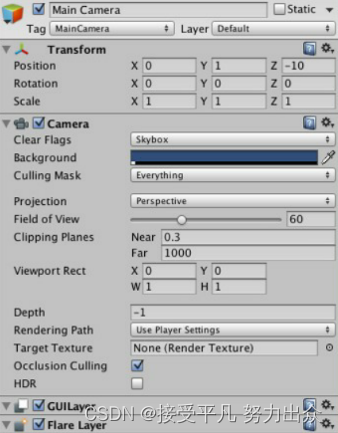
每一个可以折叠的都是组件,组件定义了GO的行为和属性
Component使用方法
右键Component可以展开功能菜单如右图:
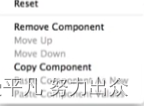
组件的属性在游戏运行时都可以手动的更改的,效果可以在Game View或者Scence Viem中直接看到。
预制体
- Prefab是一种资源类型——存储在项目视图中的一种可反复使用的游戏对象。因而当游戏中需要非常多反复使用的对象,资源等时,Prefab就有了用武之地,它拥有下面特点:
1.能够放在多个场景中。也能够在同一个场景中放置多次
2.当加入一个Prefab到场景中,就创建了他的一个实例
3.全部的Prefab实例链接到原始Prefab,本质上是原始Prefab的克隆。
4.不论项目中存在多少个实例。仅仅要对Prefab进行了改动。全部Prefab实例都将随之发生变化。
Unity事件函数
- Unity中的脚本分为不同的方法,不同的方法在特定的情况下被回调会实现特定的功能。
-Awake方法:有一个场景仅仅调用一次,在该方法内可以写一些游戏场景初始化之类的代码。
-Start方法:这个方法在GO被启用时调用
-Update方法:这个方法会在每一帧渲染之前被调用,大部分游戏代码在这里执行,除了物理部分的代码。
-FixeUpdate方法:这个方法会在固定的物理时间步调调用一次。这里也是基本物理行为代码执行的地方。
Instantiate():实例化对象
例子:脚本完成5个预制体
-向量:Unity中提供了完整的用来表示二维向量的Vector2类和表示三维向量的Vector3类
-实例化游戏对象
static function Instantiate(original:Object,position:Vector3,rotation:Quaternion):Object
vector3(2,0,0)- 参数一:是预设
- 参数二:实例化预设的坐标
- 参数三:实例化预设的旋转角度
什么是Time.deltaTime
- 在游戏,电影和动画中,都有一个渲染的帧率,电影是24帧/s,游戏大概是30帧/s(当然也有60帧/s的)。在unity里面1秒钟,Update方法执行了30次。
- 1秒钟有30帧,帧与帧之所消耗的时间是不一样的,那么我如何知道上一帧用了多少时间?Time.deltaTime就是为了解决这个问题。放在update()函数中的代码是以帧来执行的,如果我们需要物体的移动以秒来执行,需要将物体移动的值乘以Time.deltaTime.
- 物理中距离=速度*时间,通过把Speed*Time.deltaTime,计算得到上一帧游戏物体移动的距离。
Transform的移动,旋转和缩放
-Translate(Vector3 translation)
-Rotate(Vector3 eulers)
-localScale
实例演示
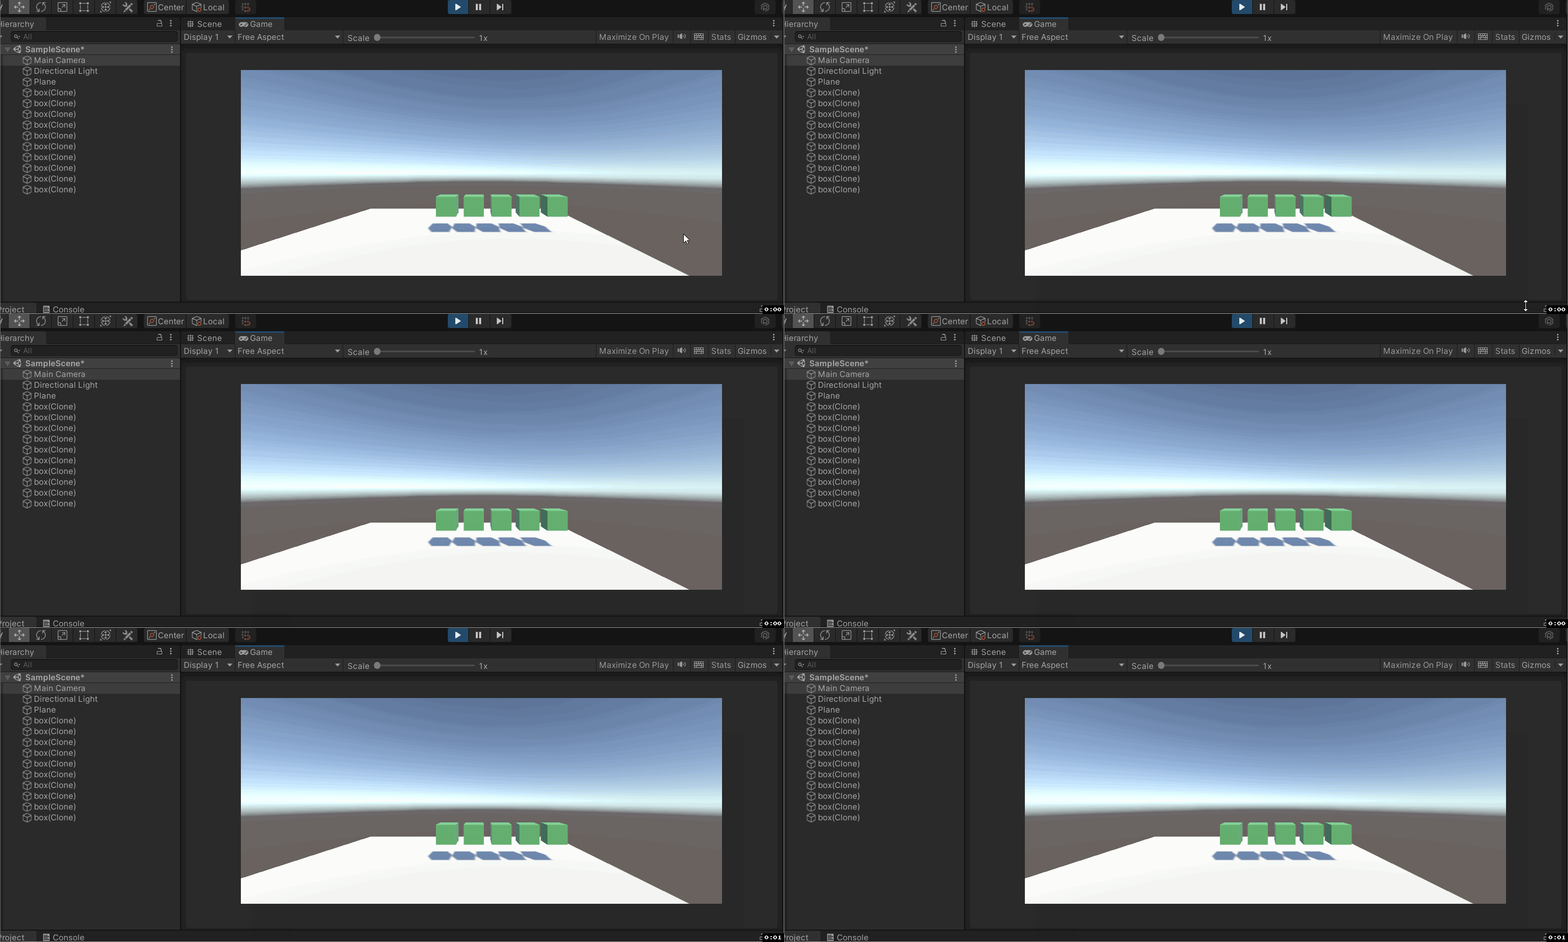
- 脚本完成5个预制体
首先创建在"_Scripts"下创建一个脚本,然后写入代码,用for循环创建5个预制体,保证每个预制体的x轴发生变化,其他坐标轴不发生变化,
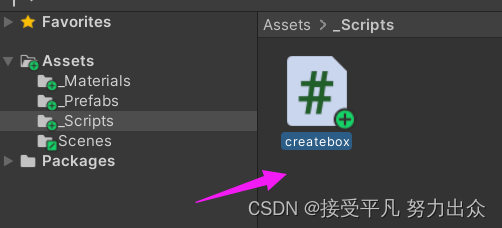
代码如下所示:
using System.Collections;
using System.Collections.Generic;
using UnityEngine;public class createbox : MonoBehaviour
{public GameObject go;// Start is called before the first frame updatevoid Start(){for(int i=0;i<5;i++){Vector3 pos = new Vector3(i * 2,0, 0);GameObject.Instantiate(go, pos, Quaternion.identity);}}// Update is called once per framevoid Update(){}
}
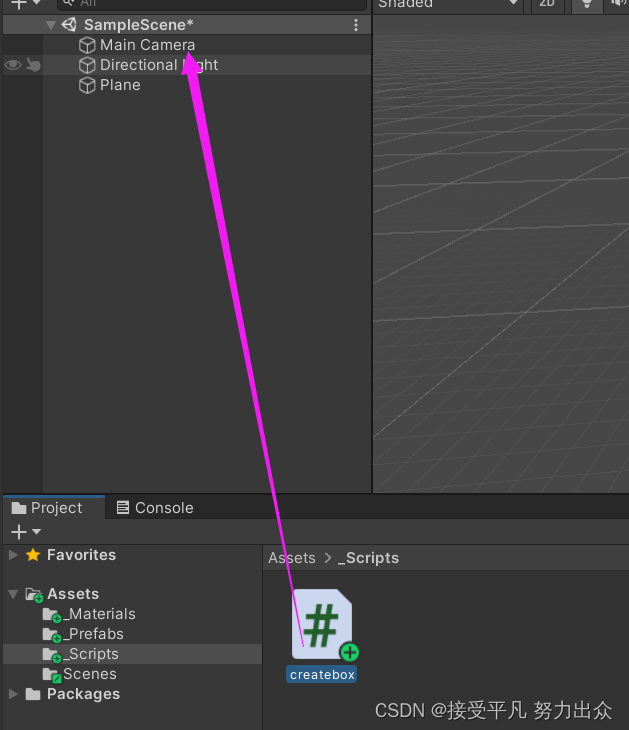
然后将代码拖入到Camera中,然后点击Camera查看右边的组件,找到代码中创建的go.
将预制体拖入GO中即可。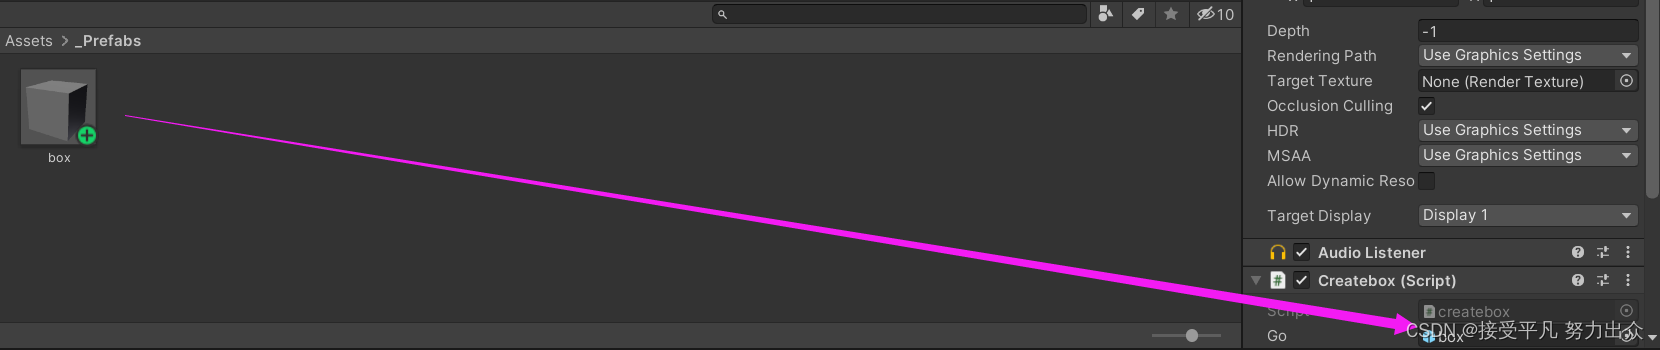
运行结果:
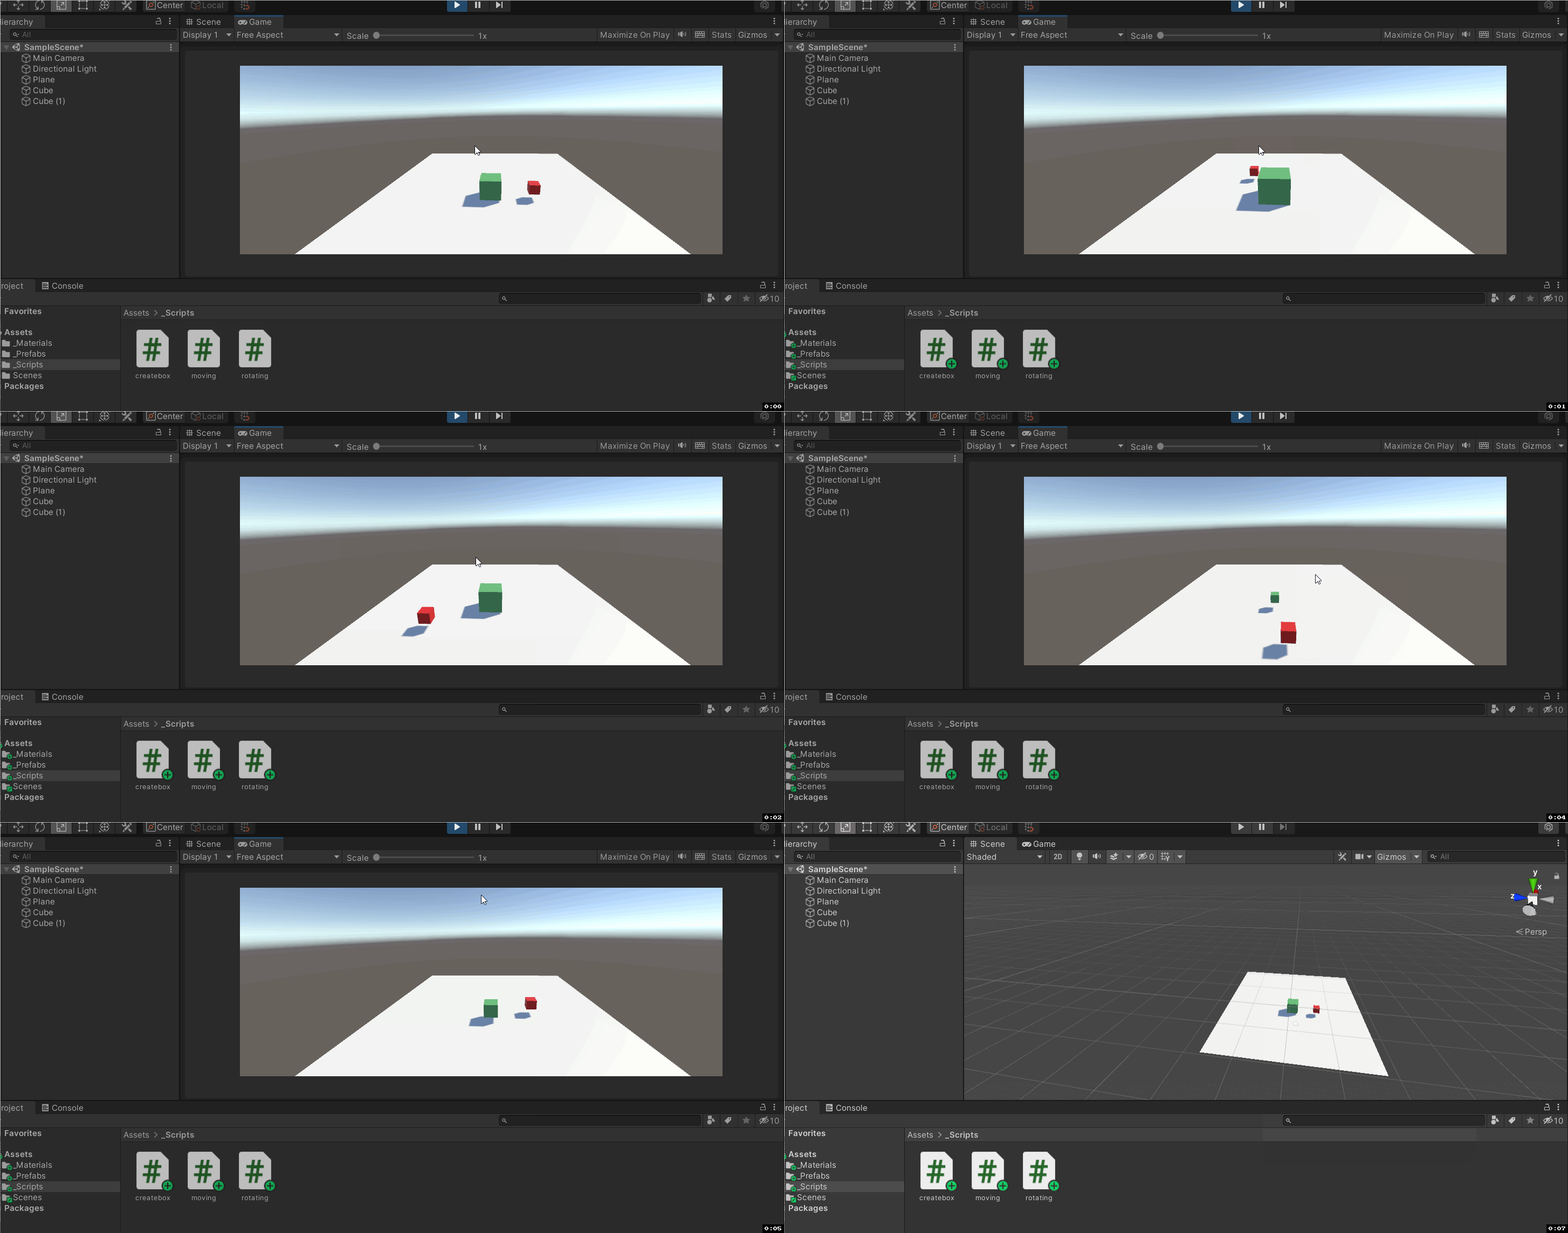
- 让一个Cube沿着矩形移动,中间Cube沿着x轴方向旋转,并扩大到4倍,然后缩小至0.5倍
运行结果
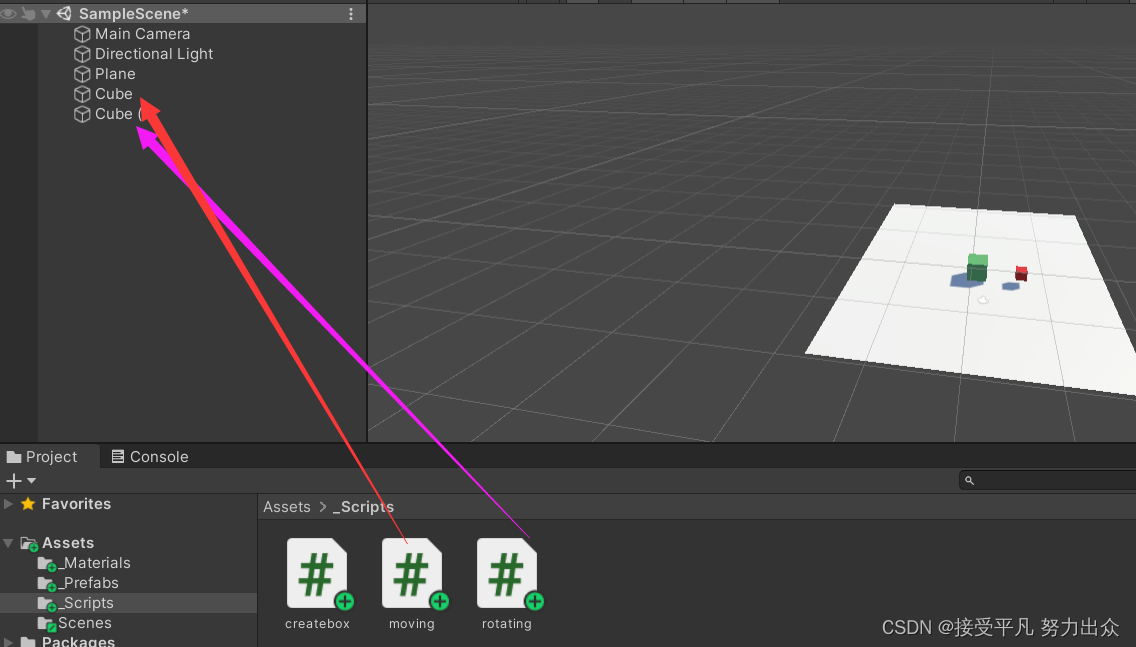
代码示例:将对应的脚本拖入到对应的物体中。
代码如下:
using System.Collections;
using System.Collections.Generic;
using UnityEngine;public class rotating : MonoBehaviour
{public float speed = 0.1f;public bool flag = true;// Start is called before the first frame updatevoid Start(){}// Update is called once per framevoid Update(){transform.Rotate(Vector3.right*speed*Time.deltaTime);if(transform.localScale.x<0.5){flag = true;// transform.localScale += new Vector3(0.1f, 0.1f, 0.1f);}if(transform.localScale.x>5){flag = false;}if(flag){transform.localScale += new Vector3(0.1f, 0.1f, 0.1f);}else{transform.localScale -= new Vector3(0.1f, 0.1f, 0.1f);}}
}
//moving.csusing System.Collections;
using System.Collections.Generic;
using UnityEngine;public class moving : MonoBehaviour
{public float speed = 5.0f;// Start is called before the first frame updatevoid Start(){}// Update is called once per framevoid Update(){//transform.Translate(Vector3.forward * speed*Time.deltaTime);if(transform.position.z>6){transform.Translate(new Vector3(-speed * Time.deltaTime, 0, 0));}if(transform.position.x<-6){transform.Translate(new Vector3(0, 0, -speed * Time.deltaTime));}if(transform.position.z<-6){transform.Translate(new Vector3(speed * Time.deltaTime, 0, 0));}if(transform.position.x>6){transform.Translate(new Vector3(0, 0, speed * Time.deltaTime));}}
}//createbox.csusing System.Collections;
using System.Collections.Generic;
using UnityEngine;public class createbox : MonoBehaviour
{public GameObject go;// Start is called before the first frame updatevoid Start(){for(int i=0;i<5;i++){Vector3 pos = new Vector3(i * 2,0, 0);GameObject.Instantiate(go, pos, Quaternion.identity);}}// Update is called once per framevoid Update(){}
}
注意:
- Awake在物体初始化就会被调用,不管脚本本身是否启用;
- Start方法只有在被激活的状态下才会被调用;
- Quaternion.indetity就是指Quaternion(0,0,0,0),就是每旋转前的初始角度,是一个确切的值。
实战:赛车游戏
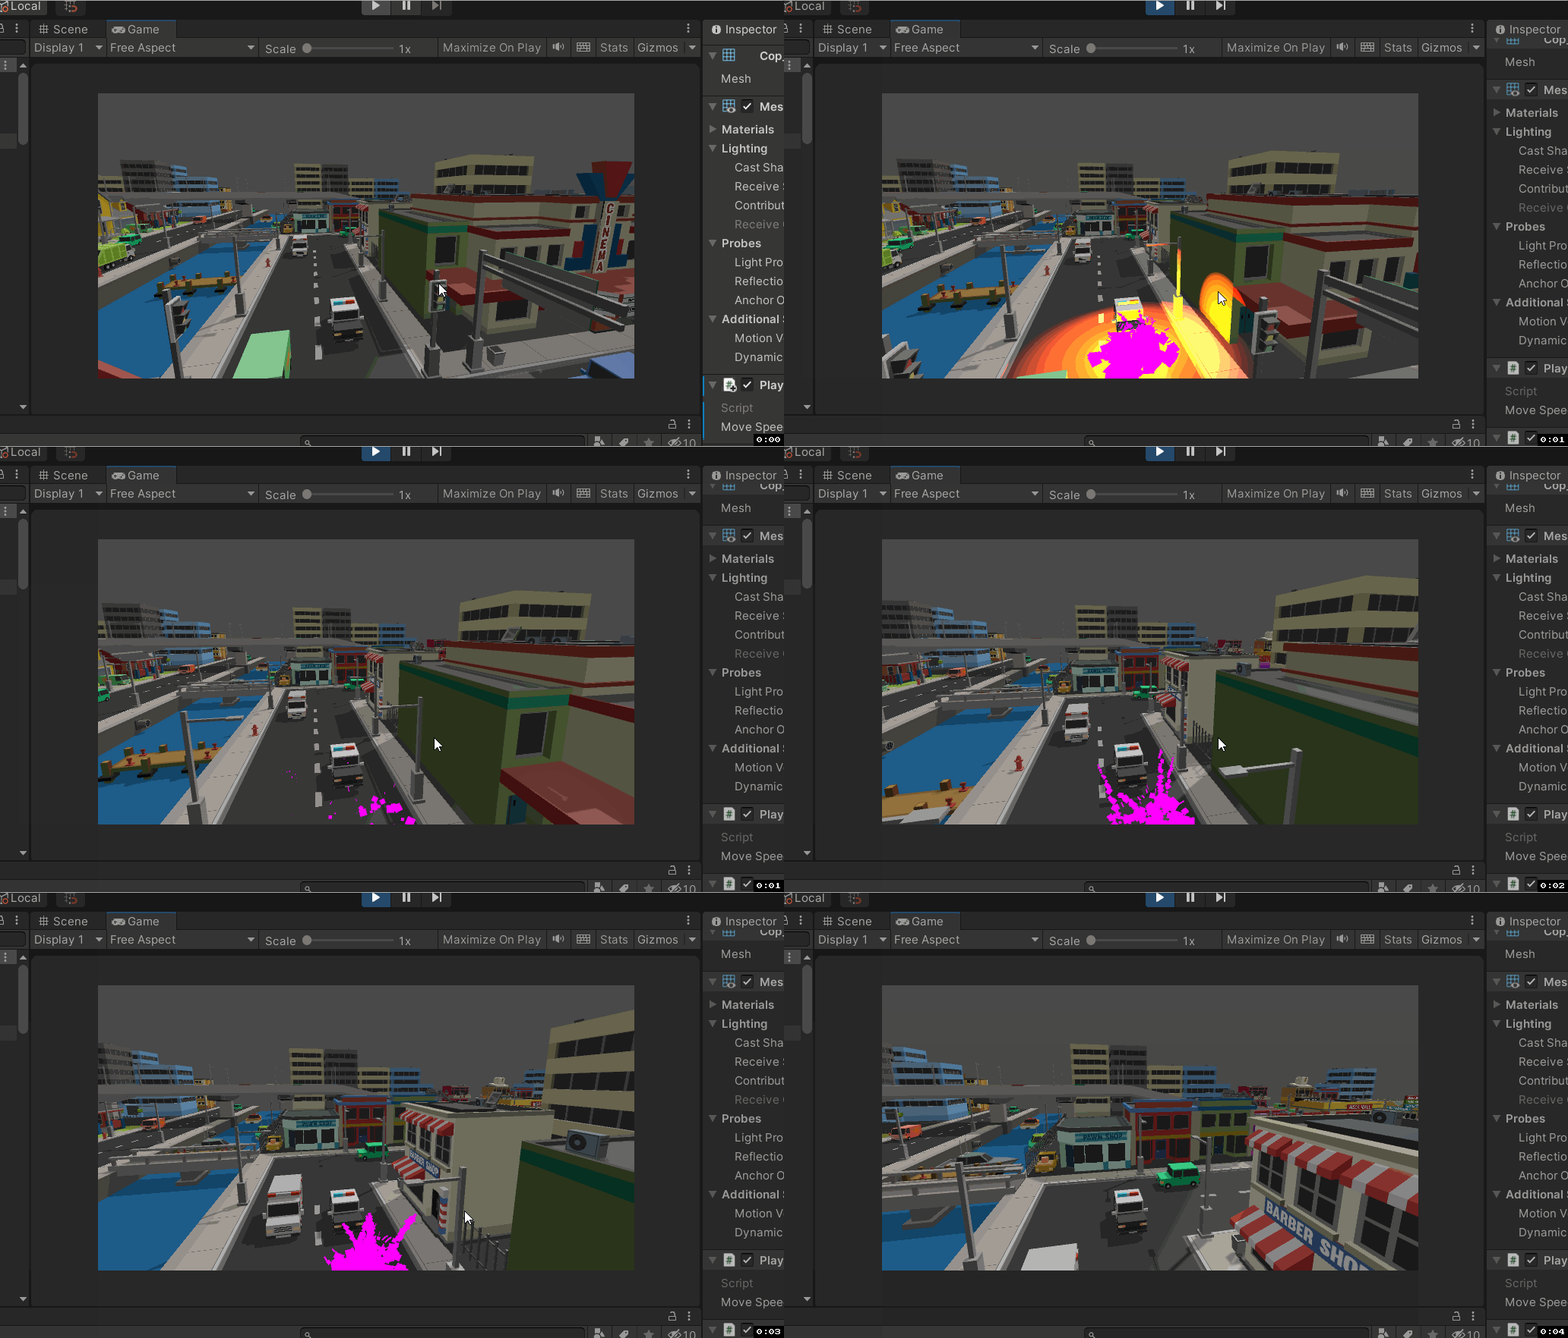
运行演示
具体步骤
1.导入资源包,我把实验需要用到的资源包放在下面,需要的自取
资源包
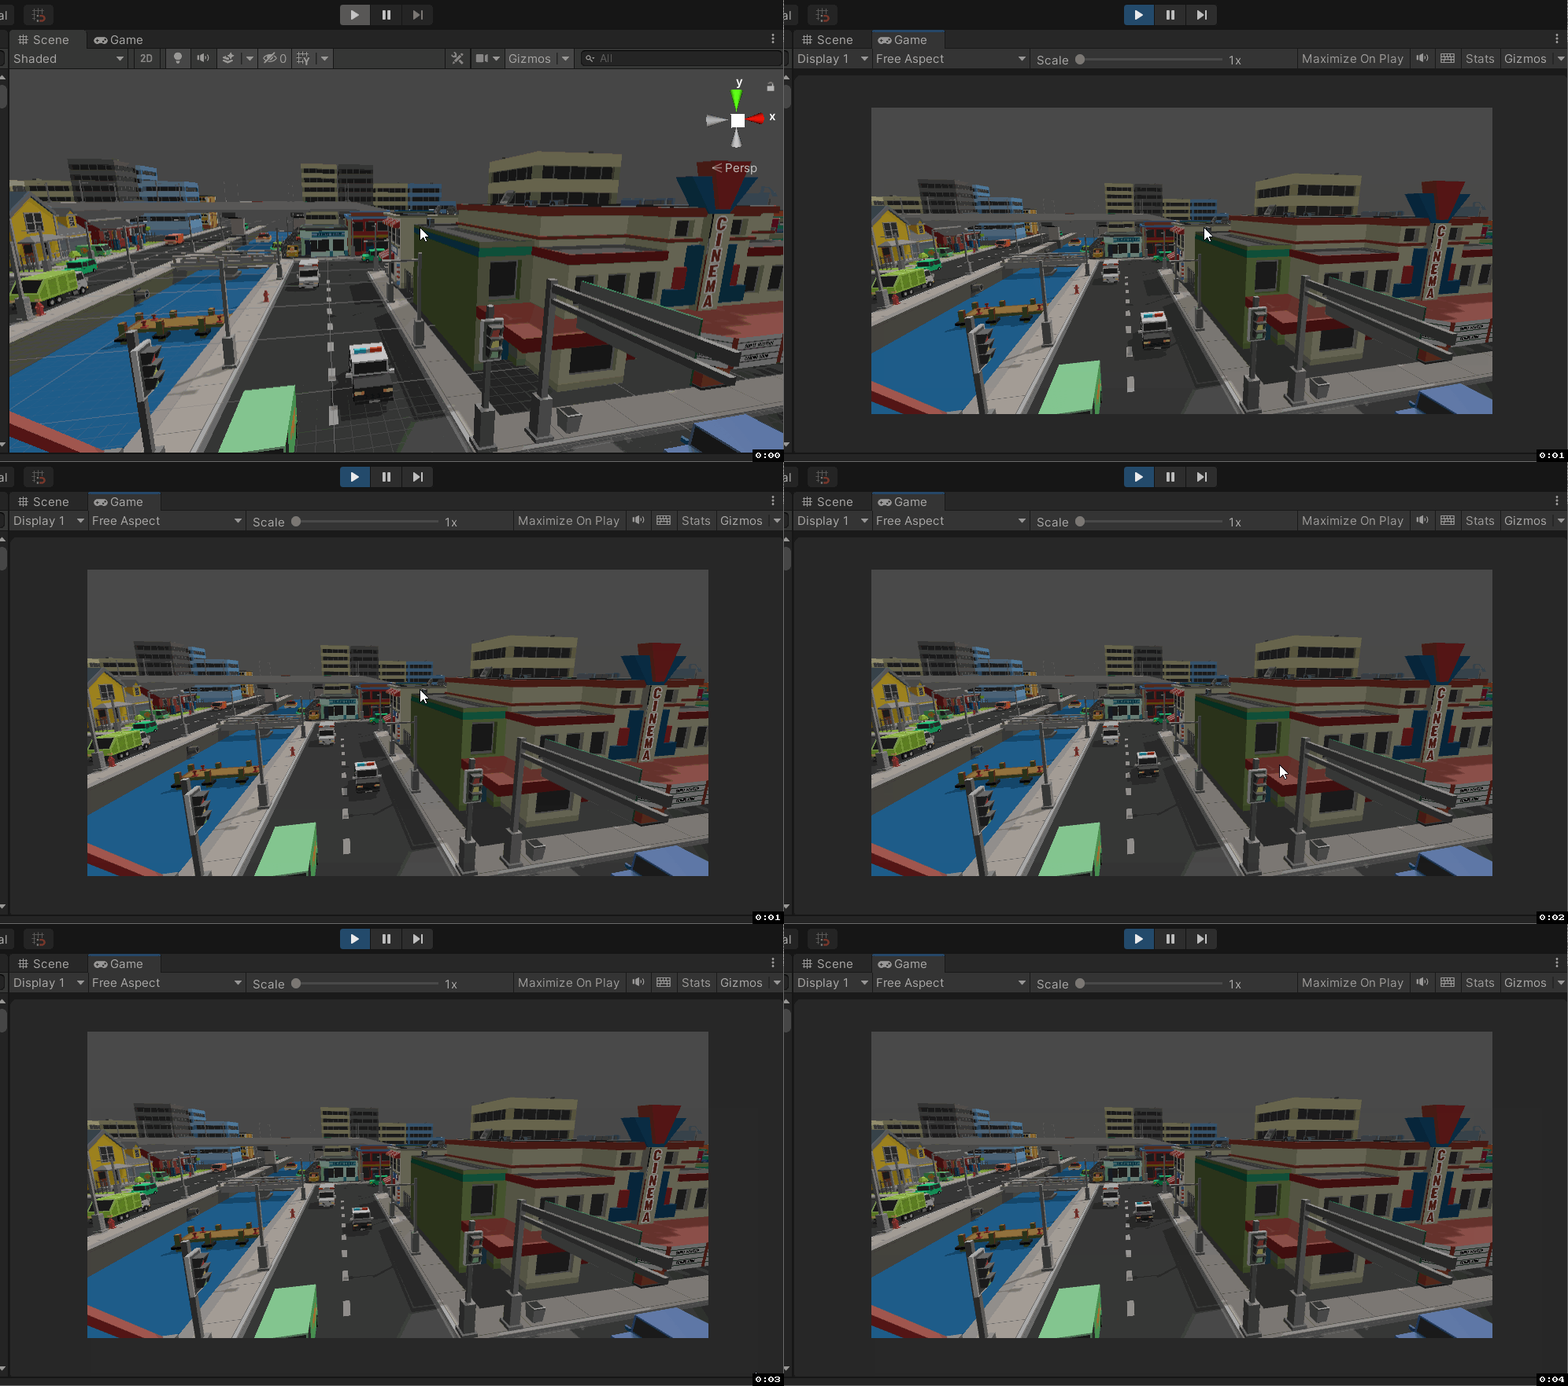
2.首先在scene中找到"警车",把它拖动到文件夹_Prefabs,生成一个新的prefab,并重新命名为player,把player拖动到场景中,放置在路的开头,调整下camera的位置,让它正对着警车的尾部,然后让警车能够跑起来,我们创建一个"PlayerMoving.cs"脚本;
运行结果:
代码:
using System.Collections;
using System.Collections.Generic;
using UnityEngine;public class PlayerMoving : MonoBehaviour
{public float moveSpeed = 5.0f;// Start is called before the first frame updatevoid Start(){}// Update is called once per framevoid Update(){transform.position += new Vector3(0, 0, moveSpeed*Time.deltaTime);}
}
问题:我们会发现车越走越远,不符合游戏的体验,所以我们要让镜头跟随着车子移动
3.需要记录camera一开始离警车有多远,因为3D游戏分布需要记录(X,Y,Z)的偏移
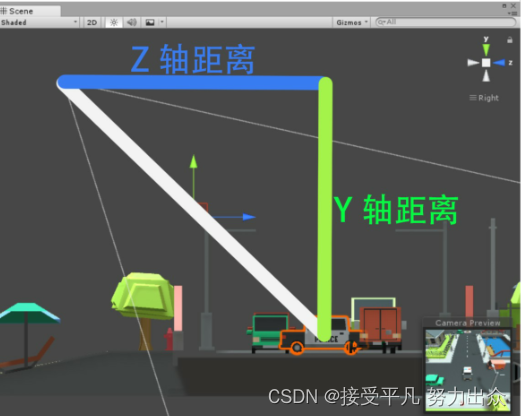
为了让我们的摄像机也能动起来,我们创建一个"CameraMove.cs"脚本,因为UNITY里面,不同脚本的update执行顺序是无序的,为了保证先移动小车再移动camera,所以要在LateUpdate里面。
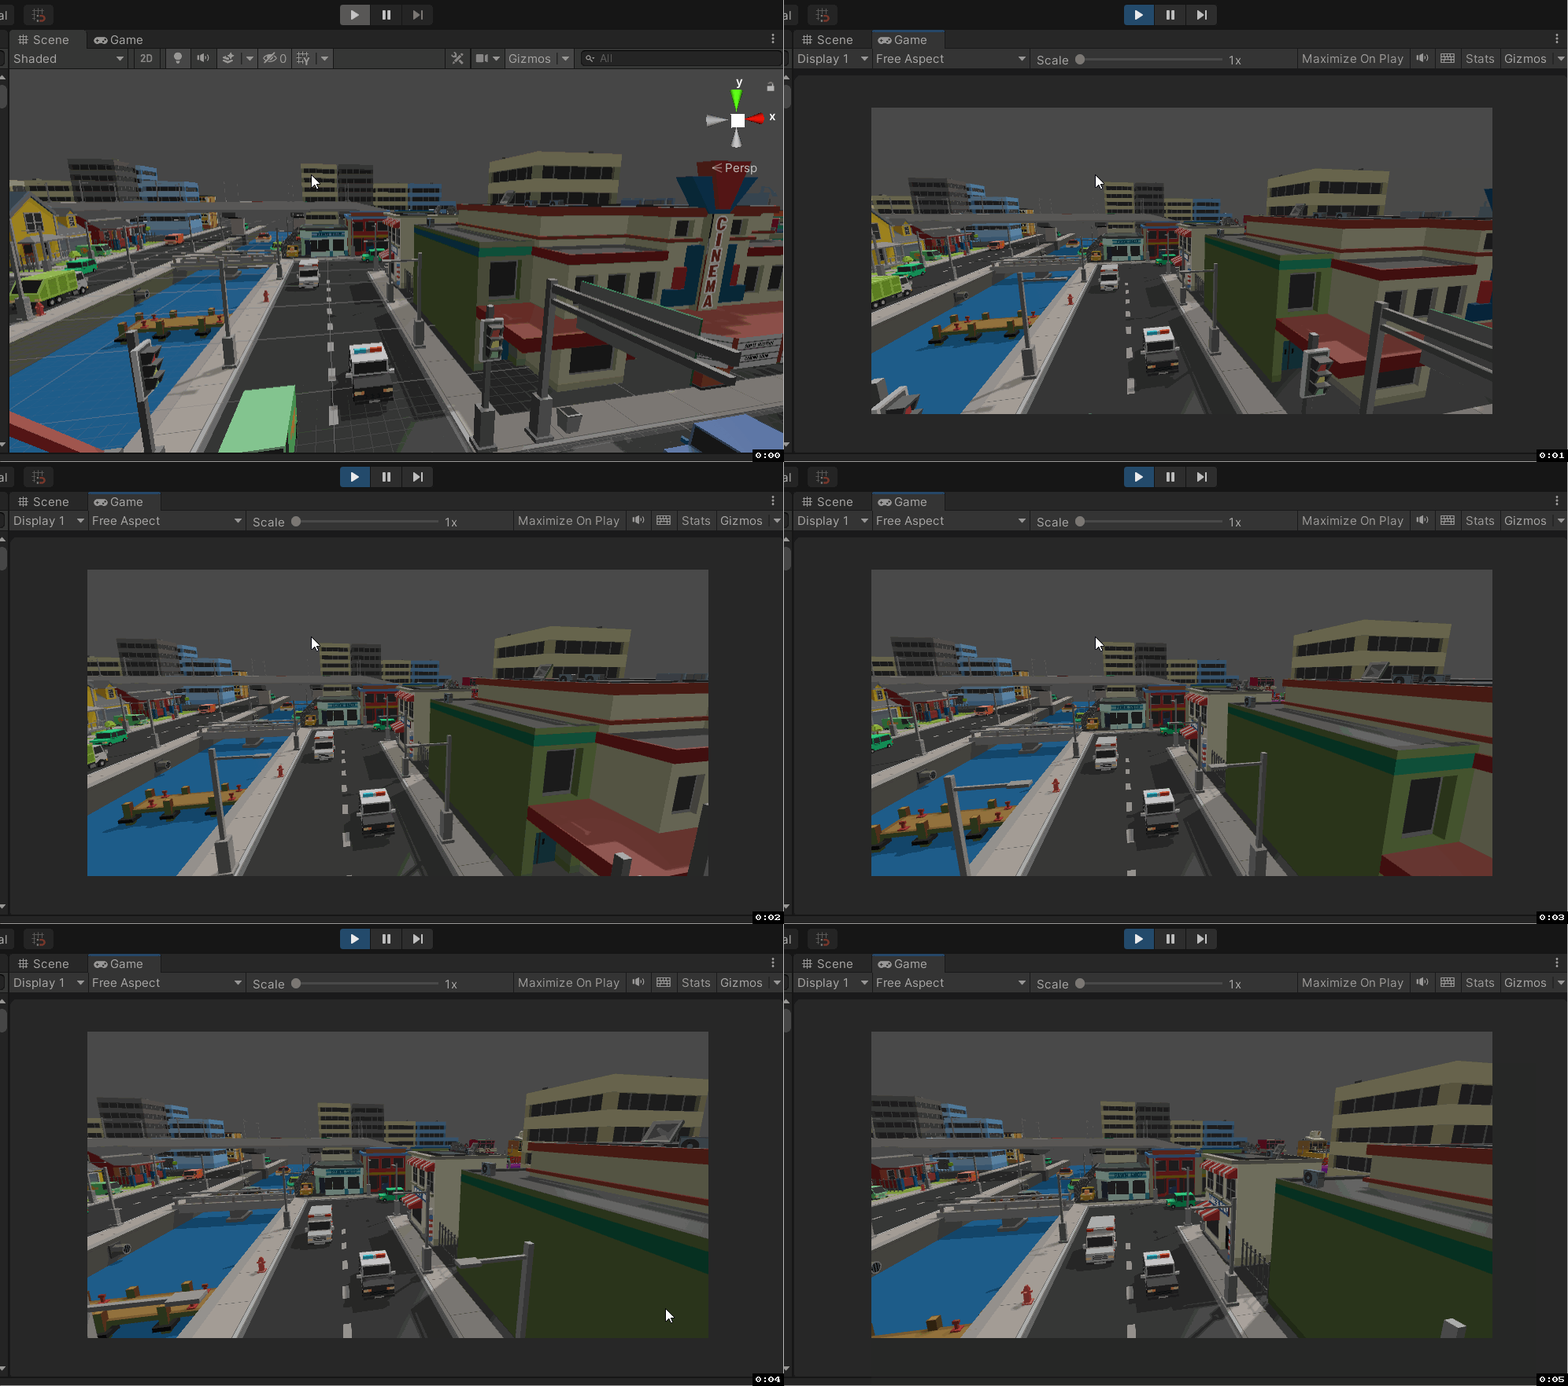
代码如下:
using System.Collections;
using System.Collections.Generic;
using UnityEngine;public class CameraMoving : MonoBehaviour
{public GameObject player;public Vector3 distance;// Start is called before the first frame updatevoid Start(){distance = transform.position - player.transform.position;}// Update is called once per framevoid LateUpdate(){transform.position = distance + player.transform.position;}}
4.为了让我们能够用键盘控制警车(左右移动和加速减速),我们创建一个"PlayerControl.cs"脚本;
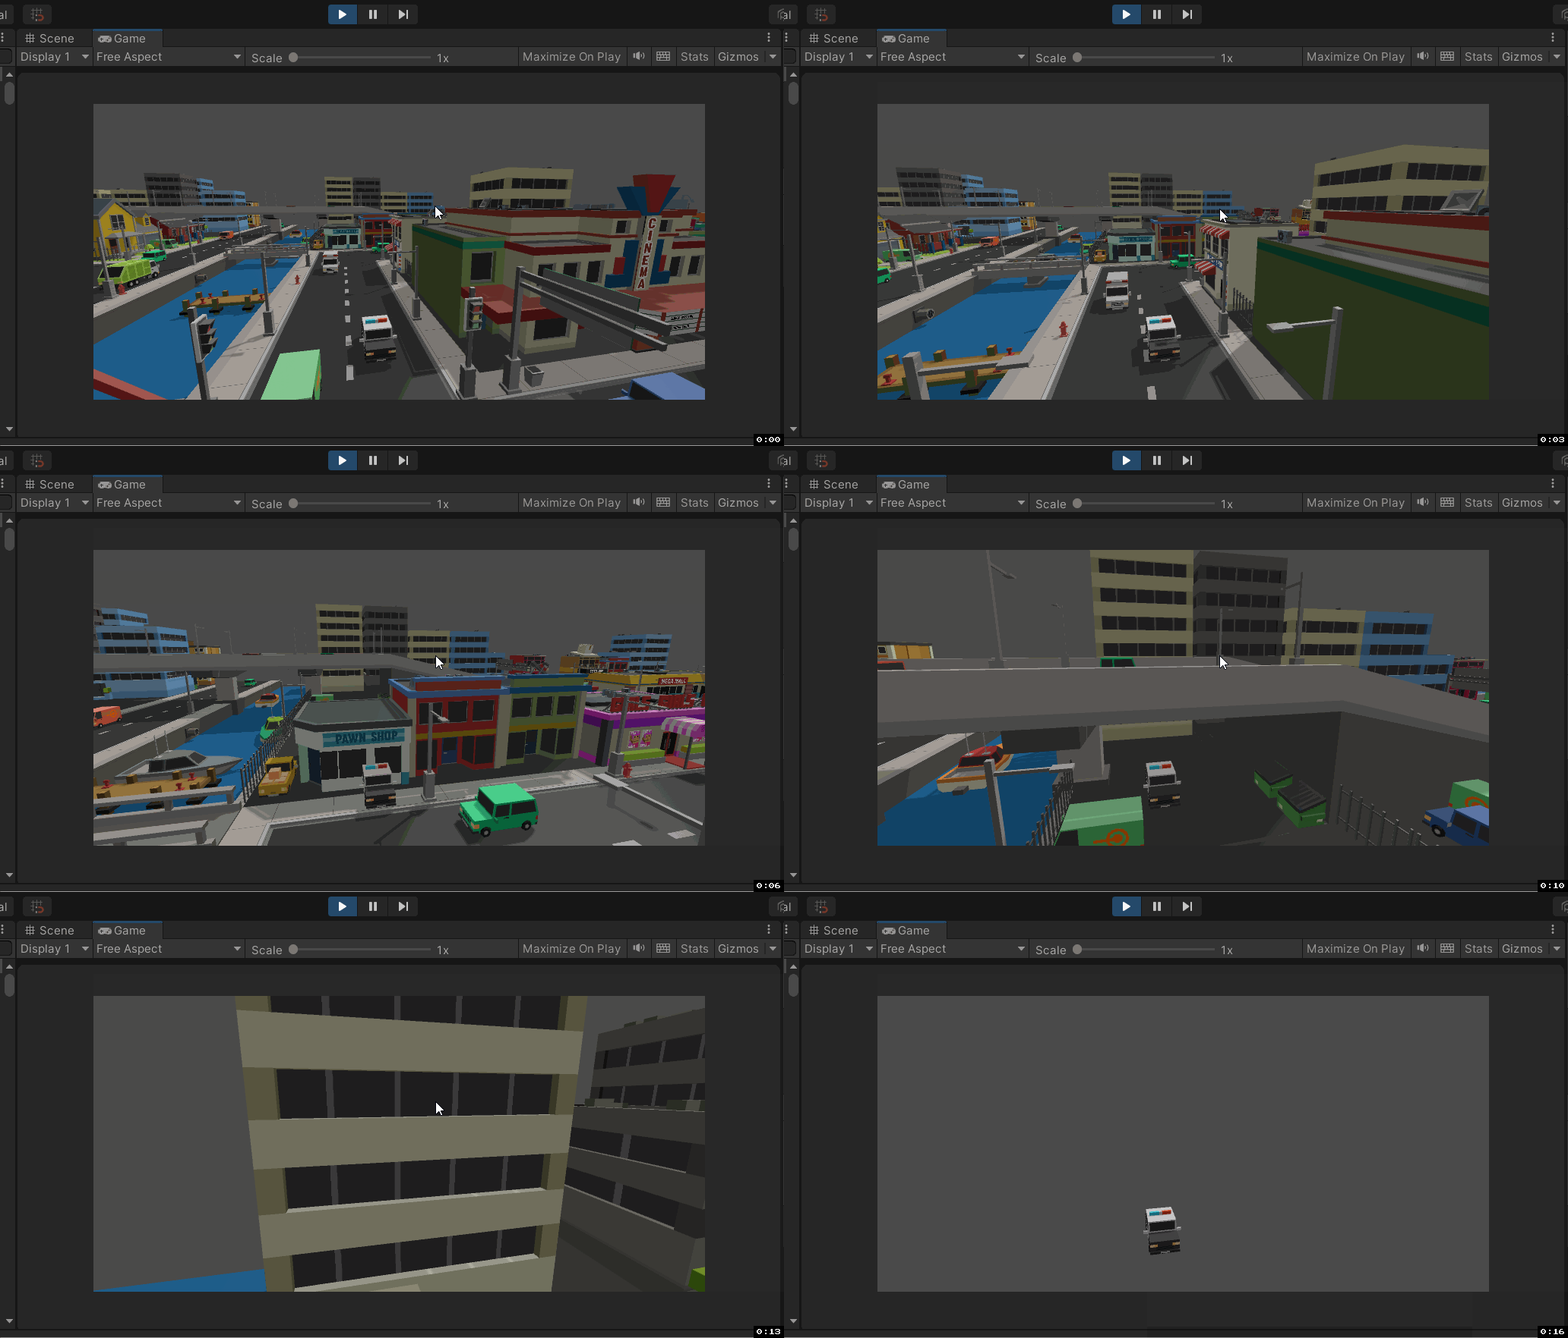
代码如下:
using System.Collections;
using System.Collections.Generic;
using UnityEngine;public class PlayerControl : MonoBehaviour
{public float HorSpeed = 5.0f;public float verSpeed = 5.0f;public float maxSpeed = 20.0f;public PlayerMoving player;// Start is called before the first frame updatevoid Start(){player = transform.GetComponent();}// Update is called once per framevoid Update(){float horDeltal = Input.GetAxis("Horizontal");Debug.Log(horDeltal);if(horDeltal!=0){transform.position += new Vector3(horDeltal * HorSpeed * Time.deltaTime, 0, 0);}float verDeltal = Input.GetAxis("Vertical");if(verDeltal!=0){player.moveSpeed += verDeltal * verSpeed * Time.deltaTime;if(Mathf.Abs(player.moveSpeed)> maxSpeed){player.moveSpeed = verDeltal * maxSpeed;}// transform.position += new Vector3(0,0,verDeltal*verSpeed*Time.deltaTime);}}
}
5.加入粒子Prefab,现在我们的小车虽然有了加速的功能,却没有加速效果。在Unity中,效果都使用粒子引擎实现的。让我们先不要管粒子的制作细节,加入我们已经制作好了两个粒子Prefab,怎么把他们加入到游戏中?在player中新建两个空的GameObject,分别命名为:effectPosition1,effectPostion2.把他们移动到你想要产生粒子效果的位置,在我们这个例子中,也就是骑车排气管的位置。然后编写脚本,设置两个public Transform类型的变量,这样我们就可以在脚本中知道粒子产生的位置。
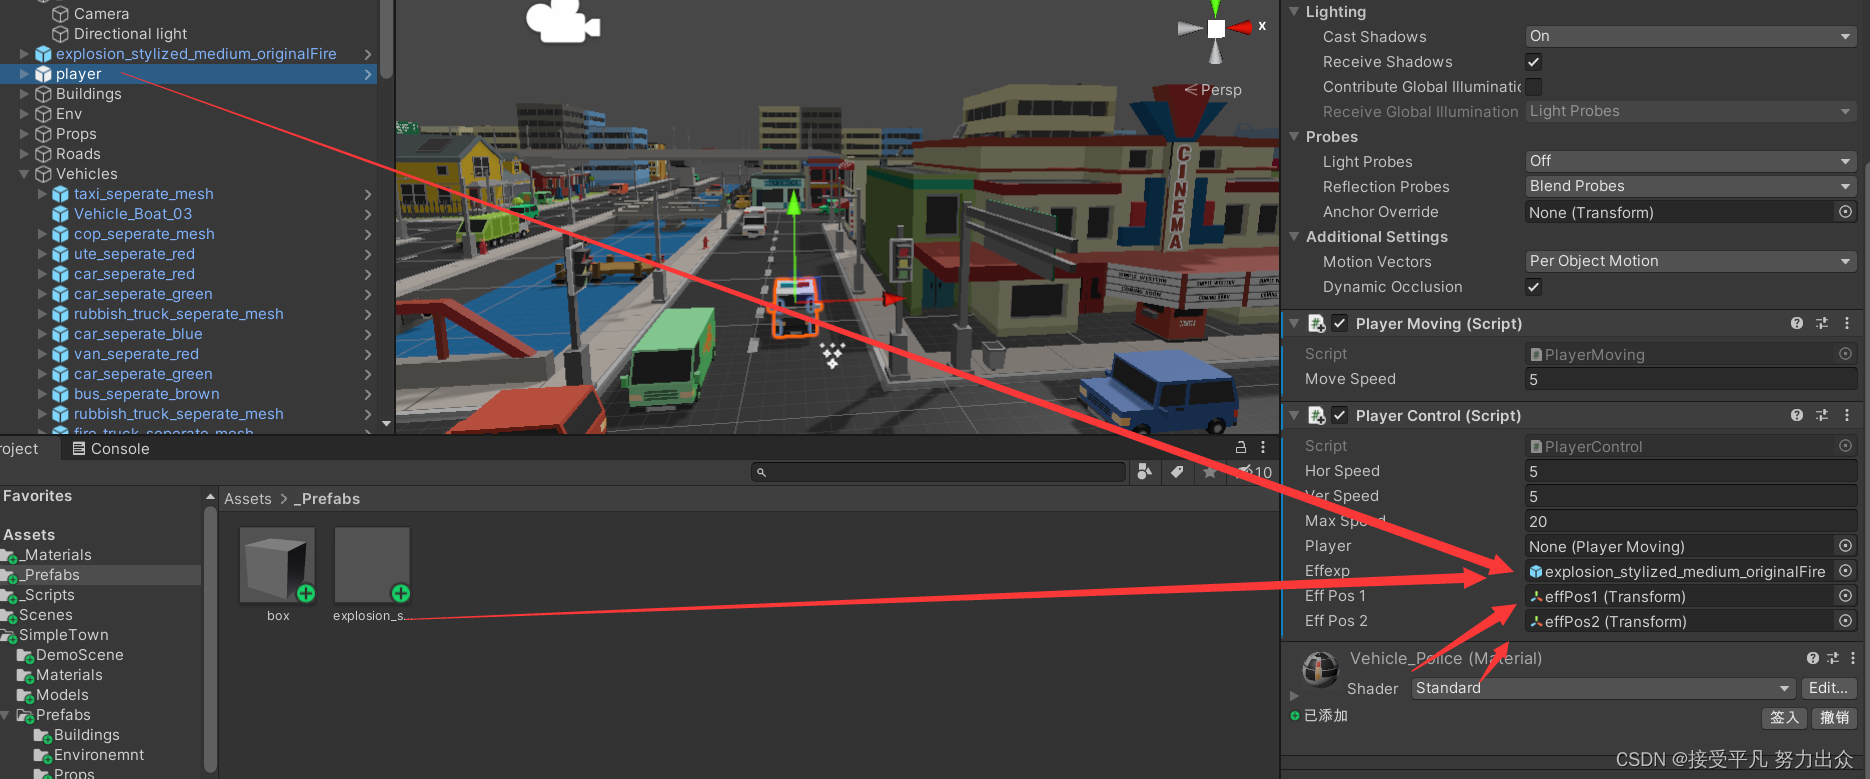
using System.Collections;
using System.Collections.Generic;
using UnityEngine;public class PlayerControl : MonoBehaviour
{public float HorSpeed = 5.0f;public float verSpeed = 5.0f;public float maxSpeed = 20.0f;public PlayerMoving player;public GameObject effexp;public Transform effPos1;public Transform effPos2;// Start is called before the first frame updatevoid Start(){player = transform.GetComponent();}// Update is called once per framevoid Update(){float horDeltal = Input.GetAxis("Horizontal");Debug.Log(horDeltal);if(horDeltal!=0){transform.position += new Vector3(horDeltal * HorSpeed * Time.deltaTime, 0, 0);}float verDeltal = Input.GetAxis("Vertical");if(verDeltal!=0){player.moveSpeed += verDeltal * verSpeed * Time.deltaTime;if(Mathf.Abs(player.moveSpeed)> maxSpeed){player.moveSpeed = verDeltal * maxSpeed;}// transform.position += new Vector3(0,0,verDeltal*verSpeed*Time.deltaTime);}if(Input.GetKeyDown(KeyCode.W)||Input.GetKeyDown(KeyCode.UpArrow)){GameObject.Instantiate(effexp, effPos1.position, Quaternion.identity);GameObject.Instantiate(effexp, effPos2.position, Quaternion.identity);}}
}
销毁游戏对象:把脚本挂在粒子效果预制体上,实现3秒钟自动销毁
using System.Collections;
using System.Collections.Generic;
using UnityEngine;public class effDestroy : MonoBehaviour
{// Start is called before the first frame updatevoid Start(){GameObject.Destroy(this.gameObject, 3.0f);}// Update is called once per framevoid Update(){}
}
大家可以下去思考独自完成转弯和碰撞的功能。
游戏打包流程
1.选择File->Build Setting
2.添加场景Scene
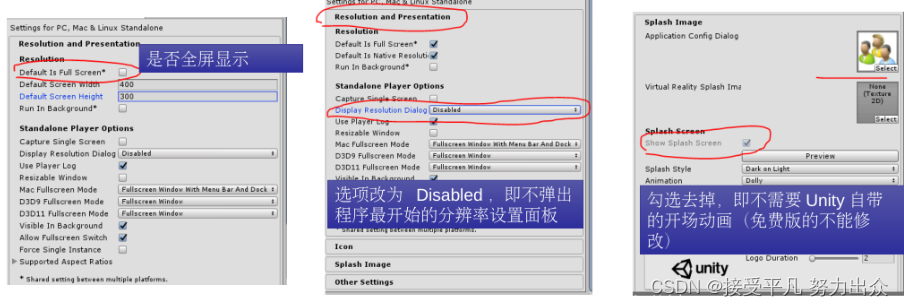
3.Player Settings设置图标,欢迎界面等
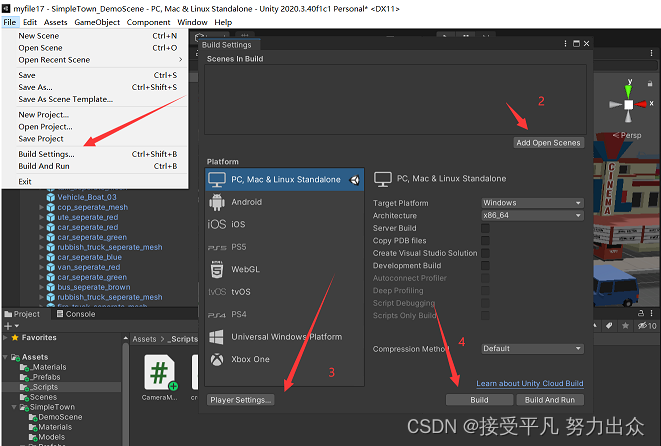
4.Build Setting
上一篇:随机访问文件类
下一篇:macOS 的「预览」有几种用法