

ROS-Unity连接教程
本篇文章主要介绍基于ROS-TCP-Connector、ROS-TCP-Endpoint两个Unity接口与ROS进行通信的环境配置,并对官方给出的Unity和ROS相互通信示例中的消息部分做了说明
一、环境配置
参考:Unity-Robotics-Hub/setup.md at main · Unity-Technologies/Unity-Robotics-Hub (github.com)
Ununtu环境下
1.成功配置ros环境
2.下载ROS-TCP-Endpoint放在工作空间编译
ROS-TCP-Endpoint下载地址:Unity-Technologies/ROS-TCP-Endpoint: ROS package used to create an endpoint to accept ROS messages sent from a Unity scene using the ROS TCP Connector scripts (github.com)
Unity环境下
1.创建新项目,在Window/Package Manager下导入两个包(方式有两个,本地导入和URL导入)
URL导入:
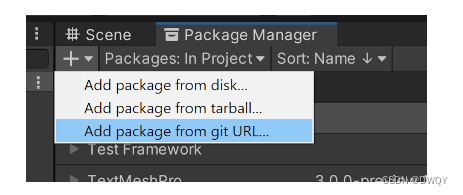
两个包:
https://github.com/Unity-Technologies/ROS-TCP-Connector.git?path=/com.unity.robotics.ros-tcp-connector
https://github.com/Unity-Technologies/ROS-TCP-Connector.git?path=/com.unity.robotics.visualizations
导入成功结果如下:
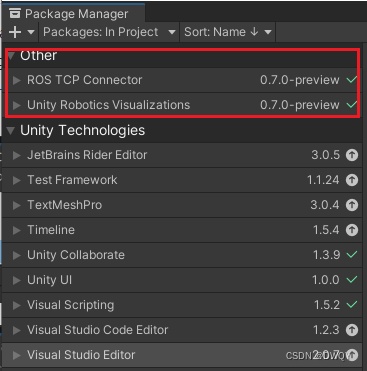
因为URL是在线下载,可能会连接失败(但我多试了几次也成功了)。选择本地的方式也可以,把整个包下载到本地,然后选择这两个com包:
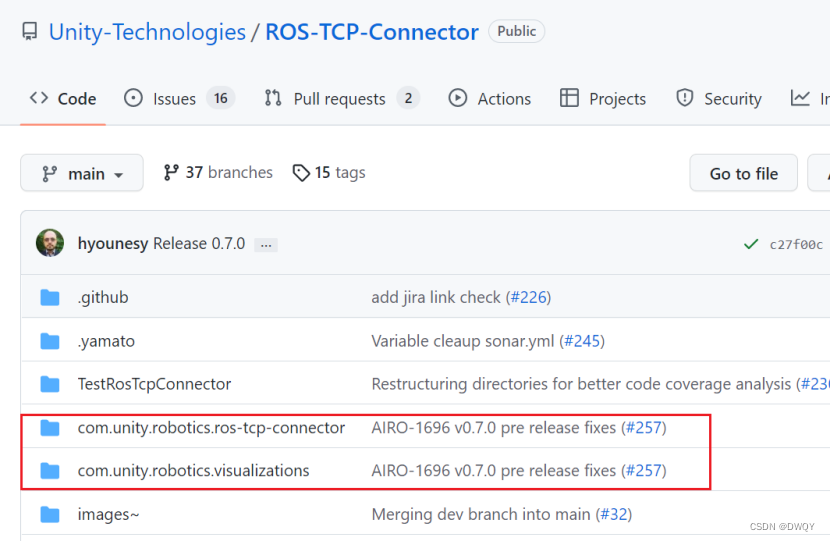
下载上面画的这两个,然后路径选择本地磁盘,点击之后,导入com文件夹下的package.json即可:
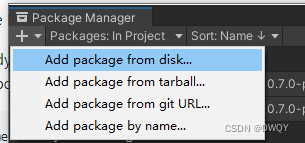
这个时候发现Unity上多了一个选项:

点击Robotics下面的ROS Settings进行配置,主要是两个ROS IP Address和ROS Port,关于ROS IP Address在ubuntu下用ifconfig查一下设置,然后端口任意了默认10000了
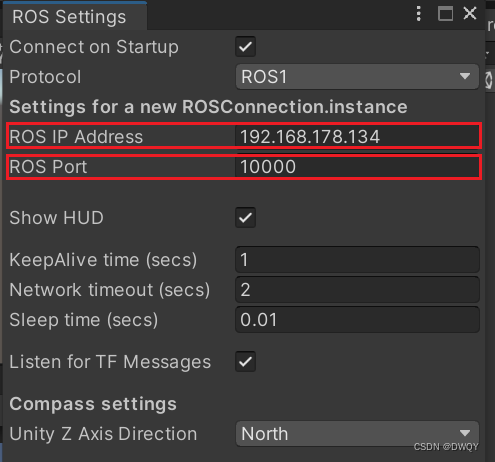
到目前为止,两方的环境配置就结束了。
二、demo环境配置
Ubuntu环境
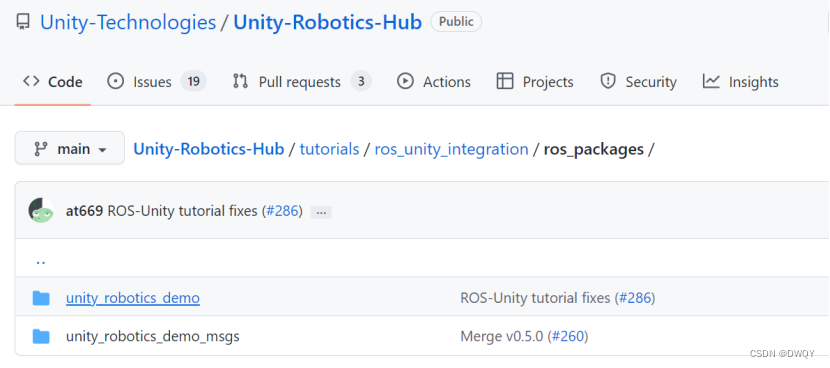
下载这两个到同一个工作空间,然后catkin_make一下
下载路径:Unity-Robotics-Hub/tutorials/ros_unity_integration/ros_packages at main · Unity-Technologies/Unity-Robotics-Hub (github.com)
Unity环境下
点击“Robotics -> Generate ROS Messages…”
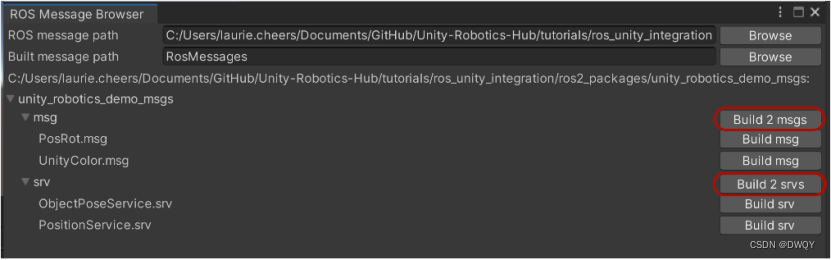
那个ROS message path是把整个项目下载下来,然后选择tutorials/ros_unity_integration/ros_packages/unity_robotics_demo_msgs文件夹,最后再Build两个一下(为了换成C#文件)
三、实例:Unity发布,ros订阅
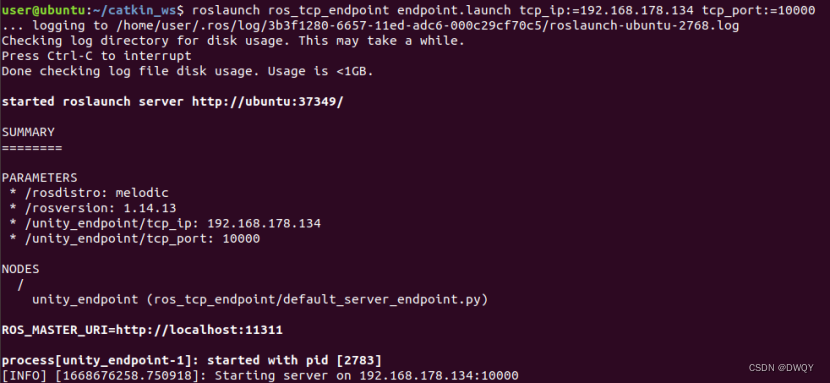
1.ubuntu端先查一下IP(根据自己的IP地址实际替换)
然后执行:
roslaunch ros_tcp_endpoint endpoint.launch tcp_ip:=192.168.178.134 tcp_port:=10000
2.Unity端建立空物体挂载文件(命名:RosPublisherExample)把以下代码放进去,再新建一个Cube,把Cube做参数传入文件
using UnityEngine;
using Unity.Robotics.ROSTCPConnector;
using RosMessageTypes.UnityRoboticsDemo;///
///
///
public class RosPublisherExample : MonoBehaviour
{ROSConnection ros;public string topicName = "pos_rot";// The game objectpublic GameObject cube;// Publish the cube's position and rotation every N secondspublic float publishMessageFrequency = 0.5f;// Used to determine how much time has elapsed since the last message was publishedprivate float timeElapsed;void Start(){// start the ROS connectionros = ROSConnection.GetOrCreateInstance();ros.RegisterPublisher(topicName);}private void Update(){timeElapsed += Time.deltaTime;if (timeElapsed > publishMessageFrequency){cube.transform.rotation = Random.rotation;PosRotMsg cubePos = new PosRotMsg(cube.transform.position.x,cube.transform.position.y,cube.transform.position.z,cube.transform.rotation.x,cube.transform.rotation.y,cube.transform.rotation.z,cube.transform.rotation.w);// Finally send the message to server_endpoint.py running in ROSros.Publish(topicName, cubePos);timeElapsed = 0;}}
}
3.unity运行
运行时出现下面的框,为蓝色时代表连接成功,红色是失败
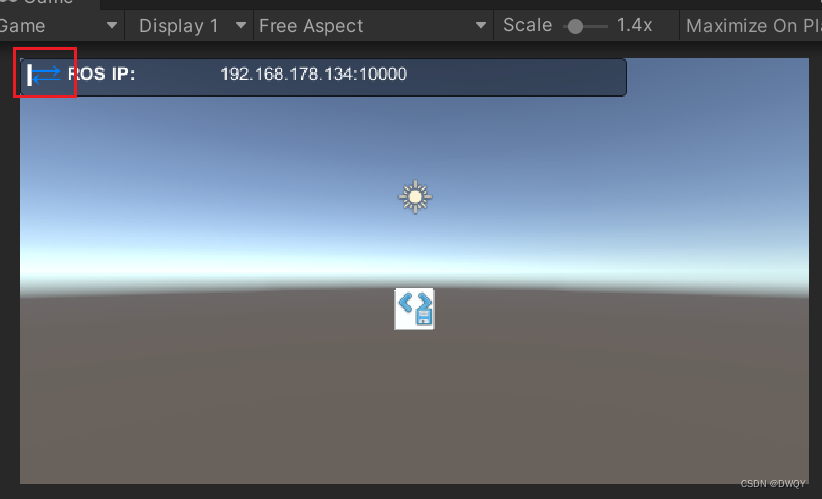
同时ubuntu那边也有显示:

然后rostopic echo pos_rot,可以看到输出
四、实例:ros发布,Unity订阅
1. ubuntu端先查一下IP(根据自己的IP地址实际替换)
然后执行:
roslaunch ros_tcp_endpoint endpoint.launch tcp_ip:=192.168.178.134 tcp_port:=10000
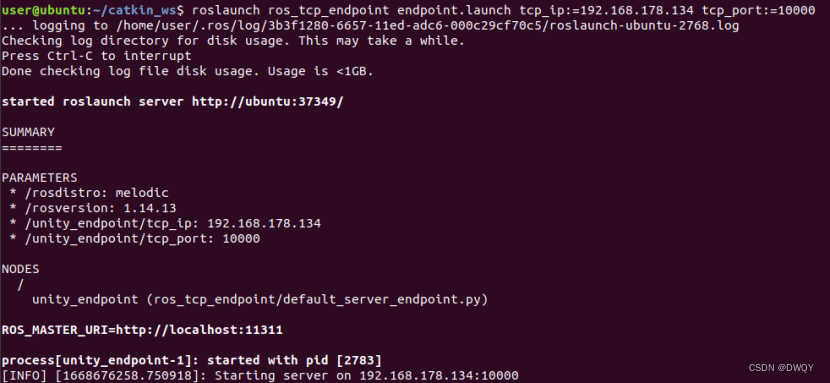
2.Unity端建立空物体挂载文件(命名:RosSubscriberExample)把以下代码放进去,再新建一个Cube,把Cube做参数传入文件
using UnityEngine;
using Unity.Robotics.ROSTCPConnector;
using RosColor = RosMessageTypes.UnityRoboticsDemo.UnityColorMsg;public class RosSubscriberExample : MonoBehaviour
{public GameObject cube;void Start(){ROSConnection.GetOrCreateInstance().Subscribe("color", ColorChange);}void ColorChange(RosColor colorMessage){cube.GetComponent().material.color = new Color32((byte)colorMessage.r, (byte)colorMessage.g, (byte)colorMessage.b, (byte)colorMessage.a);}
}
3.unity运行
运行时出现下面的框,为蓝色时代表连接成功,红色是失败
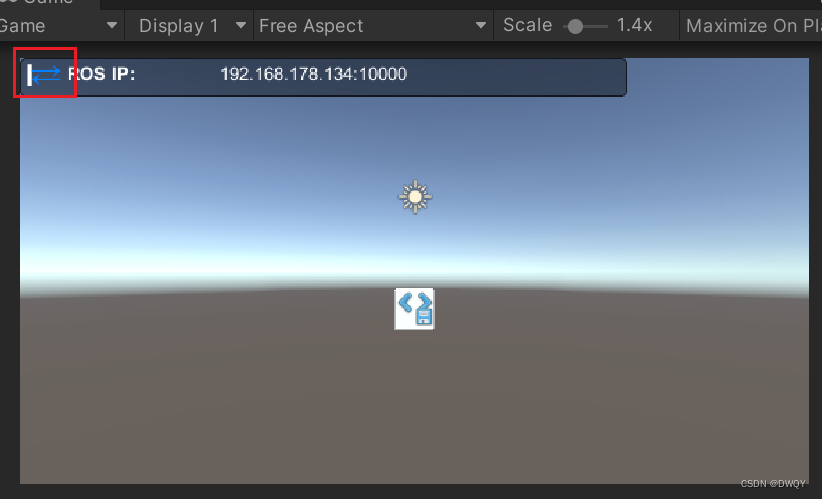
4.ubuntu端再执行:
rosrun unity_robotics_demo color_publisher.py
运行一次Unity中物体改变一次颜色
完活~