

SpringBoot——自定义start场景启动器
需求分析:为什么要学习场景启动器?
SpringBoot要引用外部组件,只需要拿到其场景启动器的依赖,再编写一些配置文件即可。
eg:SpringBoot中要使用redis就需要引入redis的场景启动器依赖
org.springframework.boot spring-boot-starter-data-redis 再到配置文件中编写具体参数
spring:redis:host: 42.0.0.0port: 6379password: 123456
需求:若现在我们自己编写了一个可复用组件需要封装然后在SpringBoot中引用如何实现?自定义场景启动器。
分析自定义场景启动器做出以下总结:
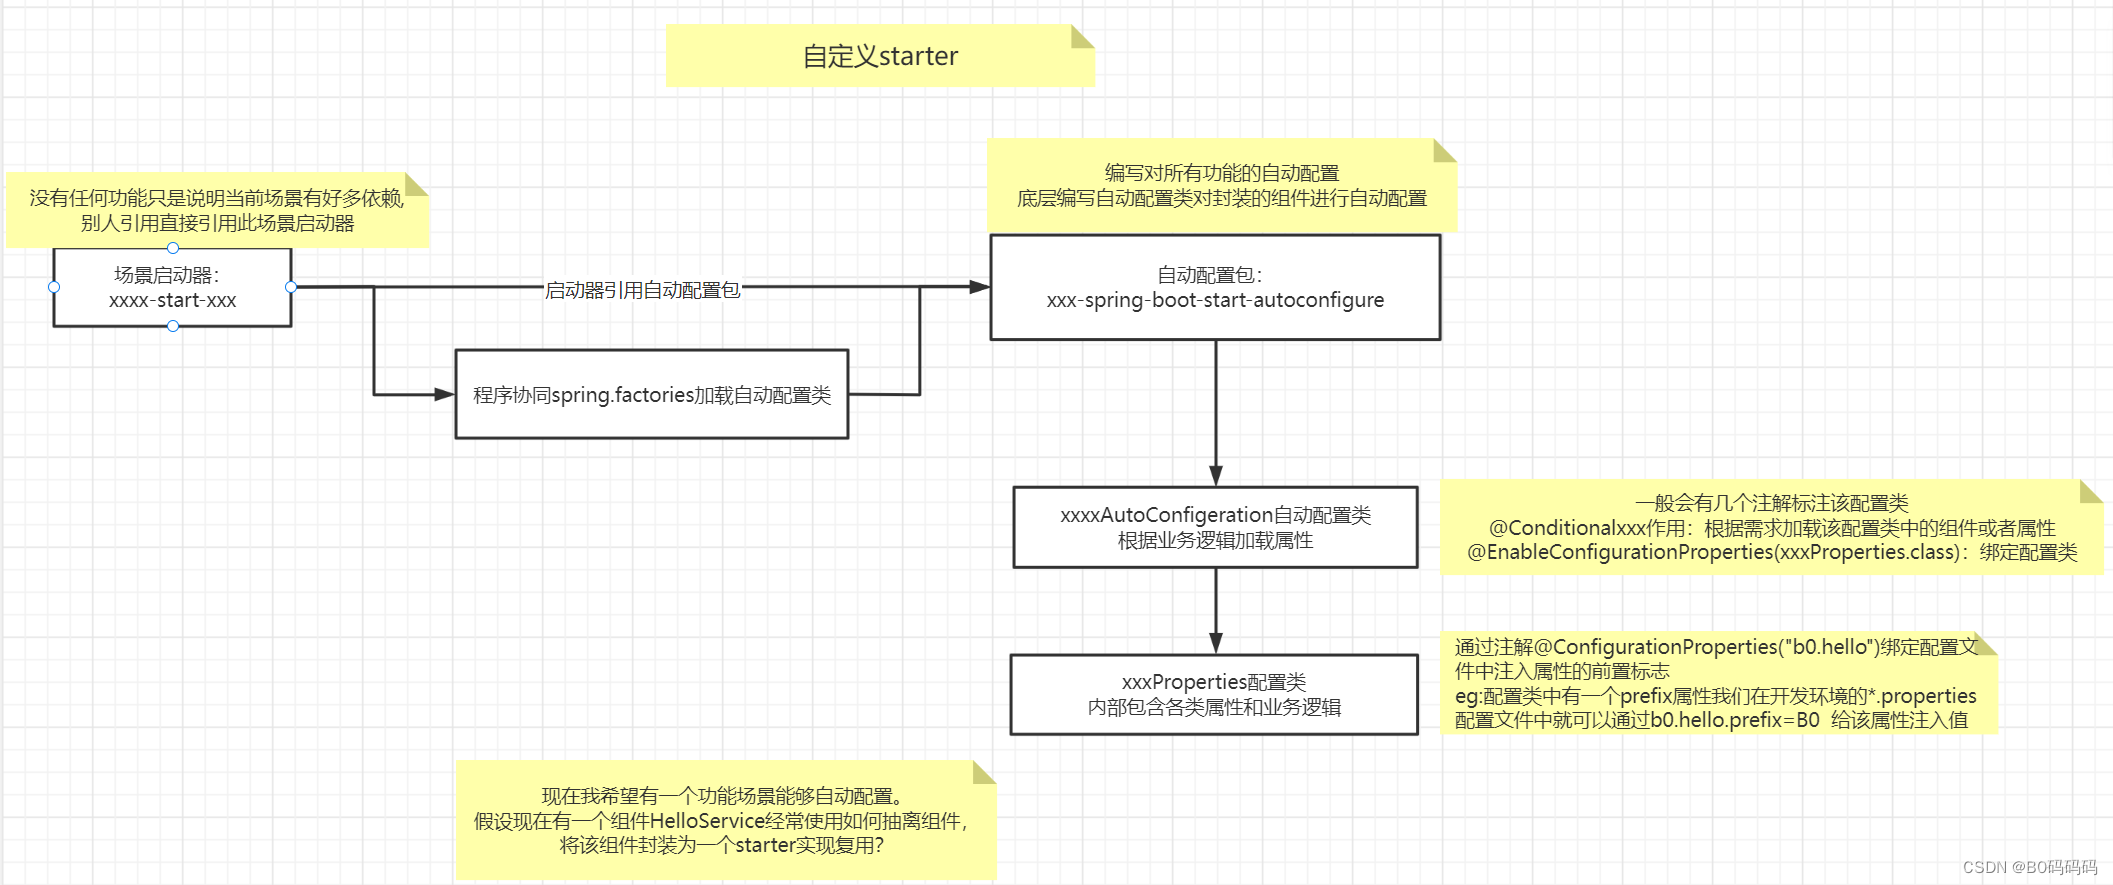
引入一个外部组件并作用的流程课归纳为:
引入starter — xxxAutoConfiguration — 容器中放入组件 ---- 绑定xxxProperties ---- 编写配置文件项
可以看到我们日常开发中只做了两个步骤1.引入xxx-starter 2.编写配置文件 中间相关操作已经被封装好了。
2.模拟案例
2.1 搭建目录架构
新建一个空项目 b0-09-customer-start 用于编写案例
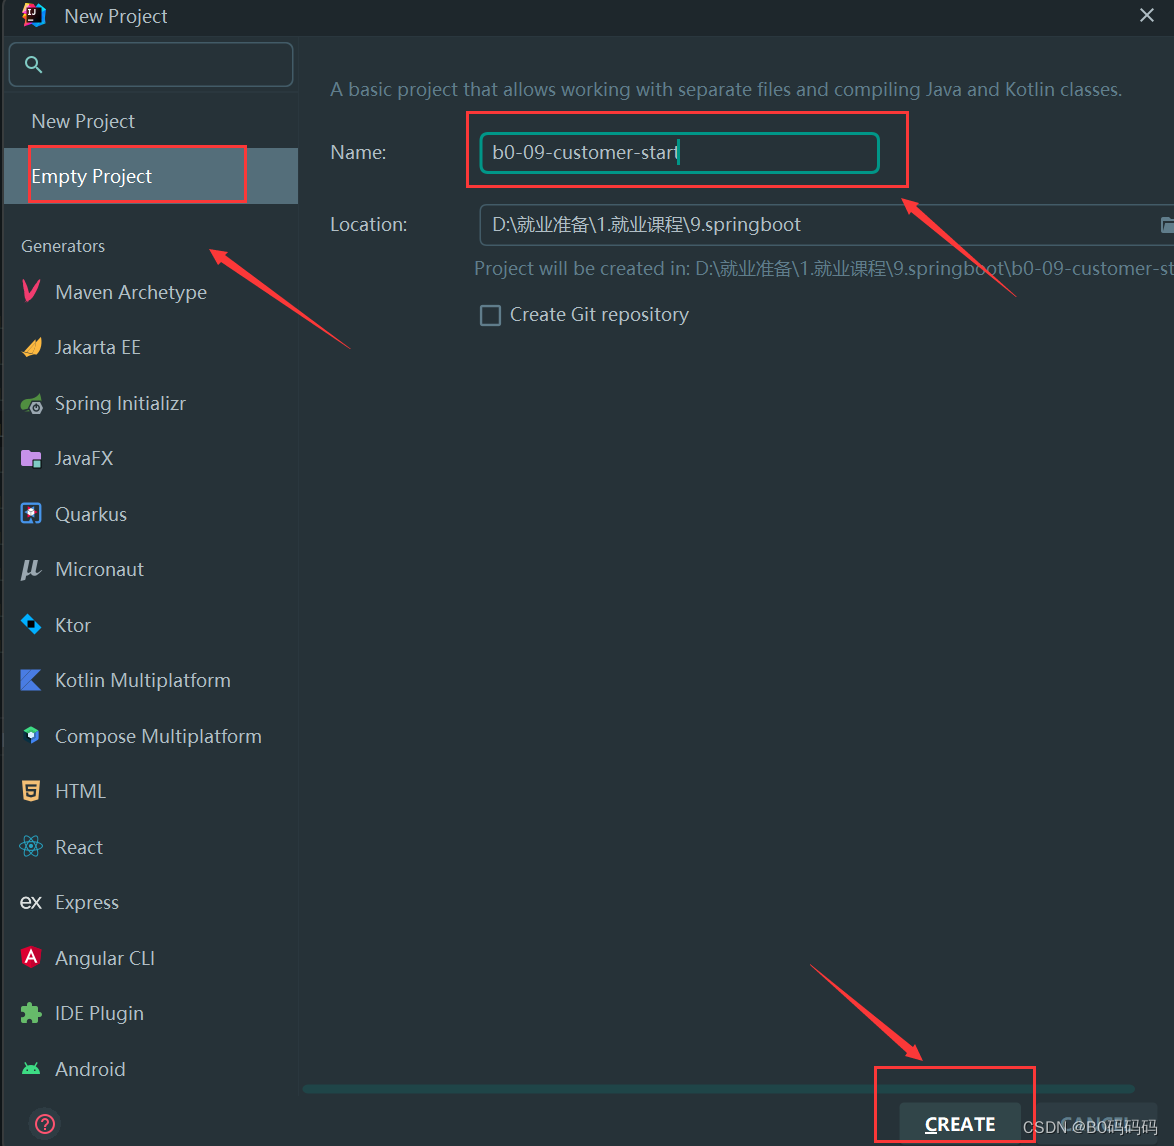
在该空项目中新建两个工程一个用maven构建,一个用springboot初始化程序构建。
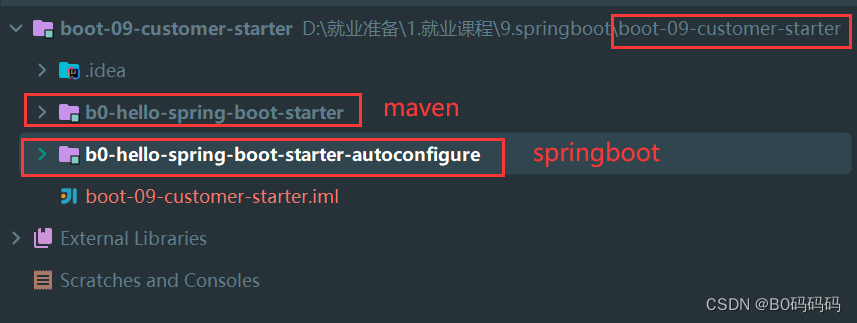
2.1.1. maven项目
b0-hello-spring-boot-starter
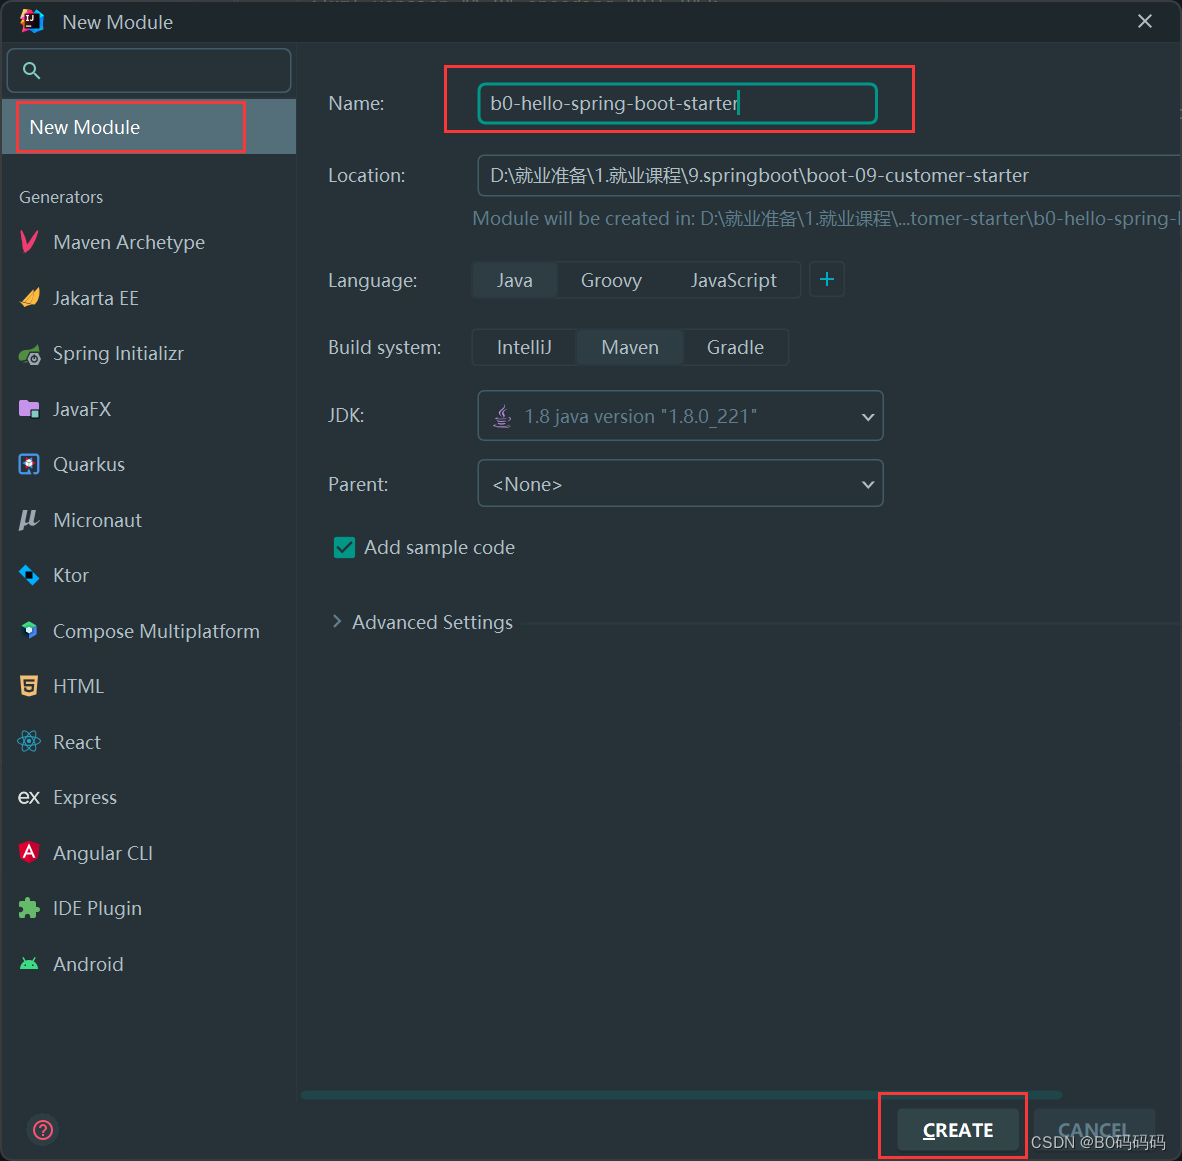
2.1.2 springboot初始化项目
b0-hello-spring-boot-starter-autoconfigure
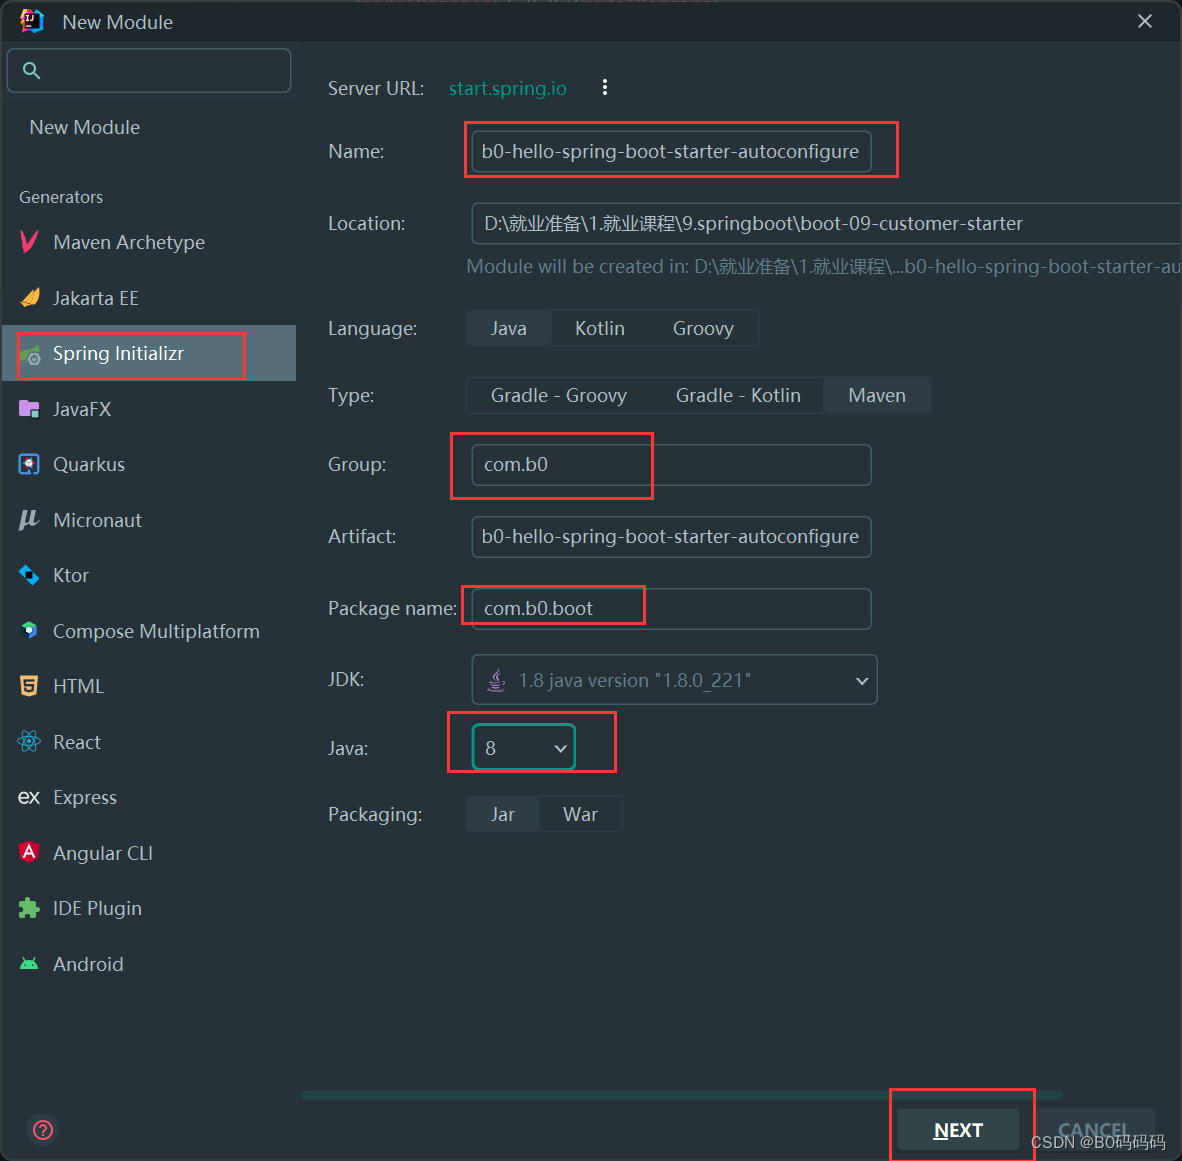
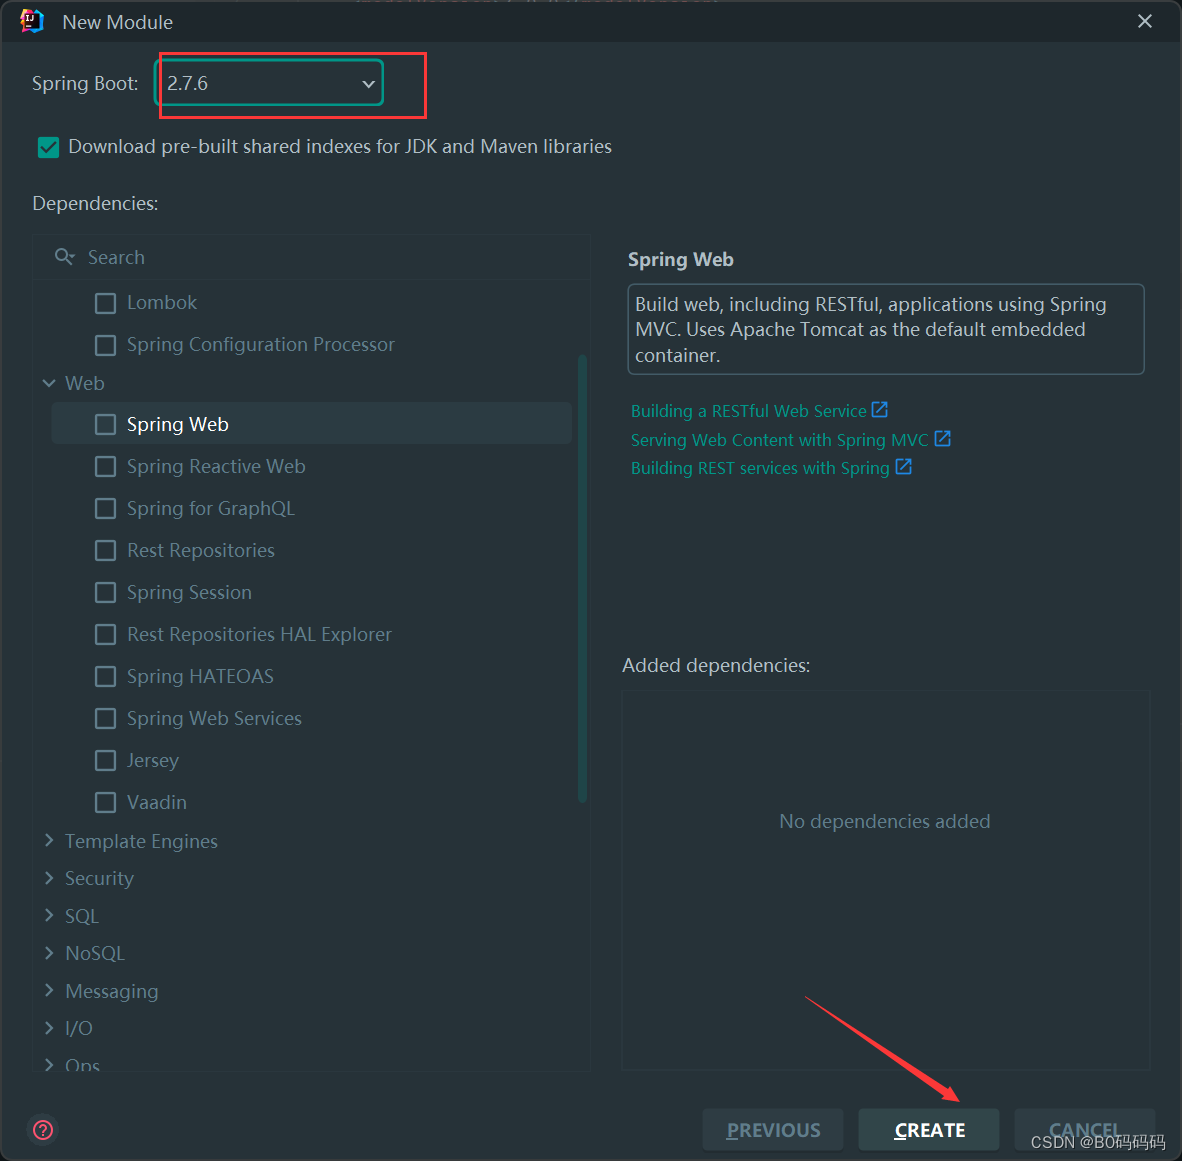
springboot初始化选择3.0以下的版本,不在勾选其他开发场景
2.2 依赖修改
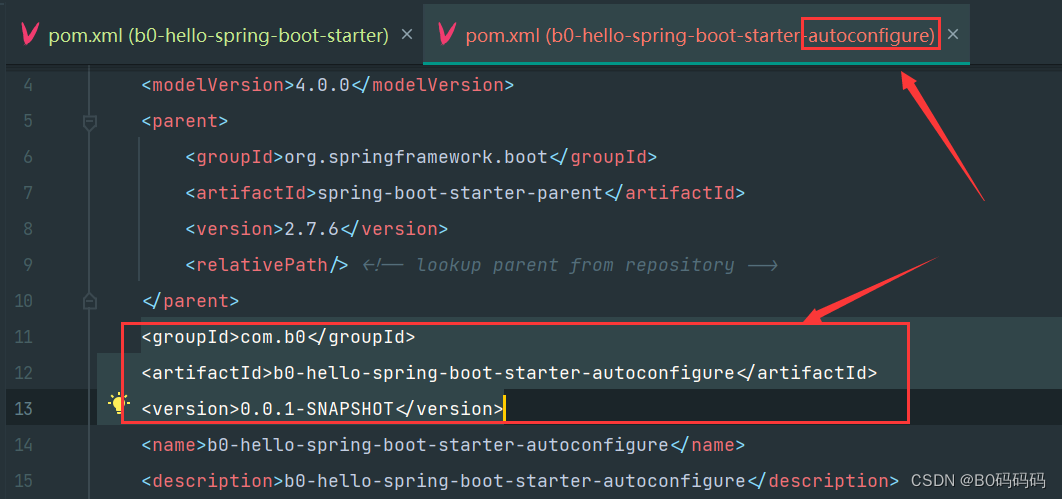
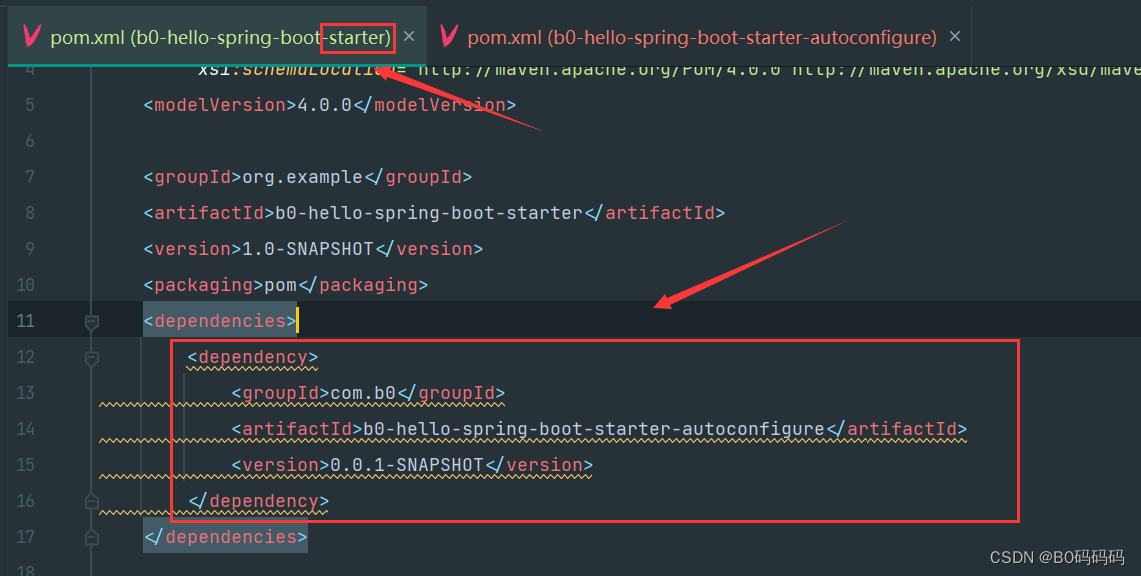
注:因为主要功能配置都在 xxx-autoconfigure里面,但是提供到用户引用的是 xxx-statrt,因此需要在start的maven里面引用autoconfigure
拷贝autoconfigure
start中引用autoconfigure依赖
2.3 编写业务场景
在编写业务场景之前需要删除一些用不到的内容,删除autoconfigure程序中的部分配置(maven中1.插件,2.测试依赖,3.配置文件)
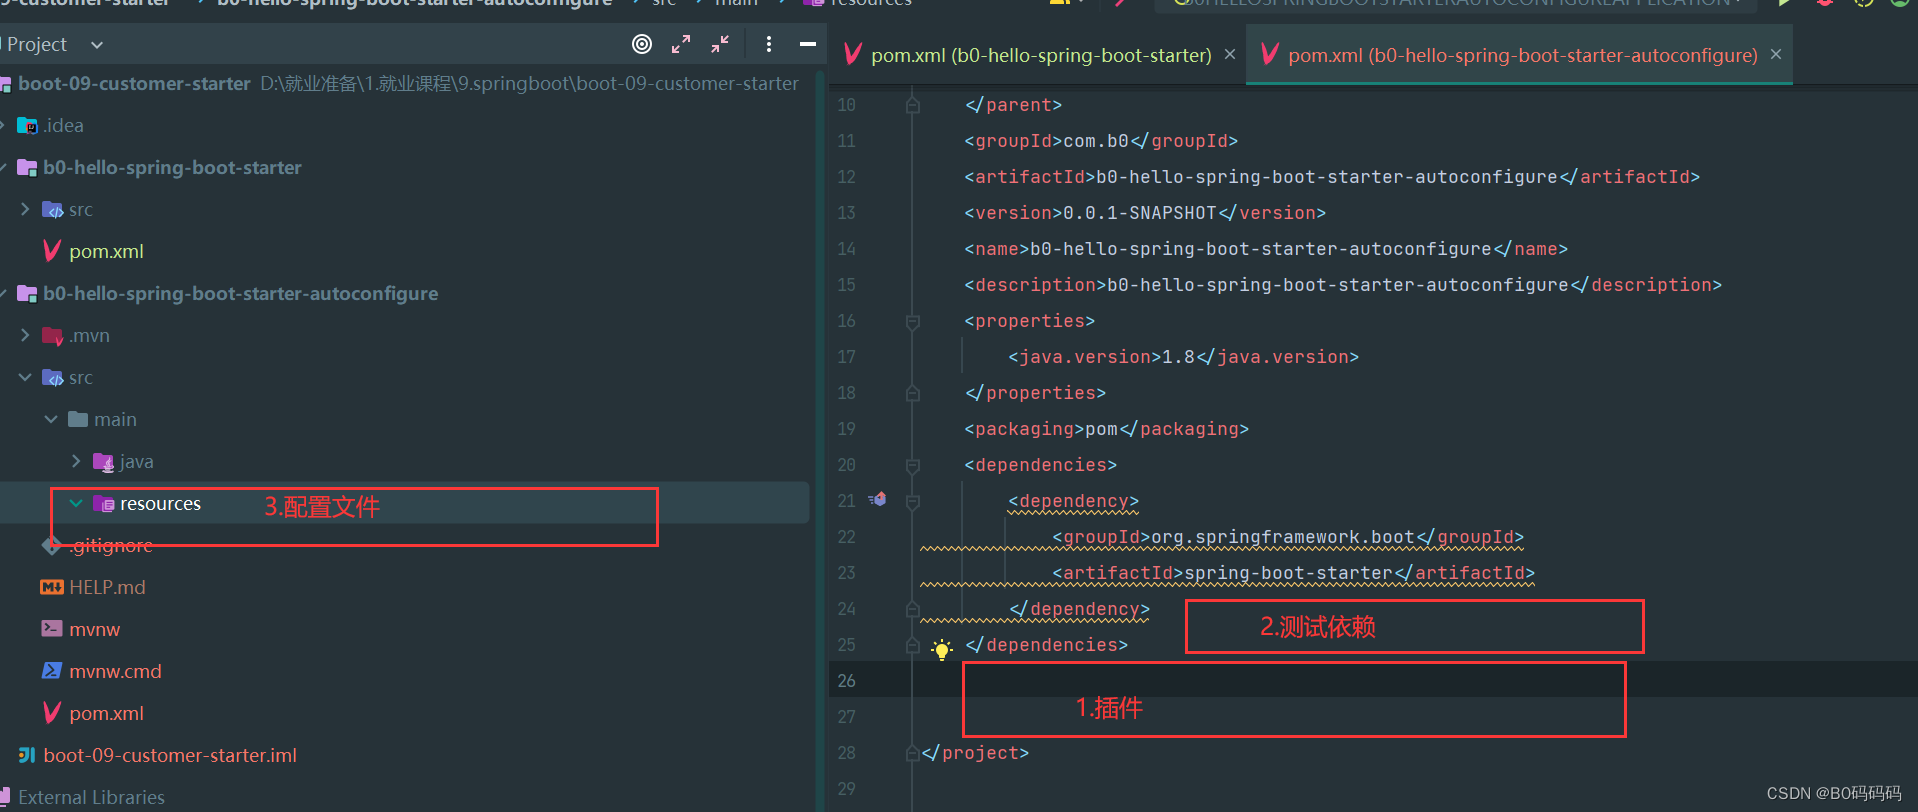
业务场景分析,现在有一个功能需要:输出一句hello但是输出之前我们需要给其添加前缀和后缀,前后缀由使用这个组件的用户调用。假设该功能我们经常使用,我们将其抽取。
项目整体目录结构展示:
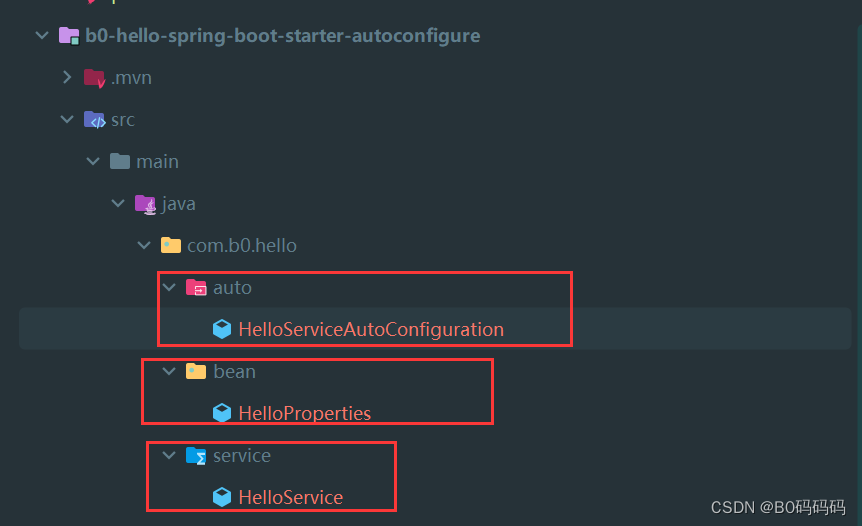
编写核心输出hello业务逻辑
package com.b0.hello.service;
/*** 组件默认不要放在容器中*/
public class HelloService {public String sayHello(String userName){//此处两个属性只用于理解不是最终版本,现在的报错不用理会return prefix + ":" +userName +">"+suffix;}
}
此处前后缀由使用组件的用户给出,我们将其抽离到配置类
编写配置类 HelloProperties
package com.b0.hello.bean;
import org.springframework.boot.context.properties.ConfigurationProperties;
//绑定配置文件b0.hello下所有的配置;我们可以在配置文件中通过bo.hello.prefix=b0直接对前缀赋值
@ConfigurationProperties("b0.hello")
public class HelloProperties {private String prefix;private String suffix;public String getPrefix() {return prefix;}public void setPrefix(String prefix) {this.prefix = prefix;}public String getSuffix() {return suffix;}public void setSuffix(String suffix) {this.suffix = suffix;}
}
修改核心逻辑,在配置文件中拿到前后缀属性
/*** 组件默认不要放在容器中,通过后面的自动配置类加入到容器中*/
public class HelloService {@AutowiredHelloProperties helloProperties;//注入配置类public String sayHello(String userName){//从配置文件中拿到前后缀属性return helloProperties.getPrefix() + ":" +userName +">"+helloProperties.getSuffix();}
}
编写一个自动配置类来完成组件注入
package com.b0.hello.auto;import com.b0.hello.bean.HelloProperties;
import com.b0.hello.service.HelloService;
import org.springframework.boot.autoconfigure.condition.ConditionalOnMissingBean;
import org.springframework.boot.context.properties.EnableConfigurationProperties;
import org.springframework.context.annotation.Bean;
import org.springframework.context.annotation.Configuration;
@Configuration//标注该类为一个配置类
@ConditionalOnMissingBean(HelloService.class)//当容器中没有配置HelloService时文件才生效(没有我们封装的核心组件下面配置的组件才生效)
@EnableConfigurationProperties(HelloProperties.class)//开启属性文件绑定功能,HelloProperties自动跟配置文件绑定,同时将HelloProperties放到容器中
public class HelloServiceAutoConfiguration {@Beanpublic HelloService helloService(){/*** 流程分析:1.只要我们实例化的HelloService对象一旦放在容器中* 2.HelloProperties会自动注入,下方sayHello方法就能拿到前后缀属性*/return new HelloService();}
}
autoconfigure程序中在resource目录下使用 META-INF/spring.factories 中 EnableAutoConfiguration 的值,使得项目启动加载指定的自动配置类
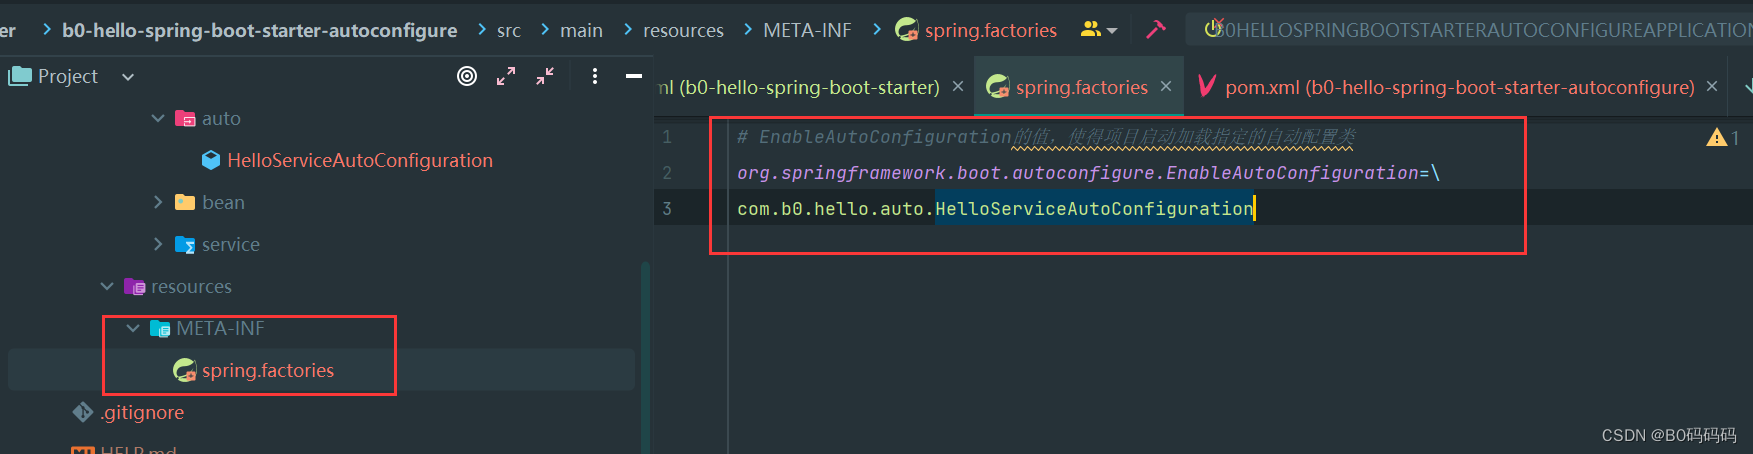
# EnableAutoConfiguration的值,使得项目启动加载指定的自动配置类
org.springframework.boot.autoconfigure.EnableAutoConfiguration=\
com.b0.hello.auto.HelloServiceAutoConfiguration
2.4 项目打包
将项目打包到本地,选中clean和install然后点击启动
先打包xxx-autoconfigure再打包xxx-start,因为此处start依赖autoconfigure
两个项目打包勾选上三处再点击三角形运行按钮
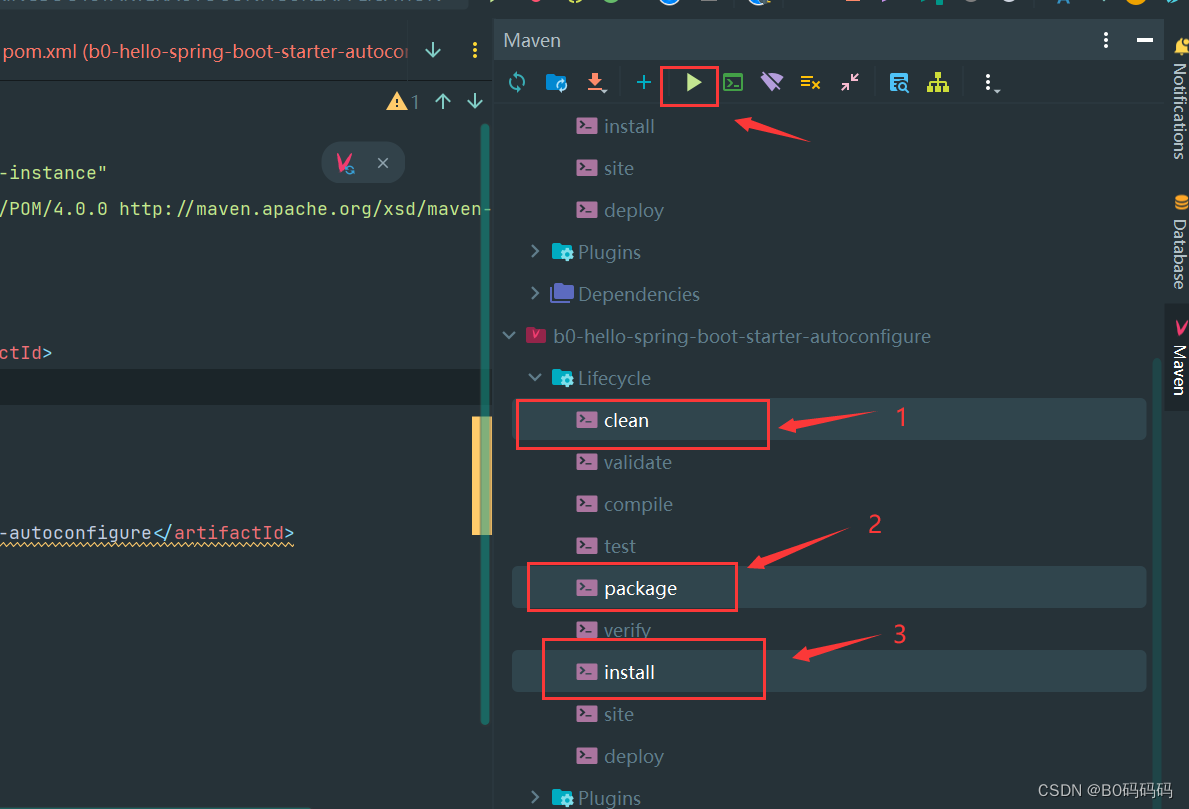
两个项目打包完成到本地仓库如下图:
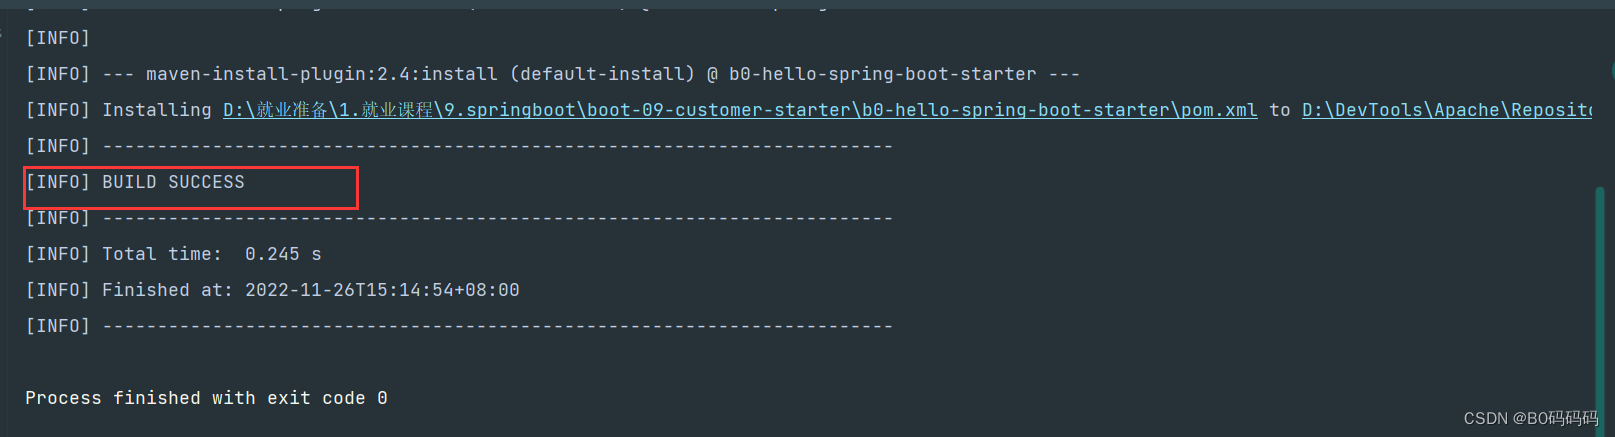
若出现打包失败在pom.xml中加入配置
pom
2.5 创建开发场景 引用 自定义场景启动器
初始化springboot项目boot-09-hello-test
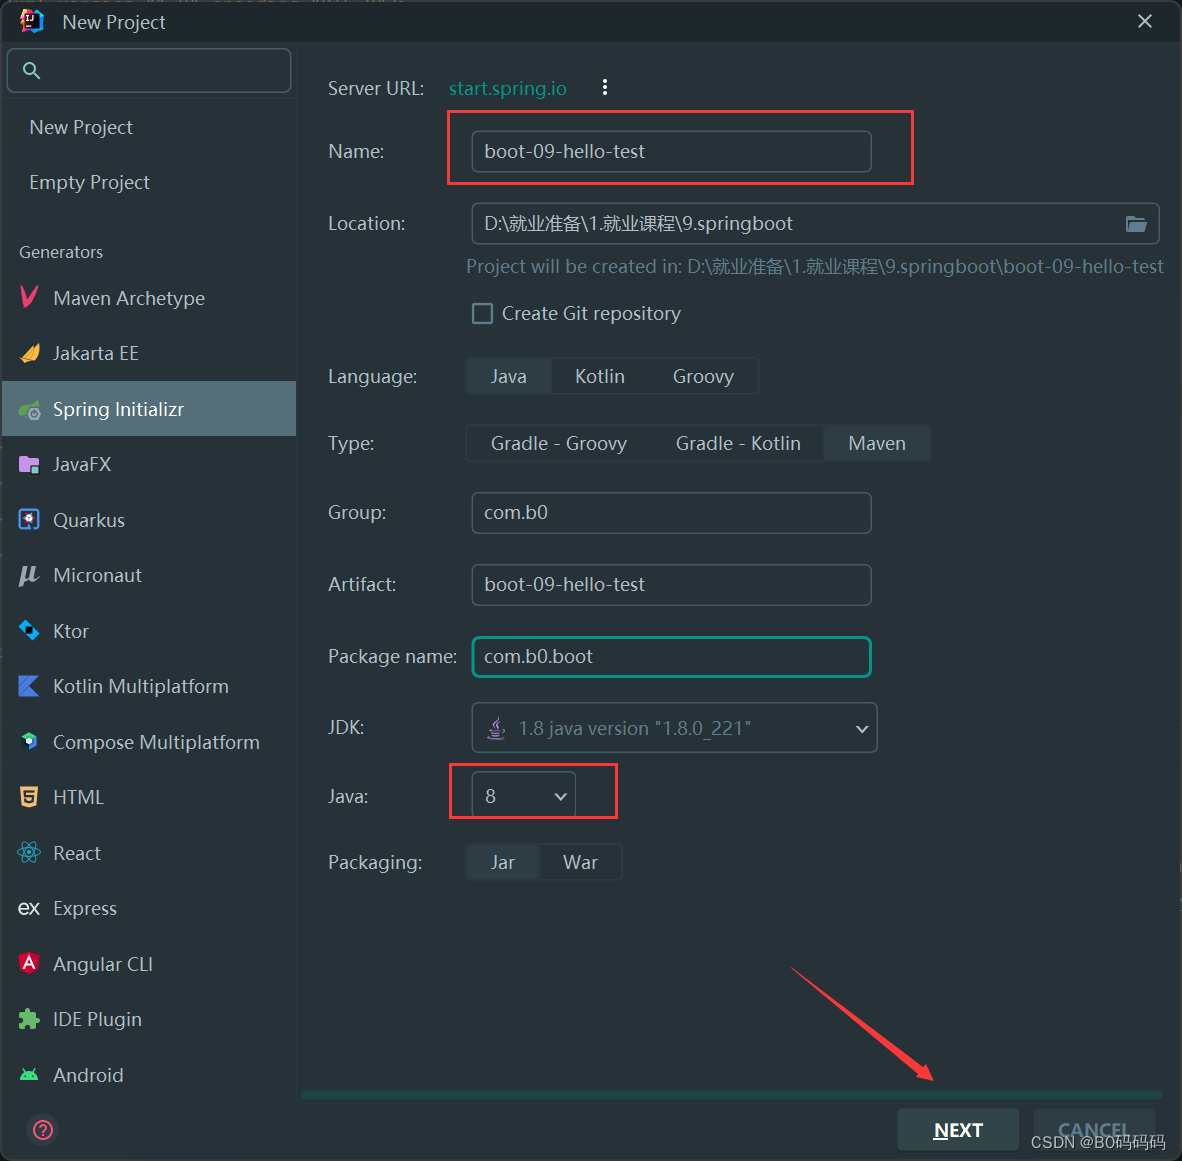
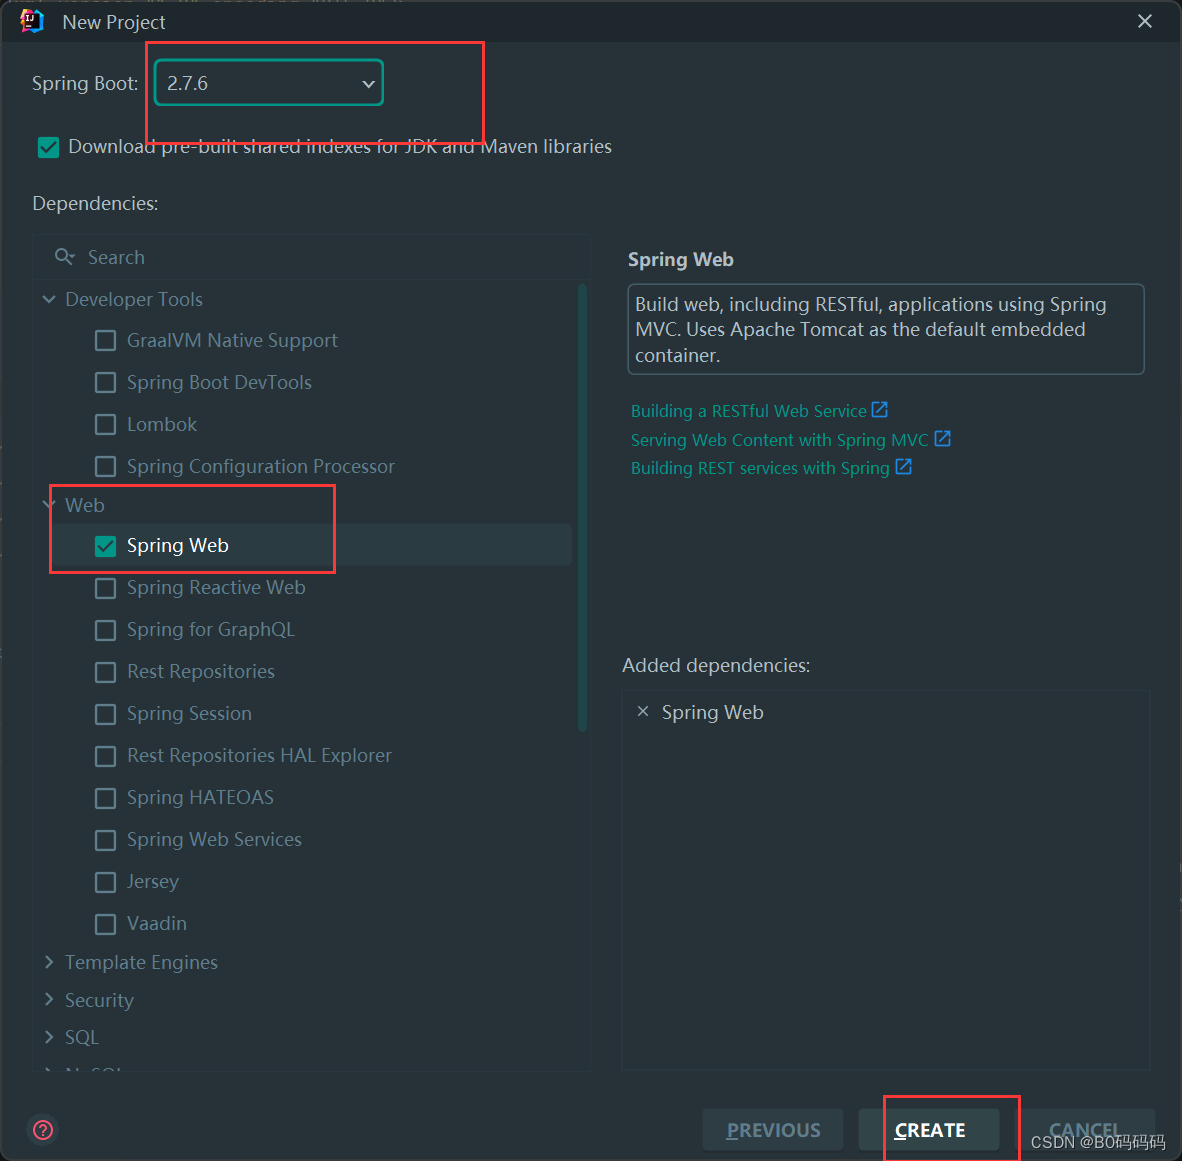
选中3.0以下版本,勾选web开发场景
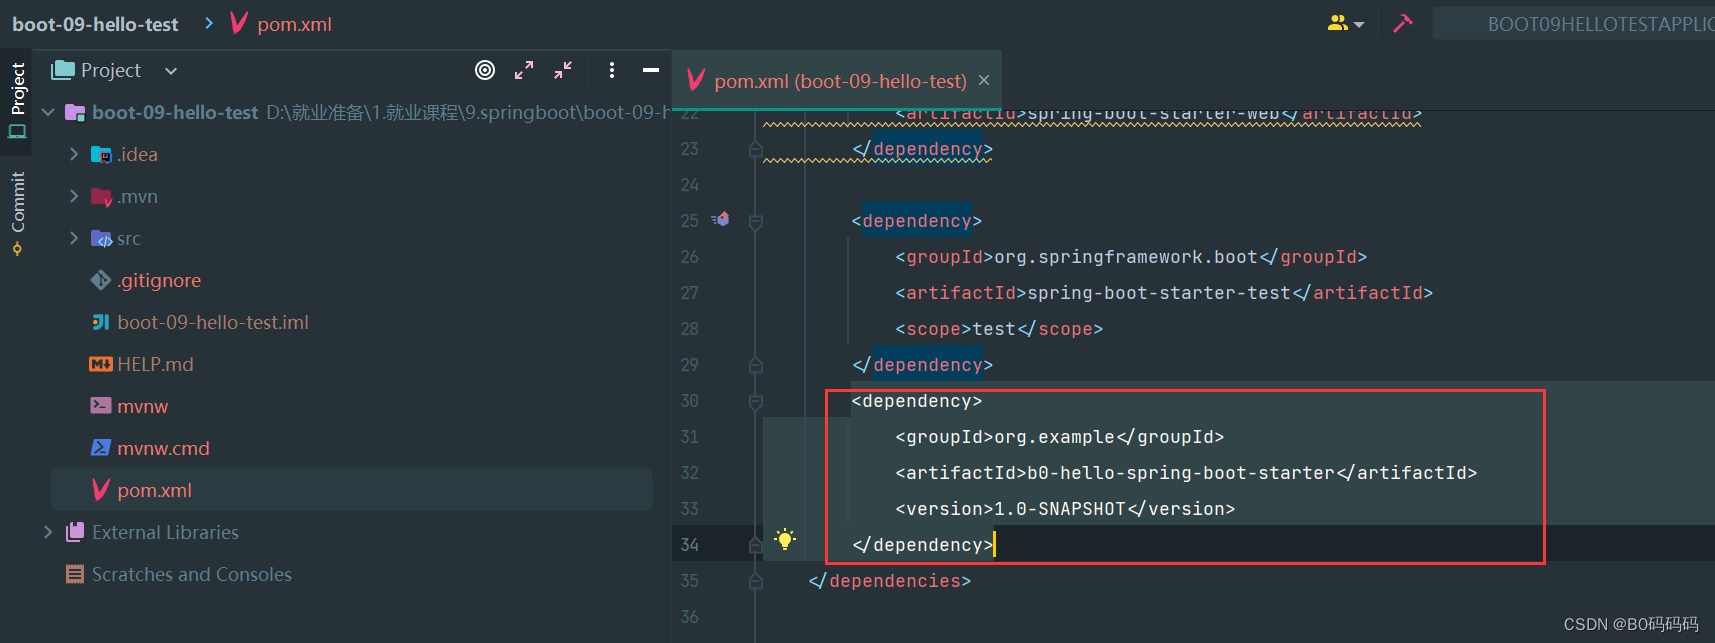
在开发场景的maven中引入自定的场景启动器xxx-starter
笔者starter的依赖
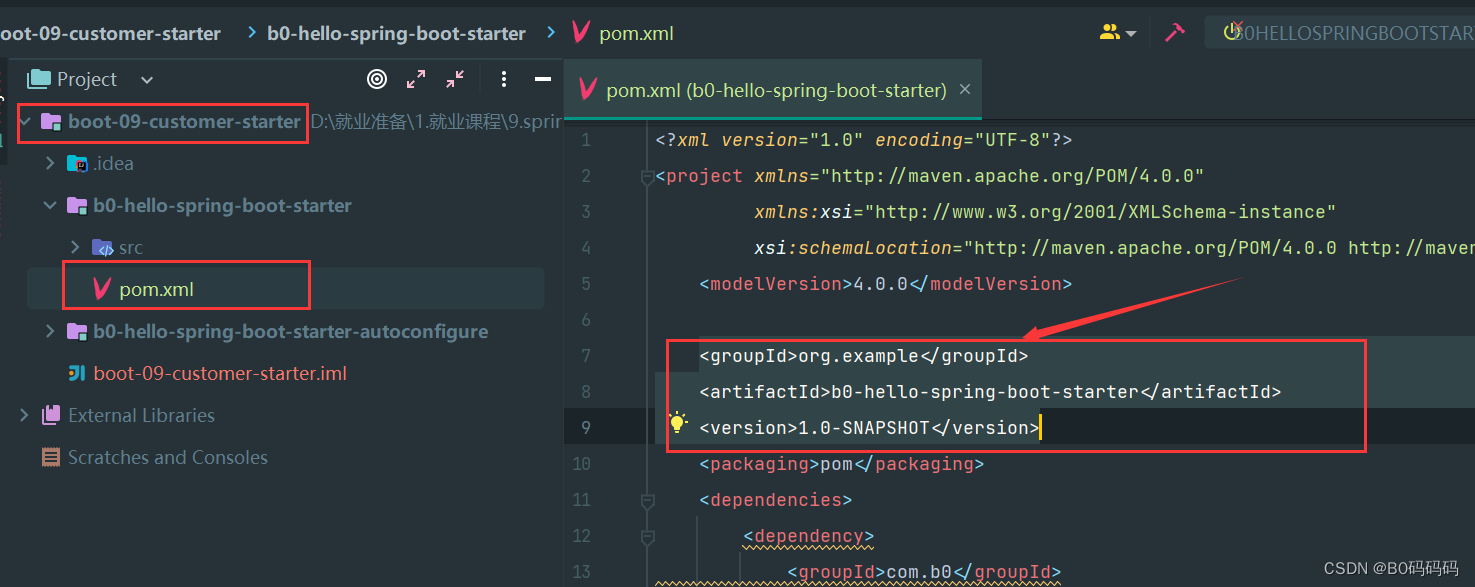
拷贝到开发环境
项目中编写测试controller
package com.b0.boot.controller;
import com.b0.hello.service.HelloService;
import org.springframework.beans.factory.annotation.Autowired;
import org.springframework.web.bind.annotation.GetMapping;
import org.springframework.web.bind.annotation.RestController;@RestController
public class HelloController {@AutowiredHelloService helloService;@GetMapping("hello")public String sayHello(){return helloService.sayHello("李四");}
}
application.properties配置文件中注入属性
b0.hello.prefix=B0
b0.hello.suffix=66666
发送请求测试

参考资料:B站尚硅谷
上一篇:一个石头掉进大海里打一成语的答案
下一篇:夕阳无限好只是近黄昏经典语句