
JavaScript游戏开发(1)(笔记)
创始人
2024-04-04 23:42:30
文章目录
- 一、让角色动起来
- 二、背景的视差效果
- 2.1 循环背景
- 2.2 视差效果
- 三、敌人的移动模式
- 3.1 敌人1
- 3.2 敌人2
- 3.3 敌人3
- 3.4 敌人4
- 四、碰撞动画
- 4.1 碰撞检测
- 4.2 碰撞动画
- 附录
素材可以去一位大佬放在github的源码中直接下,见附录。
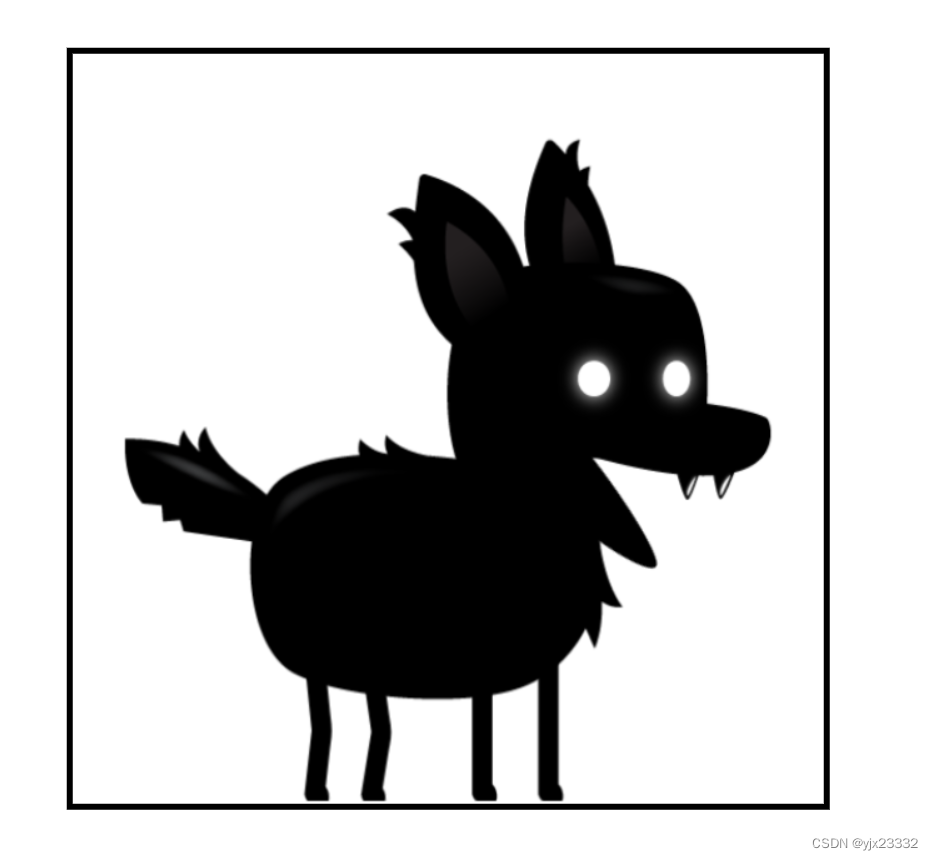
一、让角色动起来
显示页面
shadow_dog_animation
css
#canvas1 {border: 5px solid black;position: absolute;top: 50%;left: 50%;transform: translate(-50%,-50%);width: 600px;height: 600px;
}
js
const canvas = document.getElementById('canvas1');const ctx = canvas.getContext('2d');const CANVAS_WIDTH = canvas.width = 600
const CANVAS_HEIGHT = canvas.height = 600const playerImage = new Image();
playerImage.src = './shadow_dog.png';
// 截取图片的宽高
const spriteWidth = 575;
const spriteHeight = 523;// 用于计算每一帧截取位置的变动
let frameX = 0;
let frameY = 0;function animate(){// 清除举行区域内内容ctx.clearRect(0,0,CANVAS_WIDTH,CANVAS_HEIGHT);// 用图片填充内部-通过放缩,达到刚好一只大小// 图片开始裁剪的x y  图片裁剪的宽 高  图片放置在从ctx中的 x y 在ctx中使用的宽 高(放缩)ctx.drawImage(playerImage,frameX * spriteWidth,frameY * spriteHeight,spriteWidth,spriteHeight,0,0,CANVAS_WIDTH,CANVAS_HEIGHT);// 通过内置的动画帧的方式 回调我们的 animate 方法,形成死循环requestAnimationFrame(animate);
};// 执行
animate()
我们通过修改frameX 和frameY来改变截取的图片内容,此时0,0就是第一个图
那么,接下来我们通过循环让其动起来
// 此处是一个简单的帧数计算,一般来说,游戏中通过 x = 下一次重绘时间 - 当前系统时间 ,0<=x 则执行,x > 0 到则睡眠x
// 用于计算游戏帧数
let gameFrame = 0;
// 游戏设置的帧数
const staggerFrames = 5;function animate(){// 清除举行区域内内容ctx.clearRect(0,0,CANVAS_WIDTH,CANVAS_HEIGHT);// 用图片填充内部-通过放缩,达到刚好一只大小// 图片开始裁剪的x y  图片裁剪的宽 高  图片放置在从ctx中的 x y 在ctx中使用的宽 高(放缩)ctx.drawImage(playerImage,frameX * spriteWidth,frameY * spriteHeight,spriteWidth,spriteHeight,0,0,CANVAS_WIDTH,CANVAS_HEIGHT);if(gameFrame % staggerFrames == 0){// 由于第一行只有 7 帧的图片,我们让其小于等于 7 if(frameX < 6){frameX++;}else{frameX = 0;}}gameFrame++;// 通过内置的动画帧的方式 回调我们的 animate 方法,形成死循环requestAnimationFrame(animate);
};
接下来,我们把每一个行动作都装入
shadow_dog_animation
增加新的修饰
#canvas1 {border: 5px solid black;position: absolute;top: 50%;left: 50%;transform: translate(-50%,-50%);width: 600px;height: 600px;
}.controls{position: absolute;z-index: 10;top: 100px;left: 50%;transform: translate(-50%);
}.controls,select,option{font-size: 25px;
}
const canvas = document.getElementById('canvas1');const ctx = canvas.getContext('2d');const CANVAS_WIDTH = canvas.width = 600
const CANVAS_HEIGHT = canvas.height = 600const playerImage = new Image();
playerImage.src = './shadow_dog.png';
// 截取图片的宽高
const spriteWidth = 575;
const spriteHeight = 523;// 用于计算游戏帧数
let gameFrame = 0;// 游戏设置的帧数
const staggerFrames = 5;// 存储计算出的动作结果
let spriteAnimations=[]
// 动作状态
const animationStates=[{name:"idle",frames:7},{name:"jump",frames:7},{name:"fall",frames:7},{name:"run",frames:9},{name:"dizzy",frames:11},{name:"sit",frames:5},{name:"roll",frames:7},{name:"bite",frames:7},{name:"ko",frames:12},{name:"getHit",frames:4},]// 遍历动作状态,计算出结果
animationStates.forEach((state,index)=>{let frames={// 存储动作帧图片位置loc:[],// loc中的动作完成所需的帧数maxFrame:0}// 计算每一个动作的行列,使用时直接取出即可for(let i = 0;i < state.frames; i++){// 计算列let positionX = i * spriteWidth;// 计算行let positionY= index * spriteHeight;// 存入数据中frames.loc.push({x:positionX, y:positionY})}// 笔者这里增加了一个最大帧数,用于避免帧数过大的问题。frames.maxFrame = frames.loc.length * staggerFrames;// map的形式放入spriteAnimations[state.name] = frames;
})let playerState='idle' //角色的状态// 下拉框事件
const dropdown = document.getElementById('animations')// 添加事件
dropdown.addEventListener('change',(e)=>{playerState=e.target.value
})function animate(){// 清除举行区域内内容ctx.clearRect(0,0,CANVAS_WIDTH,CANVAS_HEIGHT);// 通过帧数计算当前应该加载哪一列图片,效果与之前的写法相同,只是这样写更简洁let position = Math.floor(gameFrame / staggerFrames) % (spriteAnimations[playerState].loc.length);// 用于计算每一帧截取位置的变动let frameX = spriteAnimations[playerState].loc[position].x;let frameY = spriteAnimations[playerState].loc[position].y;ctx.drawImage(playerImage,frameX,frameY ,spriteWidth,spriteHeight,0,0,CANVAS_WIDTH,CANVAS_HEIGHT);// 进入下一帧gameFrame++;// 为了防止gameFrame过大,造成CPU压力,此处用最大帧数缩放// 当游戏帧数等于最大帧数时,认为已经走完一轮,可以归零if(gameFrame >= spriteAnimations[playerState].maxFrame){gameFrame = 0;}// 通过内置的动画帧的方式 回调我们的 animate 方法,形成死循环requestAnimationFrame(animate);
};// 执行
animate()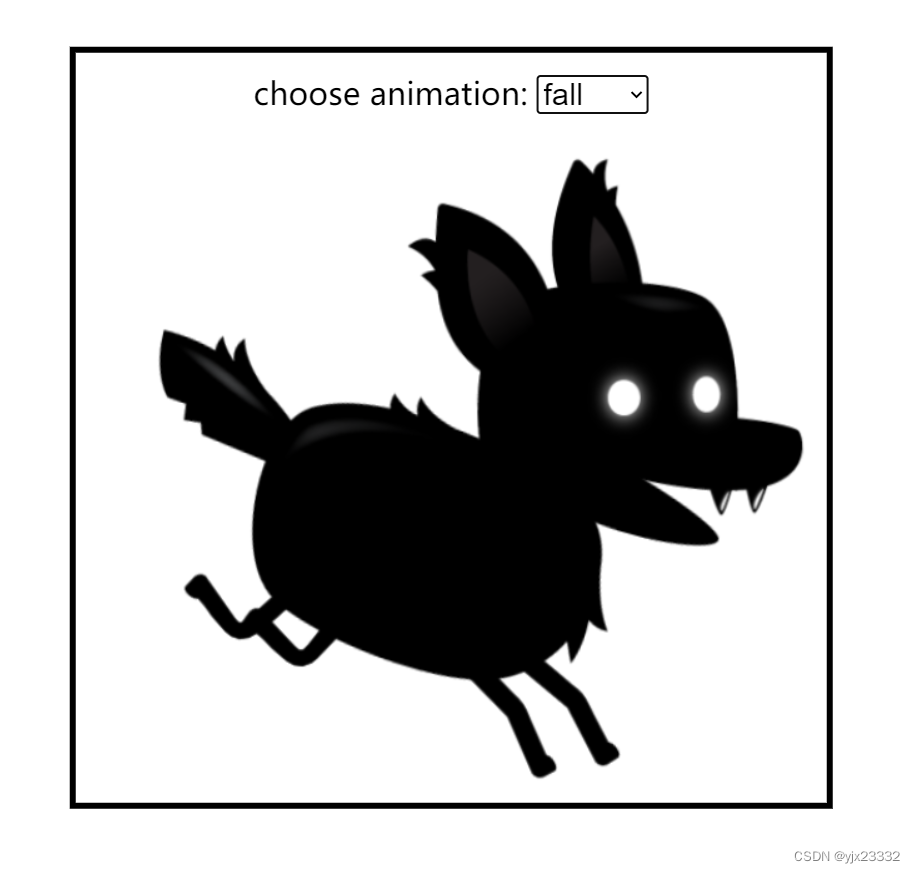
二、背景的视差效果
2.1 循环背景
我们先创建好主页
Parallax Backgrounds
body{background-color: black;
}#canvas1{position: absolute;width: 800px;height: 700px;border: 3px solid white;transform: translate(-50%,-50%);top:50%;left:50%;
}
const canvas = document.getElementById('canvas1');
const ctx = canvas.getContext('2d');
const CANVAS_WIDTH = canvas.width = 800;
const CANVAS_HEIGHT = canvas.height=700;
// 游戏速度
let gameSpeed = 15;// 载入图像
const backgroundLayer1 = new Image();
backgroundLayer1.src = './layer-1.png'const backgroundLayer2 = new Image();
backgroundLayer2.src = './layer-2.png'const backgroundLayer3 = new Image();
backgroundLayer3.src = './layer-3.png'const backgroundLayer4 = new Image();
backgroundLayer4.src = './layer-4.png'const backgroundLayer5 = new Image();
backgroundLayer5.src = './layer-5.png'let x = 0;function animate(){ctx.clearRect(0,0,CANVAS_WIDTH,CANVAS_HEIGHT);ctx.drawImage(backgroundLayer4,x,0);// 到头从来// 像素长度是2400pxif(x < -2400)x = 2400;elsex -= gameSpeed;requestAnimationFrame(animate);
}animate();
先看一看效果,如下
接下来,我们让地图无线延展。做到卷轴类游戏常见的效果。
const canvas = document.getElementById('canvas1');
const ctx = canvas.getContext('2d');
const CANVAS_WIDTH = canvas.width = 800;
const CANVAS_HEIGHT = canvas.height=700;
// 游戏速度
let gameSpeed = 15;// 载入图像
const backgroundLayer1 = new Image();
backgroundLayer1.src = './layer-1.png'const backgroundLayer2 = new Image();
backgroundLayer2.src = './layer-2.png'const backgroundLayer3 = new Image();
backgroundLayer3.src = './layer-3.png'const backgroundLayer4 = new Image();
backgroundLayer4.src = './layer-4.png'const backgroundLayer5 = new Image();
backgroundLayer5.src = './layer-5.png'let x = 0;
let x2 = 2400;function animate(){ctx.clearRect(0,0,CANVAS_WIDTH,CANVAS_HEIGHT);ctx.drawImage(backgroundLayer4,x,0);ctx.drawImage(backgroundLayer4,x2,0);// 可以理解为两张图,一张接在另一张末尾// 当第一张x走完了,接在x2后面// 第二张x2走完了,接在x后面// 此处,笔者修改了代码连接x与x2连接的逻辑// 注意:以下的处理方式,移动不可以一次性跨越两张图的长度// 也就是始终要保证一张图位置不小于0。// 原代码(视频中的代码)也是如此。if(x <= -2400){x = 2400 + x2; // 接在x2后面}else if(x2 <= -2400){x2 = 2400 + x; // 接在x后面}// 移动x -= gameSpeed;x2 -= gameSpeed;requestAnimationFrame(animate);
}animate();
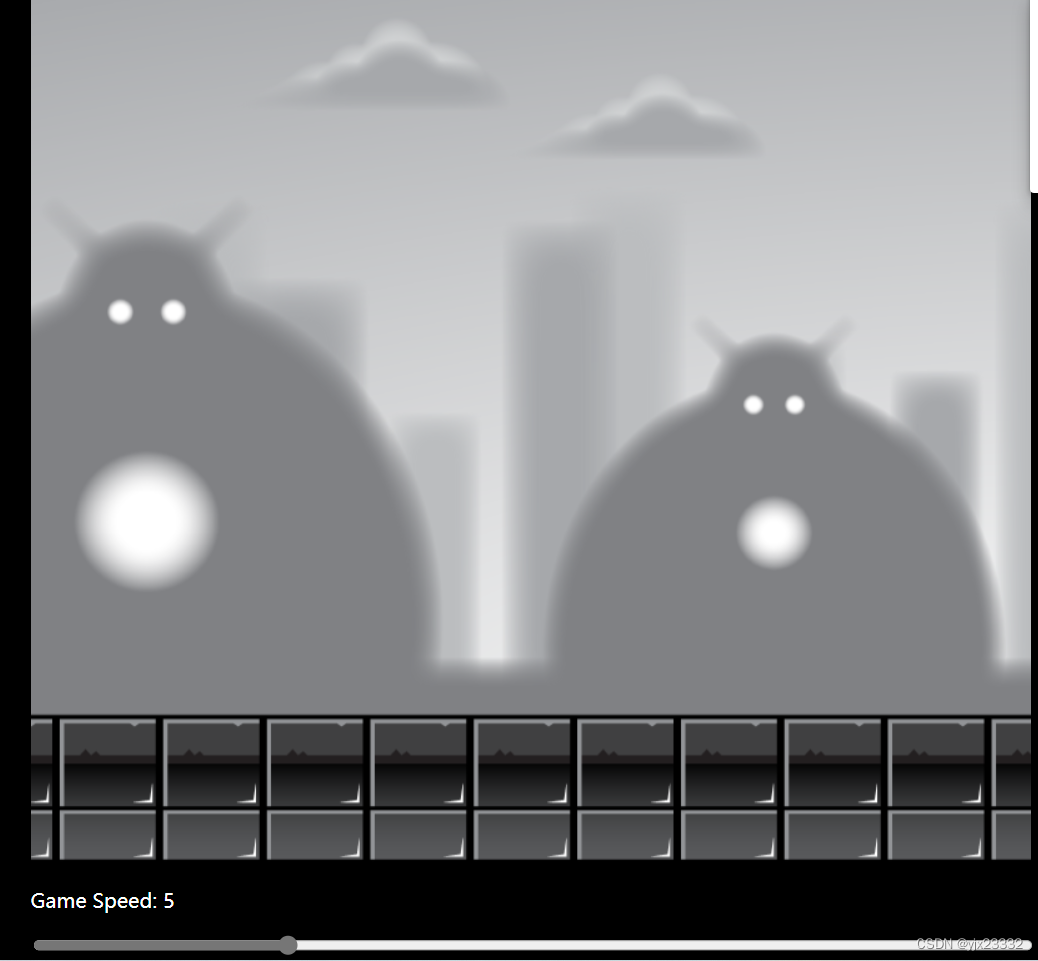
2.2 视差效果
不同图层(背景)移动速度不同,使得游戏立体(远处物体移动较慢,近处物体移动较快)。同时, 它们都是收到角色移动的控制。
为了更便于维护,我们将图层抽象为一个Layer对象。
const canvas = document.getElementById('canvas1');
const ctx = canvas.getContext('2d');
const CANVAS_WIDTH = canvas.width = 800;
const CANVAS_HEIGHT = canvas.height=700;
// 游戏速度
let gameSpeed = 5;// 载入图像
const backgroundLayer1 = new Image();
backgroundLayer1.src = './layer-1.png'const backgroundLayer2 = new Image();
backgroundLayer2.src = './layer-2.png'const backgroundLayer3 = new Image();
backgroundLayer3.src = './layer-3.png'const backgroundLayer4 = new Image();
backgroundLayer4.src = './layer-4.png'const backgroundLayer5 = new Image();
backgroundLayer5.src = './layer-5.png'// 图层对象
class Layer{/*** @param image 图片信息* @param speedModifier 该图层的速度调节器,也即:用于计算,相对全局速度,自己的速度是多少(每一个图层速度不一样)*/constructor(image,speedModifier){// 第一张图位置this.x = 0; this.y = 0;// 图片宽高this.width = 2400;this.height = 700;// 第二张图位置this.x2 = this.width;// 图片this.image = image;// 图层的速度调节器this.speedModifier = speedModifier;// 自己的移动速度this.speed = gameSpeed * this.speedModifier;}// 更新图片位置update(){// 获取新的速度this.speed = gameSpeed * this.speedModifier;// 此处笔者修改逻辑,个人认为视频可能有错误,导致图片在临界处移动了两次,因此此处修改代码        if(this.x <= -this.width){this.x = this.width + this.x2;}else if(this.x2 <= -this.width){this.x2 = this.width + this.x ;}// 避免产生小数点this.x = Math.floor(this.x - this.speed);this.x2 = Math.floor(this.x2 - this.speed);}draw(){ctx.drawImage(this.image,this.x,this.y,this.width,this.height);ctx.drawImage(this.image,this.x2,this.y,this.width,this.height);}}const layer1 = new Layer(backgroundLayer1,0.2);
const layer2 = new Layer(backgroundLayer2,0.4);
const layer3 = new Layer(backgroundLayer3,0.6);
const layer4 = new Layer(backgroundLayer4,0.8);
const layer5 = new Layer(backgroundLayer5,1);const gameObjects = [layer1,layer2,layer3,layer4,layer5];function animate(){ctx.clearRect(0,0,CANVAS_WIDTH,CANVAS_HEIGHT);gameObjects.forEach((item,index)=>{item.update();item.draw();})requestAnimationFrame(animate);
}animate();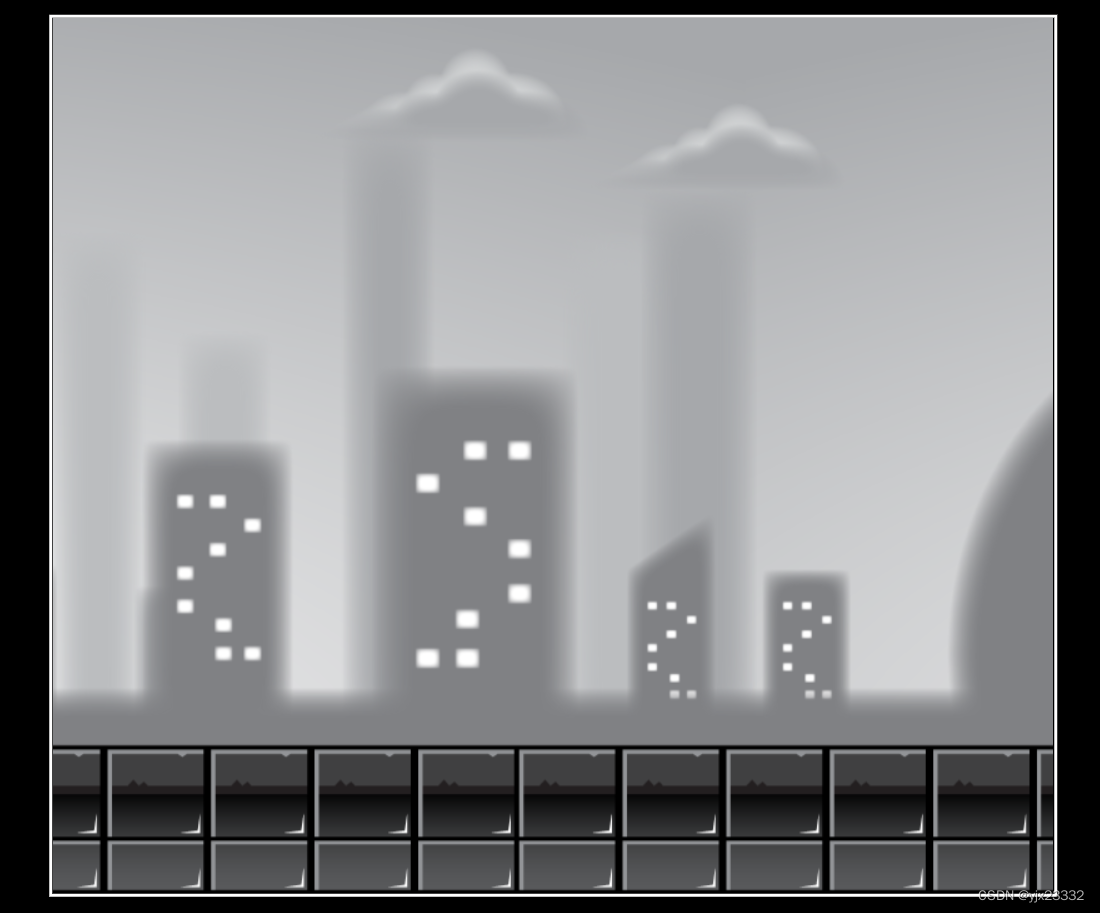
我们接下来,完善它。
body{background-color: black;
}#containter{position: absolute;width: 800px;width: 800px;transform: translate(-50%,-50%);top:50%;left:50%;
}#canvas1{position: relative;width: 800px;height: 700px;
}#slider{width: 100%;
}p{color: white;
}
Parallax Backgrounds

Game speed:
body{background-color: black;
}#container{position: absolute;width: 800px;transform: translate(-50%,-50%);top:50%;left:50%;
}#canvas1{position: relative;width: 800px;height: 700px;
}#slider{width: 100%;
}p{color: white;
}
最后JS代码也做了修改
- 使用了x1与宽度去计算第二张图的位置
- 使用了等待事件,等待DOM元素加载完毕
- 为滑块添加了改变的事件
const canvas = document.getElementById('canvas1');
const ctx = canvas.getContext('2d');
const CANVAS_WIDTH = canvas.width = 800;
const CANVAS_HEIGHT = canvas.height=700;// 游戏速度
let gameSpeed = 5;// 载入图像
const backgroundLayer1 = new Image();
backgroundLayer1.src = './layer-1.png'const backgroundLayer2 = new Image();
backgroundLayer2.src = './layer-2.png'const backgroundLayer3 = new Image();
backgroundLayer3.src = './layer-3.png'const backgroundLayer4 = new Image();
backgroundLayer4.src = './layer-4.png'const backgroundLayer5 = new Image();
backgroundLayer5.src = './layer-5.png'// 图层对象
class Layer{/*** @param image 图片信息* @param speedModifier 该图层的速度调节器,也即:用于计算,相对全局速度,自己的速度是多少(每一个图层速度不一样)*/constructor(image,speedModifier){// 第一张图位置this.x = 0; this.y = 0;// 图片宽高this.width = 2400;this.height = 700;// 图片this.image = image;// 图层的速度调节器this.speedModifier = speedModifier;// 自己的移动速度this.speed = gameSpeed * this.speedModifier;}// 更新图片位置update(){// 获取新的速度this.speed = gameSpeed * this.speedModifier;if(this.x <= -this.width){this.x = 0;}// 避免产生小数点this.x = Math.floor(this.x - this.speed);}draw(){ctx.drawImage(this.image,this.x,this.y,this.width,this.height);ctx.drawImage(this.image,this.x + this.width,this.y,this.width,this.height);}}const layer1 = new Layer(backgroundLayer1,0.2);
const layer2 = new Layer(backgroundLayer2,0.4);
const layer3 = new Layer(backgroundLayer3,0.6);
const layer4 = new Layer(backgroundLayer4,0.8);
const layer5 = new Layer(backgroundLayer5,1);const gameObjects = [layer1,layer2,layer3,layer4,layer5];function animate(){ctx.clearRect(0,0,CANVAS_WIDTH,CANVAS_HEIGHT);gameObjects.forEach((item,index)=>{item.update();item.draw();})requestAnimationFrame(animate);
}// 等待DOM元素加载完成后,再执行
document.addEventListener('DOMContentLoaded', function() {// 获取滑块const slider = document.getElementById('slider');// 获取dom元素const showGameSpeed = document.getElementById('showGameSpeed');// 获取当前速度slider.value = gameSpeed;// 绑定change事件slider.addEventListener('change',function(e){gameSpeed = e.target.value;showGameSpeed.innerHTML = gameSpeed;});// 向内部插入gameSpeed作为内容showGameSpeed.innerHTML = gameSpeed;animate();
})
三、敌人的移动模式
html
NPC movement animations
css
#canvas1{border: 3px solid black;position: absolute;top: 50%;left: 50%;transform: translate(-50%,-50%);width: 500;height: 1000;
}
js
/**  @type {HTMLCanvasElement} */const canvas = document.getElementById('canvas1');const ctx = canvas.getContext('2d');const CANVAS_WIDTH = canvas.width = 500;const CANVAS_HEIGHT = canvas.height = 1000;/**敌人总数 */
const numberOfEnemies = 10;/**存放敌人对象 */
const enemiesArray = [];class Enemy{constructor(){/**敌人刷出的位置*/this.x = Math.random() * canvas.width;this.y = Math.random() * canvas.height;/**敌人宽高 */this.width = 100; this.height = 100;/**速度 -2 ~ 2 */this.speed = Math.random()*4 - 2;}   update(){this.x += this.speed;this.y += this.speed;}draw(){ctx.strokeRect(this.x,this.y,this.width,this.height);}
}function animate(){ctx.clearRect(0,0,CANVAS_WIDTH,CANVAS_HEIGHT);enemiesArray.forEach((item,index)=>{item.update();item.draw();})requestAnimationFrame(animate);
}for(let i = 0;i < numberOfEnemies;i++){enemiesArray.push(new Enemy);
}animate();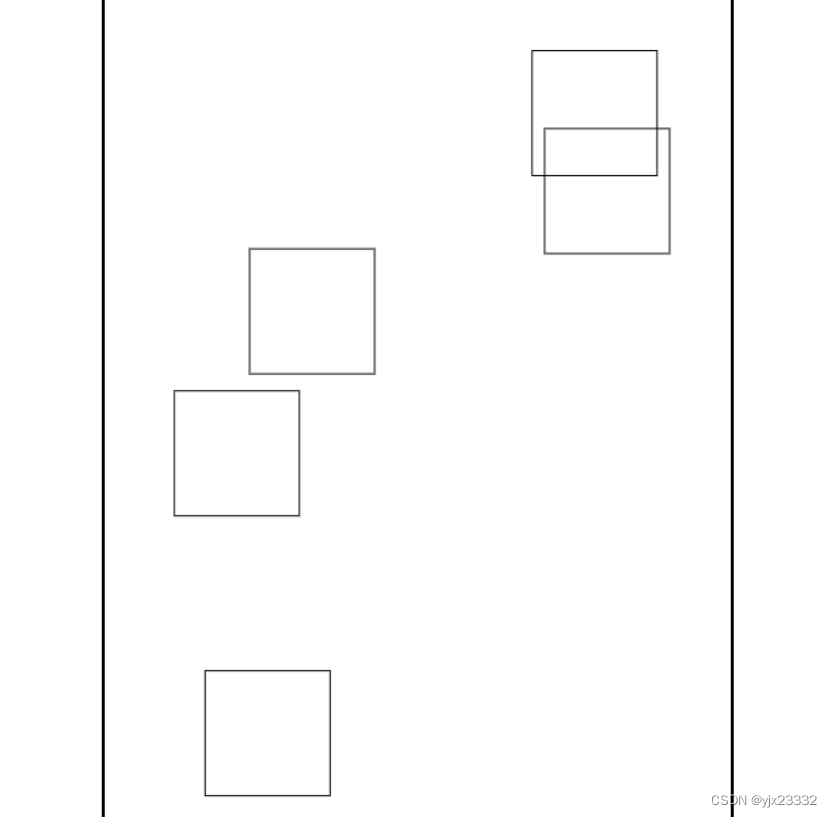
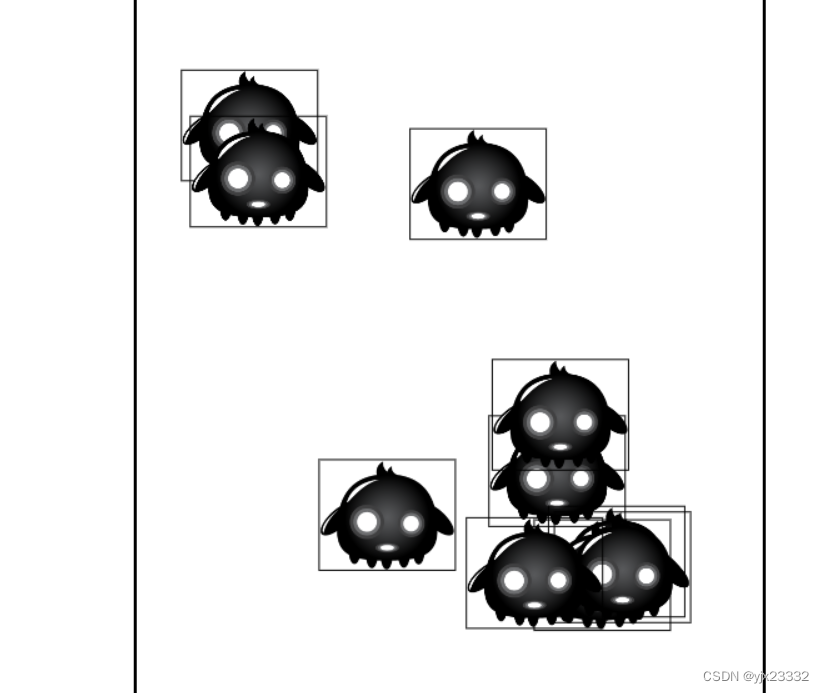
接下来我们将敌人的图片放入,同时为不同的敌人制作动画。
3.1 敌人1
/**  @type {HTMLCanvasElement} */const canvas = document.getElementById('canvas1');const ctx = canvas.getContext('2d');const CANVAS_WIDTH = canvas.width = 500;const CANVAS_HEIGHT = canvas.height = 1000;/**敌人总数 */
const numberOfEnemies = 10;/**存放敌人对象 */
const enemiesArray = [];/**游戏帧 */
let gameFrame  = 0;class Enemy{constructor(){/**敌人图像 */this.image = new Image();this.image.src = './enemy1.png'/**截取图片宽高 */this.spriteWidth = 293;this.spriteHeight = 155;/**敌人宽高,之后可以作为碰撞检测使用*/// 此处缩小this.width = this.spriteWidth/2.5; this.height = this.spriteHeight/2.5;/**敌人刷出的位置,此处减去宽高保证其在内部 */this.x = Math.random() * (canvas.width - this.width);this.y = Math.random() * (canvas.height - this.height);/**速度 -2 ~ 2 */this.speed = Math.random()*4 - 2;/**敌人动作帧数 */this.frame = 0;/**敌人动作改变频率 */this.flapSpeed = Math.floor(Math.random()*3 + 1);}   update(){// 随机化,让它看起来像是在飞// Math.random() *5 - 2.5 这样写更像是悬停,来回飞this.x += Math.random() *5 - 2.5 + this.speed;this.y += Math.random() *5 - 2.5 + this.speed;// 通过该条件控制敌人动画帧if(gameFrame % this.flapSpeed === 0){this.frame > 4?this.frame = 0:this.frame++;}}draw(){ctx.strokeRect(this.x,this.y,this.width,this.height);ctx.drawImage(this.image,this.frame*this.spriteWidth,0,this.spriteWidth,this.spriteHeight,this.x,this.y,this.width,this.height)}
}function animate(){ctx.clearRect(0,0,CANVAS_WIDTH,CANVAS_HEIGHT);enemiesArray.forEach((item,index)=>{item.update();item.draw();})gameFrame++;requestAnimationFrame(animate);
}for(let i = 0;i < numberOfEnemies;i++){enemiesArray.push(new Enemy);
}animate();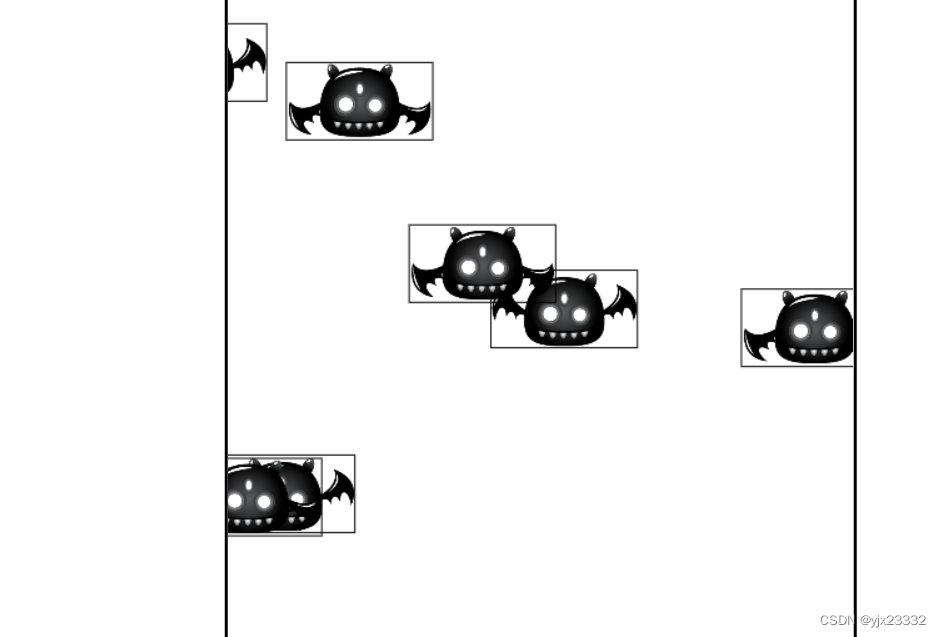
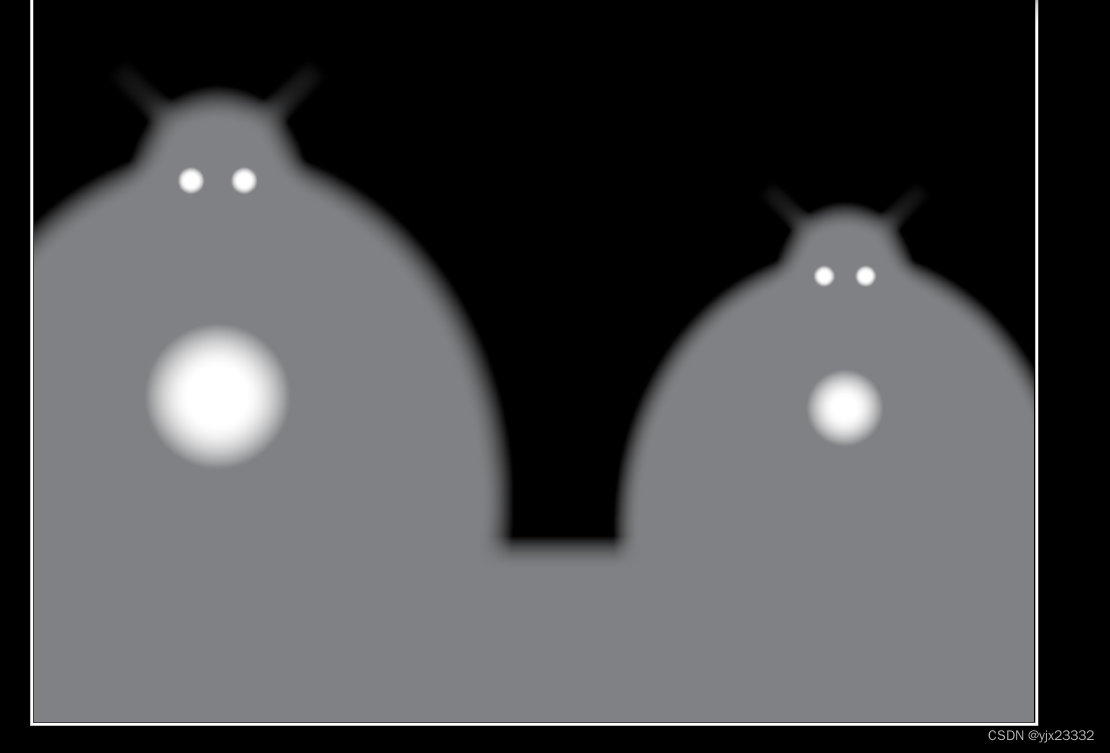
3.2 敌人2
同理,我们制作第二个敌人
/**  @type {HTMLCanvasElement} */const canvas = document.getElementById('canvas1');const ctx = canvas.getContext('2d');const CANVAS_WIDTH = canvas.width = 500;const CANVAS_HEIGHT = canvas.height = 1000;/**敌人总数 */
const numberOfEnemies = 20;/**存放敌人对象 */
const enemiesArray = [];/**游戏帧 */
let gameFrame  = 0;class Enemy{constructor(){/**敌人图像 */this.image = new Image();this.image.src = './enemy2.png'/**截取图片宽高 */this.spriteWidth = 266;this.spriteHeight = 188;/**敌人宽高,之后可以作为碰撞检测使用*/// 此处缩小this.width = this.spriteWidth/2.5; this.height = this.spriteHeight/2.5;/**敌人刷出的位置,此处减去宽高保证其在内部 */this.x = Math.random() * (canvas.width - this.width);this.y = Math.random() * (canvas.height - this.height);/**速度 1~5 */this.speed = Math.random()*4 + 1;/**敌人动作帧数 */this.frame = 0;/**敌人动作改变频率 */this.flapSpeed = Math.floor(Math.random()*3 + 1);/**正弦波度数,用来实现上下往返飞 */this.angle = 0/*度数变化速度 */this.angleSpeed = Math.random()* 0.2;}   update(){this.x -= this.speed;// 按照正弦波,上下飞this.y += 5 * Math.sin(this.angle);this.angle += this.angleSpeed;//为了避免angle过大,这里笔者修改// 如果大于2*pi,就缩小。if(this.angle >= 2*Math.PI){this.angle = this.angle - 2*Math.PI;}// 飞出屏幕,则重新来过,这也保证了最大怪物数目if(this.x + this.width < 0){this.x =  canvas.width;}// 通过该条件控制敌人动画帧if(gameFrame % this.flapSpeed === 0){this.frame > 4?this.frame = 0:this.frame++;}}draw(){ctx.strokeRect(this.x,this.y,this.width,this.height);ctx.drawImage(this.image,this.frame*this.spriteWidth,0,this.spriteWidth,this.spriteHeight,this.x,this.y,this.width,this.height)}
}function animate(){ctx.clearRect(0,0,CANVAS_WIDTH,CANVAS_HEIGHT);enemiesArray.forEach((item,index)=>{item.update();item.draw();})gameFrame++;requestAnimationFrame(animate);
}for(let i = 0;i < numberOfEnemies;i++){enemiesArray.push(new Enemy);
}animate();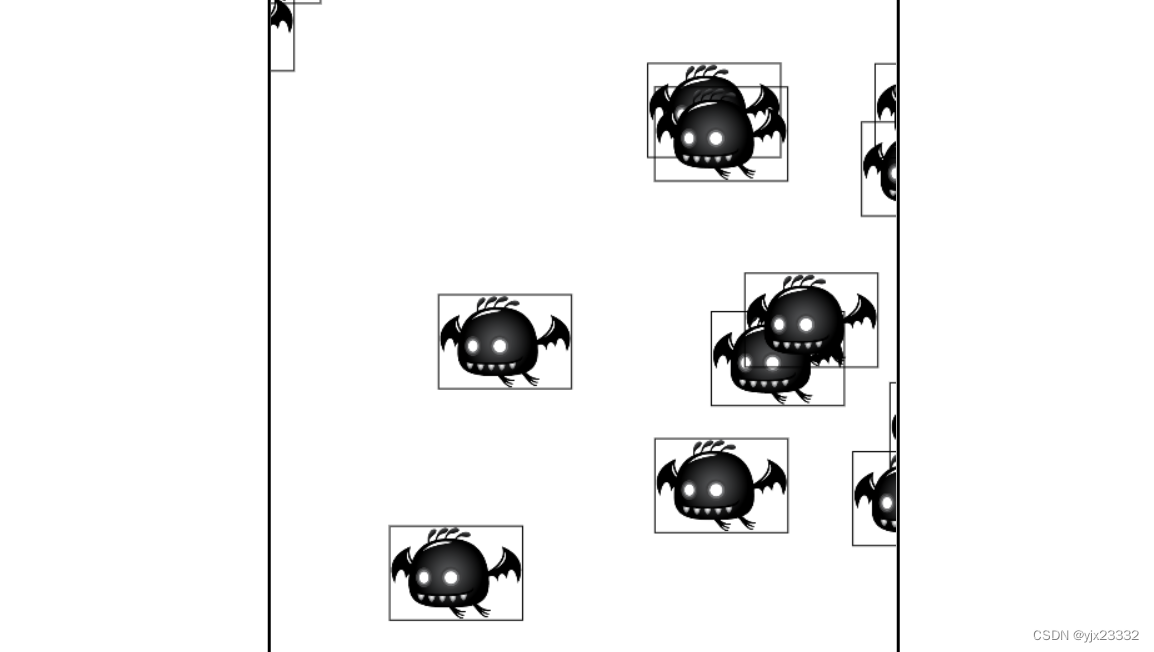
当然,如果想让怪物上下移动更不可预料,我们可以让绘制Y轴的过程更复杂。我们用在下一个敌人上。
3.3 敌人3
笔者这里修改了角度的范围,因此没有用视频中的写法。因此调整的话需要做乘法,而不是除法。
当然,这一块就是自由发挥,通过组合来绘制复杂的怪物移动。
class Enemy{constructor(){/**敌人图像 */this.image = new Image();this.image.src = './enemy3.png'/**截取图片宽高 */this.spriteWidth = 218;this.spriteHeight = 177;/**敌人宽高,之后可以作为碰撞检测使用*/// 此处缩小this.width = this.spriteWidth /2; this.height = this.spriteHeight /2;/**敌人刷出的位置,此处减去宽高保证其在内部 */this.x = Math.random() * (canvas.width - this.width);this.y = Math.random() * (canvas.height - this.height);/**速度 1~5 */this.speed = Math.random()*4 + 1;/**敌人动作帧数 */this.frame = 0;/**敌人动作改变频率 */this.flapSpeed = Math.floor(Math.random()*3 + 1);/**度数,用来实现特殊移动 */this.angle = 0;/*度数变化速度 */this.angleSpeed = Math.random() * 0.01 + 0.01;/**复杂化运动 */this.curve = Math.random() * 200 + 40;}   update(){this.x = this.curve * Math.sin(this.angle + 0.05) + (canvas.width - this.width)/2;this.y = this.curve * Math.cos(this.angle + 0.05) + (canvas.height - this.height)/2;this.angle += this.angleSpeed;if(this.angle >= 2*Math.PI){this.angle = this.angle - 2*Math.PI;}// 通过该条件控制敌人动画帧if(gameFrame % this.flapSpeed === 0){this.frame > 4?this.frame = 0:this.frame++;}}draw(){ctx.strokeRect(this.x,this.y,this.width,this.height);ctx.drawImage(this.image,this.frame*this.spriteWidth,0,this.spriteWidth,this.spriteHeight,this.x,this.y,this.width,this.height)}
}
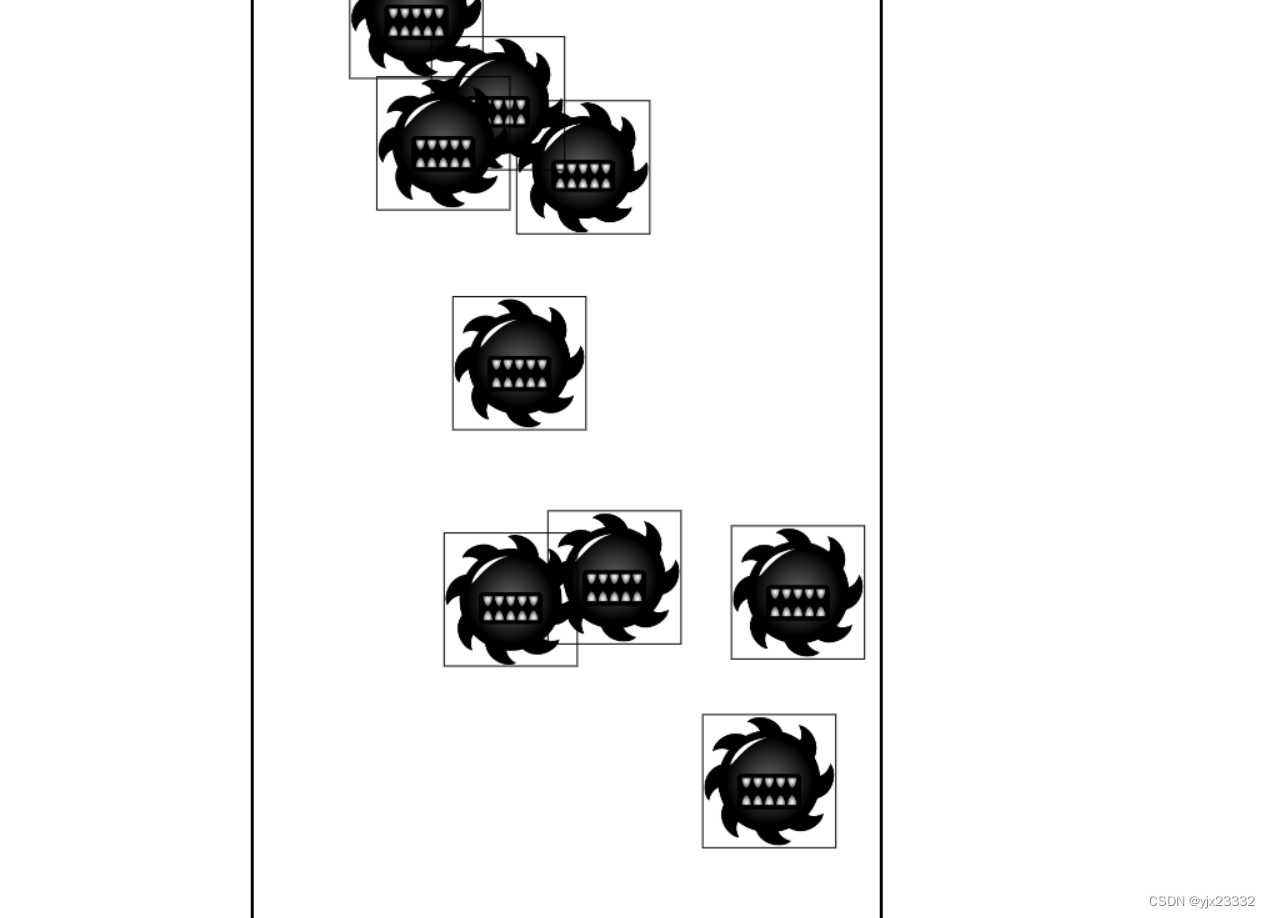
3.4 敌人4
class Enemy{constructor(){/**敌人图像 */this.image = new Image();this.image.src = './enemy4.png'/**截取图片宽高 */this.spriteWidth = 213;this.spriteHeight = 213;/**敌人宽高,之后可以作为碰撞检测使用*/// 此处缩小this.width = this.spriteWidth /2; this.height = this.spriteHeight /2;/**敌人刷出的位置,此处减去宽高保证其在内部 */this.x = Math.random() * (canvas.width - this.width);this.y = Math.random() * (canvas.height - this.height);/**速度 1~5 */this.speed = Math.random()*4 + 1;/**敌人动作帧数 */this.frame = 0;/**敌人动作改变频率 */this.flapSpeed = Math.floor(Math.random()*3 + 1);// 改变量this.newX = Math.random() * (canvas.width - this.width);this.newY = Math.random() * (canvas.height - this.height); // 何时改变变化量 this.interval = Math.floor(Math.random() * 200 + 50);}   update(){if(gameFrame % this.interval === 0){this.newX = Math.random() * (canvas.width - this.width);this.newY = Math.random() * (canvas.height - this.height);}let dx = this.x - this.newX;let dy = this.y - this.newY;this.x -= dx/70;this.y -= dy/70;// 通过该条件控制敌人动画帧if(gameFrame % this.flapSpeed === 0){this.frame > 7?this.frame = 0:this.frame++;}}draw(){ctx.strokeRect(this.x,this.y,this.width,this.height);ctx.drawImage(this.image,this.frame*this.spriteWidth,0,this.spriteWidth,this.spriteHeight,this.x,this.y,this.width,this.height)}
}
四、碰撞动画
4.1 碰撞检测
- 矩形:
- 检测水平(没有碰撞):
rect1.x > rect2.x + rect2.width || rect1.x + rect1.width < rect2.x - 检测竖直(没有碰撞):
rect1.y > rect2.y + rect2.height || rect1.y + rect1.height < rect2.y - 上述两条语句用 ‘或(||)’ 连接
- 检测水平(没有碰撞):
- 圆形:两个圆心的距离是否小于两个半径和,小于则有碰撞
4.2 碰撞动画
html
Playing animations on trigger
css
#canvas1{border: 3px solid black;position: absolute;height: 700px;width: 500px;background: black;top: 50%;left: 50%;transform: translate(-50%,-50%);
}
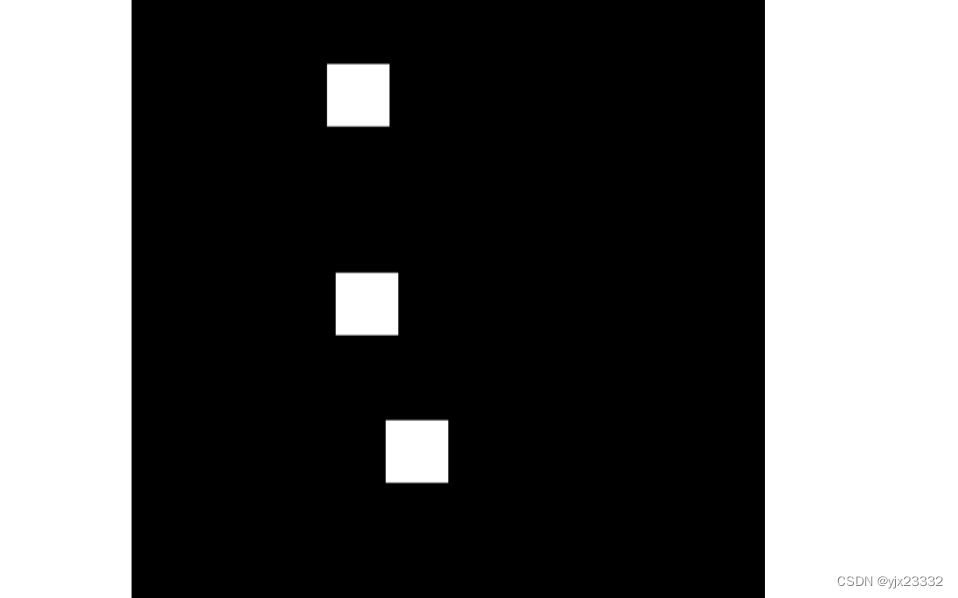
先准备动画
const canvas = document.getElementById('canvas1');const ctx = canvas.getContext('2d');canvas.width = 500;canvas.height = 700;// 测量DOM元素的位置,此处我们获取了边框canvas的坐标
let canvasPosition = canvas.getBoundingClientRect();window.addEventListener('click',function(e){ctx.fillStyle = 'white';// 此处用点击坐标 - 绘制坐标,这样就算出了在边框中绘制的坐标(相对坐标)// ctx.fillRect(e.x - canvasPosition.left,e.y - canvasPosition.top,50,50);// 在那减去25 是因为我们想包裹点击处let dx = e.x - canvasPosition.left - 25;let dy = e.y - canvasPosition.top - 25;ctx.fillRect(dx,dy,50,50);
})
接下来绘制图片
const canvas = document.getElementById('canvas1');const ctx = canvas.getContext('2d');canvas.width = 500;canvas.height = 700;const explosions = [];// 测量DOM元素的位置,此处我们获取了边框canvas的坐标
let canvasPosition = canvas.getBoundingClientRect();// 爆炸效果
class Explosion{constructor(x,y){this.x = x;this.y = y;this.spriteWidth = 200;this.spriteHeight = 179;this.width = this.spriteWidth/2;this.height = this.spriteHeight/2;this.image = new Image();this.image.src = './boom.png';this.frame = 0;}update(){this.frame++;}draw(){ctx.drawImage(this.image,this.spriteWidth * this.frame,0,this.spriteWidth,this.spriteHeight,this.x,this.y,this.width,this.height);}}window.addEventListener('click',function(e){let dx = e.x - canvasPosition.left;let dy = e.y - canvasPosition.top;ctx.fillRect(dx,dy,50,50);explosions.push(new Explosion(dx,dy));
})function animate(){ctx.clearRect(0,0,canvas.width,canvas.height)for(let i = 0;i < explosions.length; i++){explosions[i].update();explosions[i].draw();}requestAnimationFrame(animate);
}animate();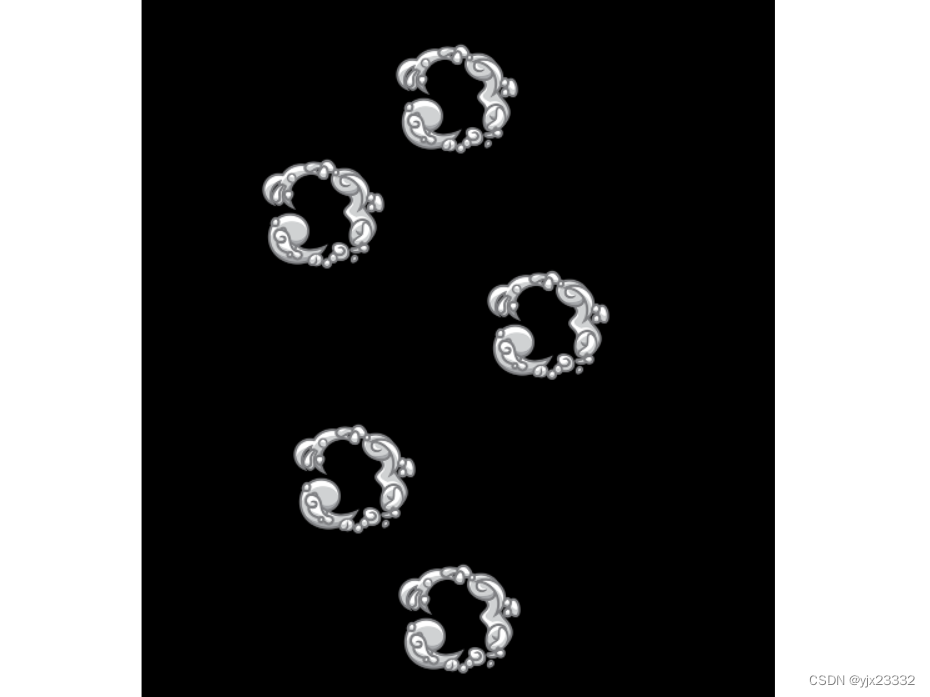
接下来,我们让每一个类单独给自己计时,来播放动画。
同时,我们让绘制中心位于点击点。
当然要删除无效的对象。
const canvas = document.getElementById('canvas1');const ctx = canvas.getContext('2d');canvas.width = 500;canvas.height = 700;const explosions = [];// 测量DOM元素的位置,此处我们获取了边框canvas的坐标
let canvasPosition = canvas.getBoundingClientRect();// 爆炸效果
class Explosion{constructor(x,y){this.spriteWidth = 200;this.spriteHeight = 179;this.width = this.spriteWidth*0.7;this.height = this.spriteHeight*0.7;this.x = x - this.width/2;this.y = y - this.height/2;this.image = new Image();this.image.src = './boom.png';this.frame = 0;this.timer = 0;}update(){this.timer++;if(this.timer % 10 === 0){this.frame++;}}draw(){ctx.drawImage(this.image,this.spriteWidth * this.frame,0,this.spriteWidth,this.spriteHeight,this.x,this.y,this.width,this.height);}}window.addEventListener('click',function(e){createAnimation(e);
})function createAnimation(e){let dx = e.x - canvasPosition.left;let dy = e.y - canvasPosition.top;ctx.fillRect(dx,dy,50,50);explosions.push(new Explosion(dx,dy));
}function animate(){ctx.clearRect(0,0,canvas.width,canvas.height)for(let i = 0;i < explosions.length; i++){explosions[i].update();explosions[i].draw();if(explosions[i].frame > 5){explosions.splice(i,1);}}requestAnimationFrame(animate);
}animate();
我们还想加入angle来让生成的动画旋转,并让旋转速度不同。
// 爆炸效果
class Explosion{constructor(x,y){this.spriteWidth = 200;this.spriteHeight = 179;this.width = this.spriteWidth*0.7;this.height = this.spriteHeight*0.7;this.x = x;this.y = y;this.image = new Image();this.image.src = './boom.png';this.frame = 0;this.timer = 0;this.angle = Math.random() * 6.2;}update(){this.timer++;if(this.timer % 10 === 0){this.frame++;}}draw(){//  存储当前上下文,避免我们接下来的绘制仅在此处生效,而不会影响整个布局// 可以理解为我们复制了当前的所有内容为一个新的图层,我们只会在新的图层上修改,而不会之后的操作通过restore,回到另一个张图层,避免影响到之后操作ctx.save();// ctx移动到当前位置,即:右移动this.x,下移this.yctx.translate(this.x,this.y);// 旋转整个画框 this.anglectx.rotate(this.angle);// 绘制// 因为我们移动了ctx,也就是画框,到了this.x,this.y。于是此时的this.x,this.y也就是边界,0,0。// 因此我们此处用0,0替换。换句话说,因为绘画点就是边界,我们不需要再使用绘制点相对画框的位置。ctx.drawImage(this.image,this.spriteWidth * this.frame,0,this.spriteWidth,this.spriteHeight,0 - this.width/2,0 - this.height/2,this.width,this.height);// 取出之前保存的上下文,此时ctx回到了原来的位置ctx.restore();}}
我们加入音效
下载地址Magic SFX Sample
当然你也可以用其他的。
选一个放在项目下,导入即可。

constructor(x,y){this.spriteWidth = 200;this.spriteHeight = 179;this.width = this.spriteWidth*0.7;this.height = this.spriteHeight*0.7;this.x = x;this.y = y;this.image = new Image();this.image.src = './boom.png';this.frame = 0;this.timer = 0;this.angle = Math.random() * 6.2;this.sound = new Audio();this.sound.src = 'Fire impact 1.wav';}update(){if(this.frame === 0){this.sound.play();}this.timer++;if(this.timer % 10 === 0){this.frame++;}}
附录
[1]源-素材地址
[2]源-视频地址
[3]搬运视频地址(JavaScript 游戏开发)
[4]github-视频的素材以及源码
上一篇:windows内存管理操作
相关内容
热门资讯
埃菲尔铁塔在哪 中国仿建埃菲尔...
2019年4月26日,广西南宁市,街头惊现一座巨型山寨版埃菲尔铁塔,高约20米,白色塔身,造型逼真,...
苗族的传统节日 贵州苗族节日有...
【岜沙苗族芦笙节】岜沙,苗语叫“分送”,距从江县城7.5公里,是世界上最崇拜树木并以树为神的枪手部落...
北京的名胜古迹 北京最著名的景...
北京从元代开始,逐渐走上帝国首都的道路,先是成为大辽朝五大首都之一的南京城,随着金灭辽,金代从海陵王...
长白山自助游攻略 吉林长白山游...
昨天介绍了西坡的景点详细请看链接:一个人的旅行,据说能看到长白山天池全凭运气,您的运气如何?今日介绍...
应用未安装解决办法 平板应用未...
---IT小技术,每天Get一个小技能!一、前言描述苹果IPad2居然不能安装怎么办?与此IPad不...
脚上的穴位图 脚面经络图对应的...
人体穴位作用图解大全更清晰直观的标注了各个人体穴位的作用,包括头部穴位图、胸部穴位图、背部穴位图、胳...
猫咪吃了塑料袋怎么办 猫咪误食...
你知道吗?塑料袋放久了会长猫哦!要说猫咪对塑料袋的喜爱程度完完全全可以媲美纸箱家里只要一有塑料袋的响...
demo什么意思 demo版本...
618快到了,各位的小金库大概也在准备开闸放水了吧。没有小金库的,也该向老婆撒娇卖萌服个软了,一切只...
世界上最漂亮的人 世界上最漂亮...
此前在某网上,选出了全球265万颜值姣好的女性。从这些数量庞大的女性群体中,人们投票选出了心目中最美...
埃菲尔铁塔在哪 中国仿建埃菲尔...
2019年4月26日,广西南宁市,街头惊现一座巨型山寨版埃菲尔铁塔,高约20米,白色塔身,造型逼真,...
苗族的传统节日 贵州苗族节日有...
【岜沙苗族芦笙节】岜沙,苗语叫“分送”,距从江县城7.5公里,是世界上最崇拜树木并以树为神的枪手部落...
北京的名胜古迹 北京最著名的景...
北京从元代开始,逐渐走上帝国首都的道路,先是成为大辽朝五大首都之一的南京城,随着金灭辽,金代从海陵王...
长白山自助游攻略 吉林长白山游...
昨天介绍了西坡的景点详细请看链接:一个人的旅行,据说能看到长白山天池全凭运气,您的运气如何?今日介绍...
世界上最漂亮的人 世界上最漂亮...
此前在某网上,选出了全球265万颜值姣好的女性。从这些数量庞大的女性群体中,人们投票选出了心目中最美...
应用未安装解决办法 平板应用未...
---IT小技术,每天Get一个小技能!一、前言描述苹果IPad2居然不能安装怎么办?与此IPad不...
脚上的穴位图 脚面经络图对应的...
人体穴位作用图解大全更清晰直观的标注了各个人体穴位的作用,包括头部穴位图、胸部穴位图、背部穴位图、胳...
demo什么意思 demo版本...
618快到了,各位的小金库大概也在准备开闸放水了吧。没有小金库的,也该向老婆撒娇卖萌服个软了,一切只...
猫咪吃了塑料袋怎么办 猫咪误食...
你知道吗?塑料袋放久了会长猫哦!要说猫咪对塑料袋的喜爱程度完完全全可以媲美纸箱家里只要一有塑料袋的响...