
从零开始搭建SpringBoot项目,并且用Mybatis进行数据查询(包含所用数据库)
核心内容:这是一篇从零开始搭建SpringBoot,加上配置文件如何配置Mybatis的文章。每一步我都用图片加文字都有注释,我也上传了对应所用的数据库。
适用人群:刚接触SpringBoot的新手在创建项目的时候肯定会遇到各种各样的问题,愿这篇文章能够对你有所收获,愿你拼荆斩棘,乘风破浪!!!!
一、SpringBoot项目初始化
注意:
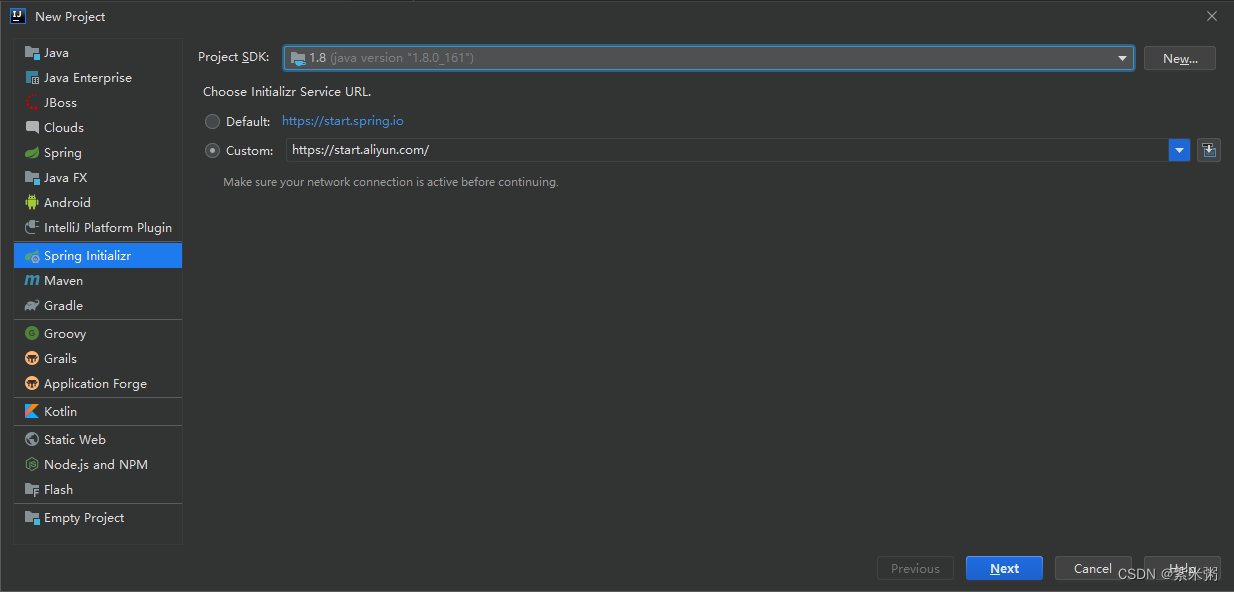
(1)项目初始化路径修改:
开始Choose Initializar Service URL的会默认选择Default,但是如果第一个默认初始化失败的话,那就可以选择自定义初始化路径,这里我们选择的是阿里云的:https://start.aliyun.com/
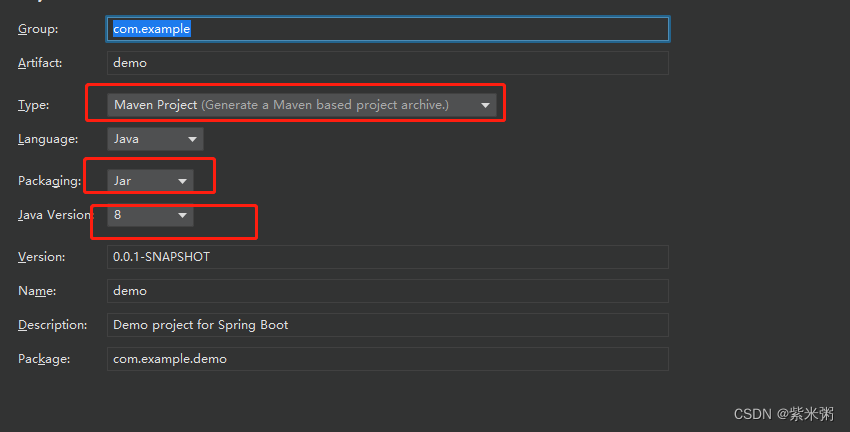
(2)SpringBoot项目选择合适的JDK版本、Jar包管理工具。
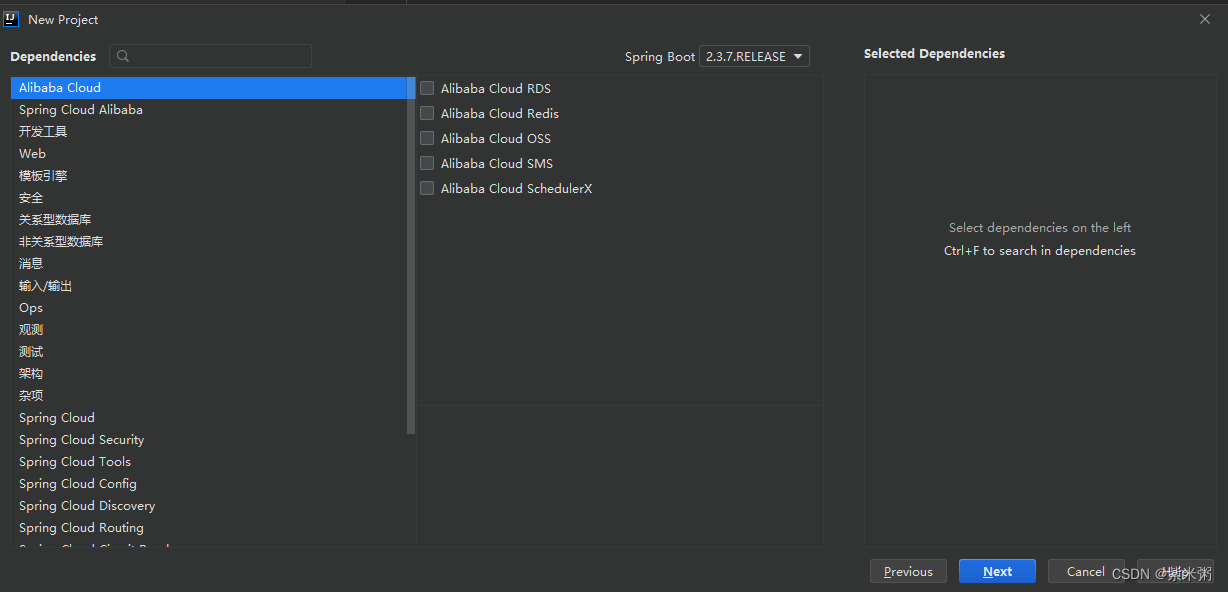
(3)因为我们打算做的是前后端分离版,因此接下来直接Next就行了,不用勾选任何选项!大家在这里可以根据自己的项目合理选择!
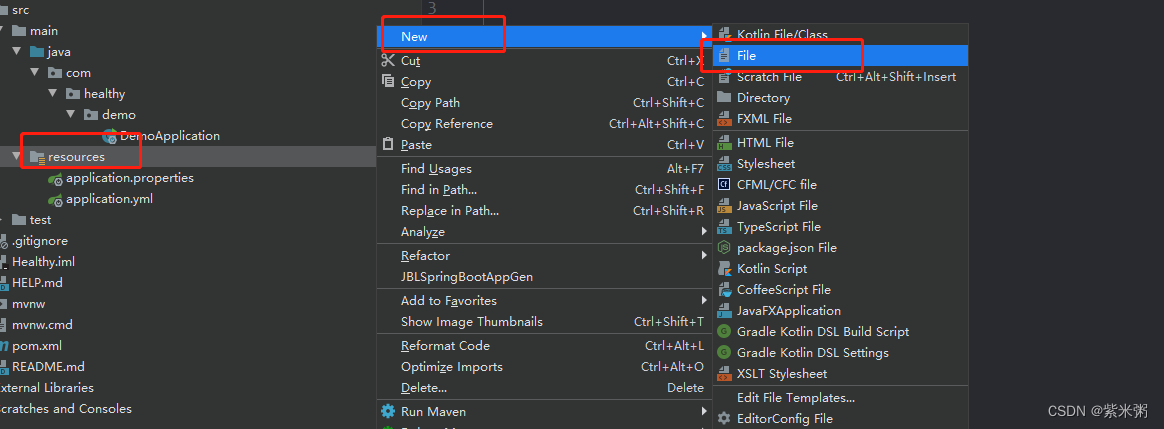
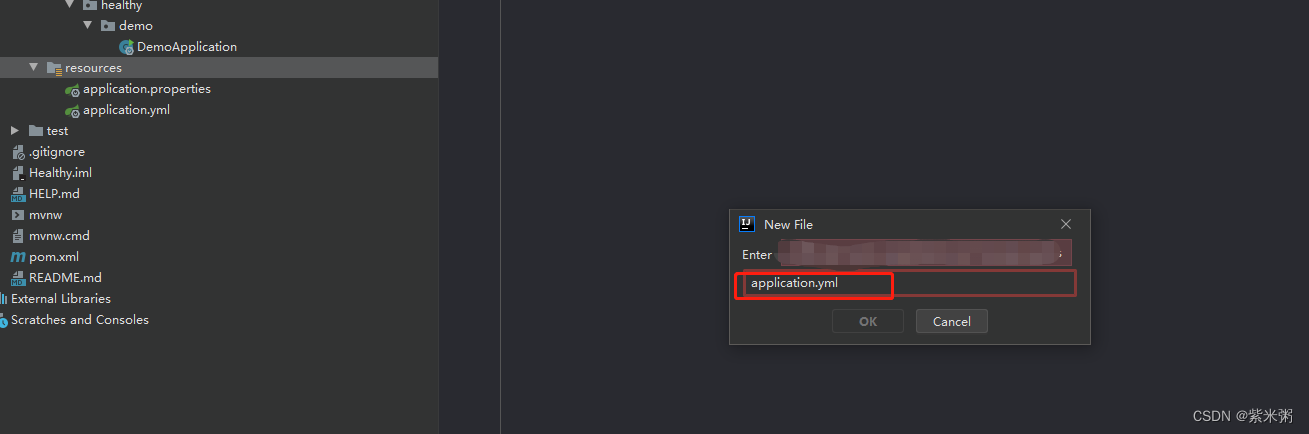
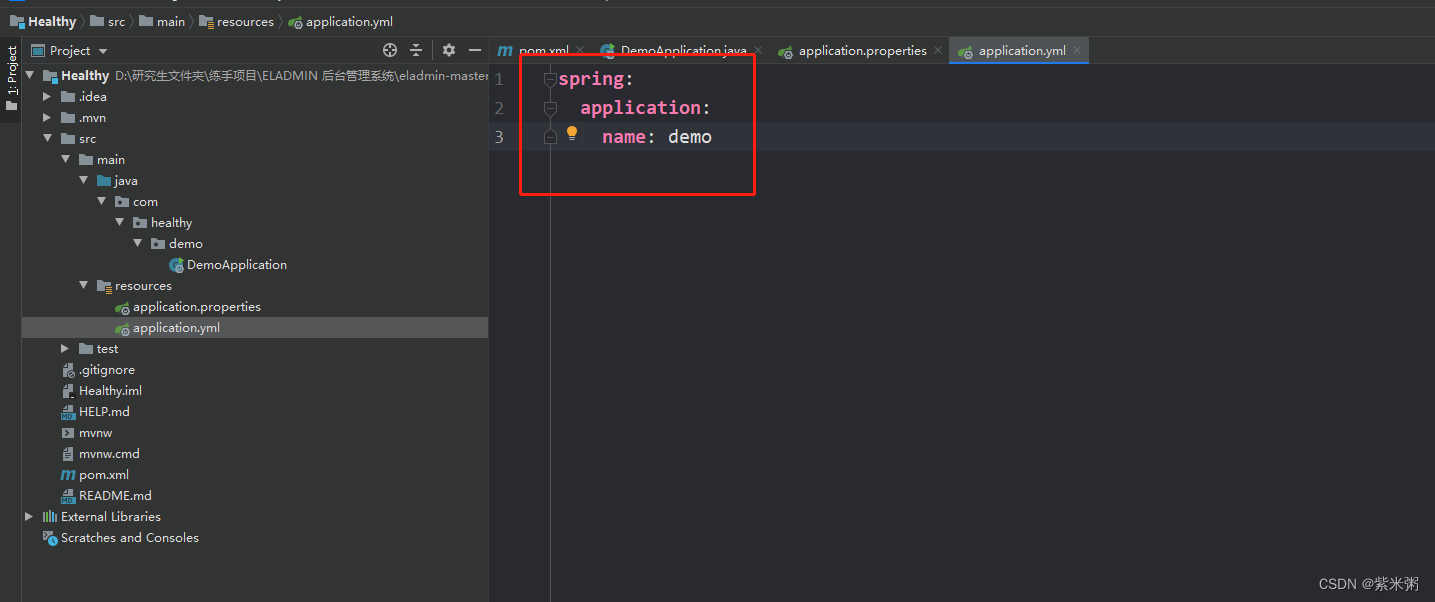
(4)修改配置文件:我比较习惯yml格式的配置文件,所以在这里对application.properties,修改成application.yml!
大家可以按照我下面的步骤进行修改!修改完之后直接把application.properties删除就可以了!切记一定不要忘了删除application.properties!!!!
并且大家可以在这里提前修改一下端口号,默认应该是8080,如果端口号被占用了以后可以在这里进行修改哈!

(5)修改pom.xml文件:添加web场景启动器
org.springframework.boot spring-boot-starter-web pom.xml文件预览:
4.0.0 com.healthy demo 0.0.1-SNAPSHOT demo Demo project for Spring Boot 1.8 UTF-8 UTF-8 2.3.7.RELEASE org.springframework.boot spring-boot-starter org.springframework.boot spring-boot-starter-web org.springframework.boot spring-boot-starter-test test org.junit.vintage junit-vintage-engine org.springframework.boot spring-boot-dependencies ${spring-boot.version} pom import org.apache.maven.plugins maven-compiler-plugin 3.8.1 1.8 1.8 UTF-8 org.springframework.boot spring-boot-maven-plugin 2.3.7.RELEASE com.healthy.demo.DemoApplication repackage repackage (6) 测试:
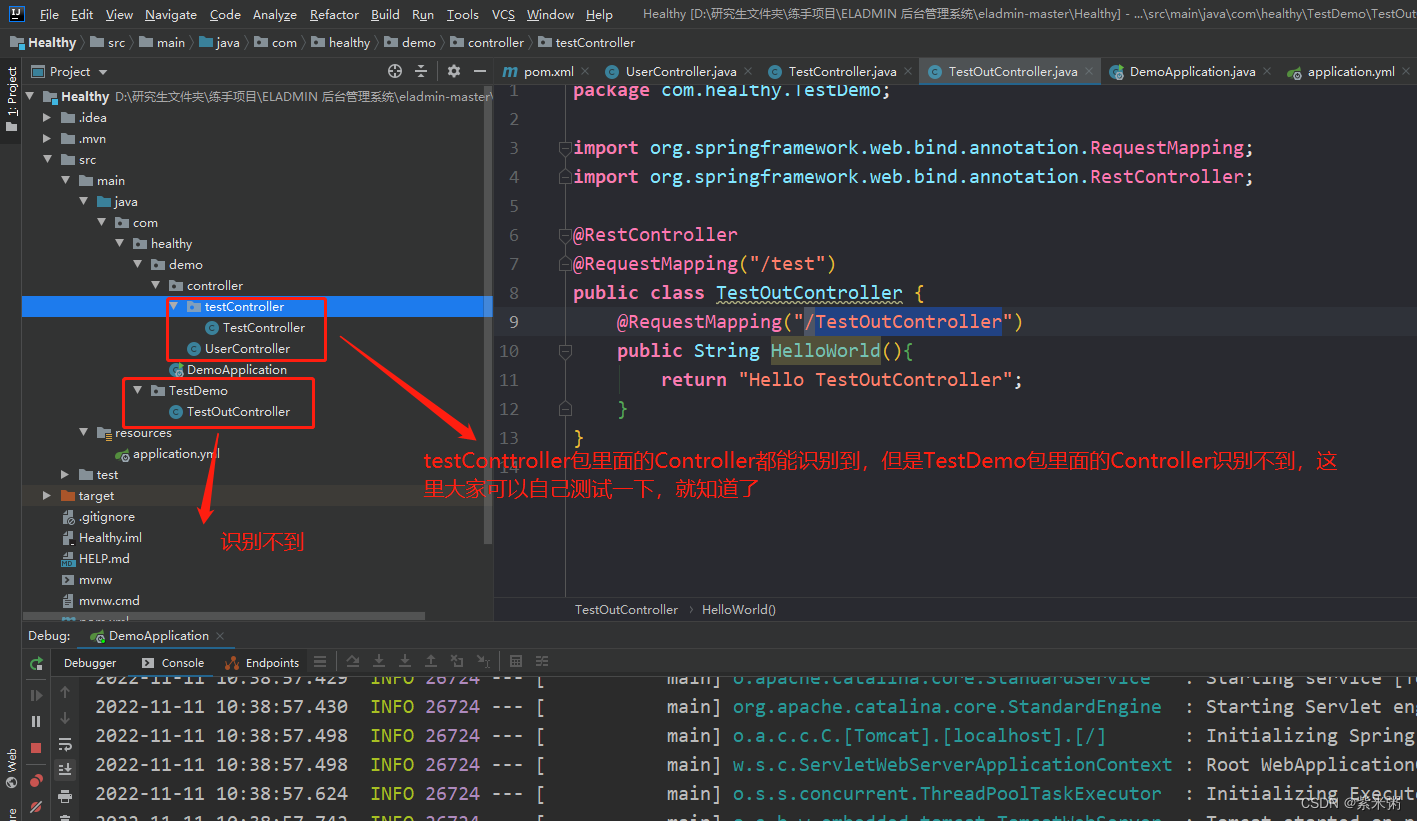
在测试的时候大家一定要注意:编写Http接口的时候一定要在主程序的同级目录下,新建一个controller包,一定要在同级目录下,否则识别不到。**
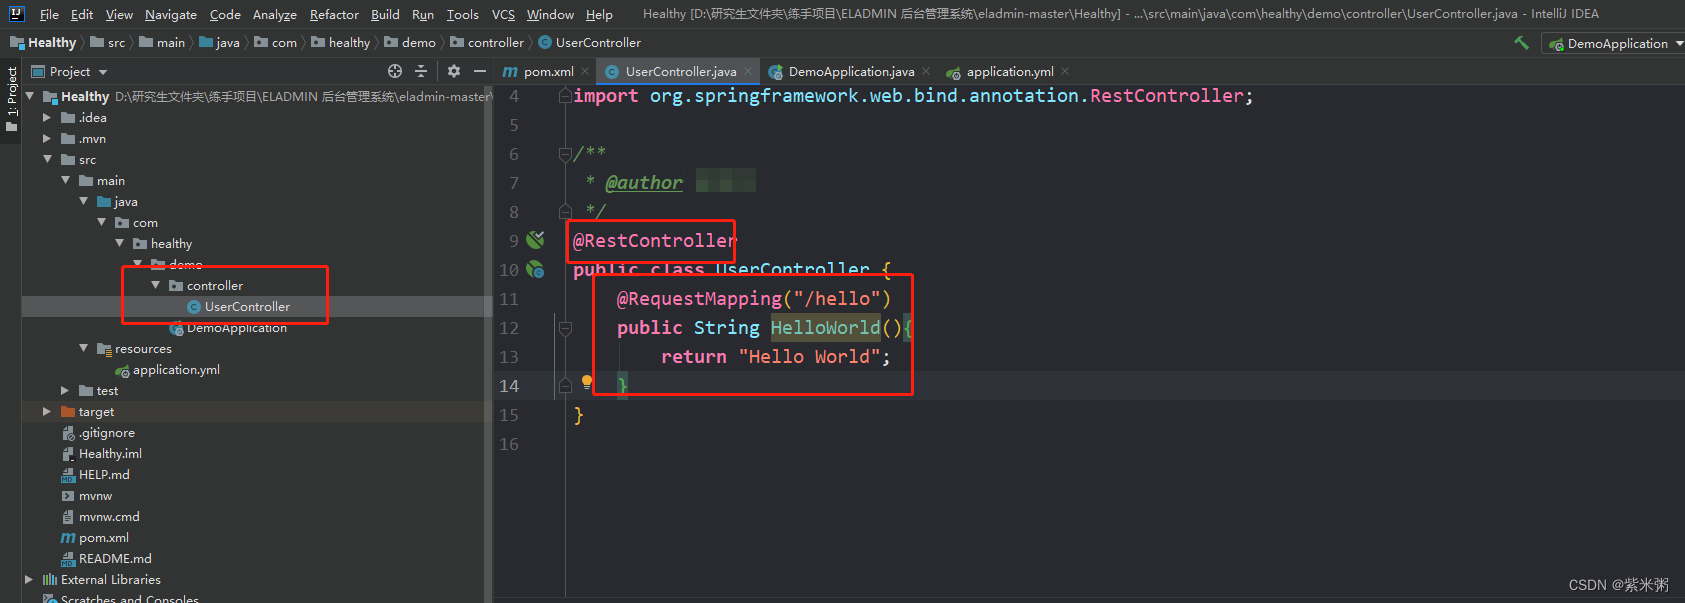
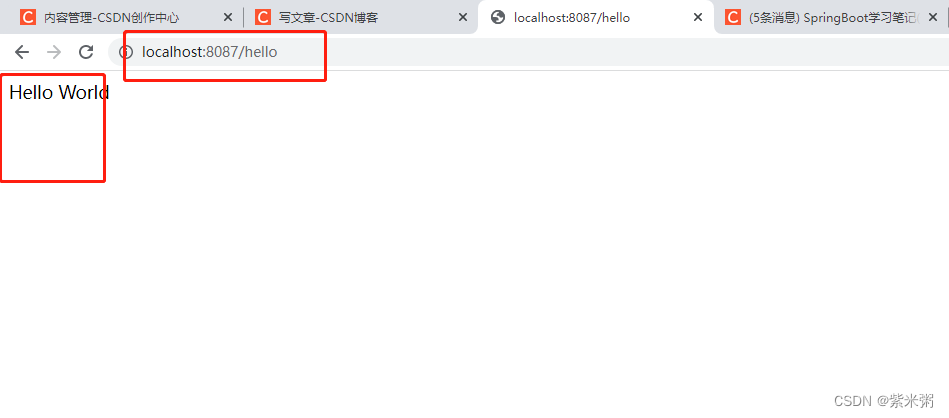
(7)编写如下测试代码,然后重新启动项目,输入地址:http://localhost:8087/hello,如果页面显示HelloWorld,截止目前,SpringBoot项目已经搭建完毕!
package com.healthy.demo.controller;import org.springframework.web.bind.annotation.RequestMapping;
import org.springframework.web.bind.annotation.RestController;/*** @author */
@RestController
public class UserController {@RequestMapping("/hello")public String HelloWorld(){return "Hello World";}
}
二、Mybatis配置:
我将所用的数据库上传到了CSDN上,大家可以自行下载一下:
https://download.csdn.net/download/weixin_43388691/86954858!
1、配置pom.xml文件
(1)注意在这里要仔细查看自己电脑的Mysql的版本,我在这里使用的mysql5版本的。
但是在这里我也是按照高版本的Mysq进行连接的,因为对于Mysql的数据驱动而言,他是高版本往低版本向下兼容的,但是他并不可以低版本往上兼容!
(2)注意我们要引入mybatis的启动器。
mysql mysql-connector-java runtime org.mybatis.spring.boot mybatis-spring-boot-starter 2.1.1 2、配置application.yml
(1)在这里我了我们方便分清开发版和测试版我又建了一个yml文件专门用于配置Myabtis的。然后在application-dev.yml中添加如下代码。
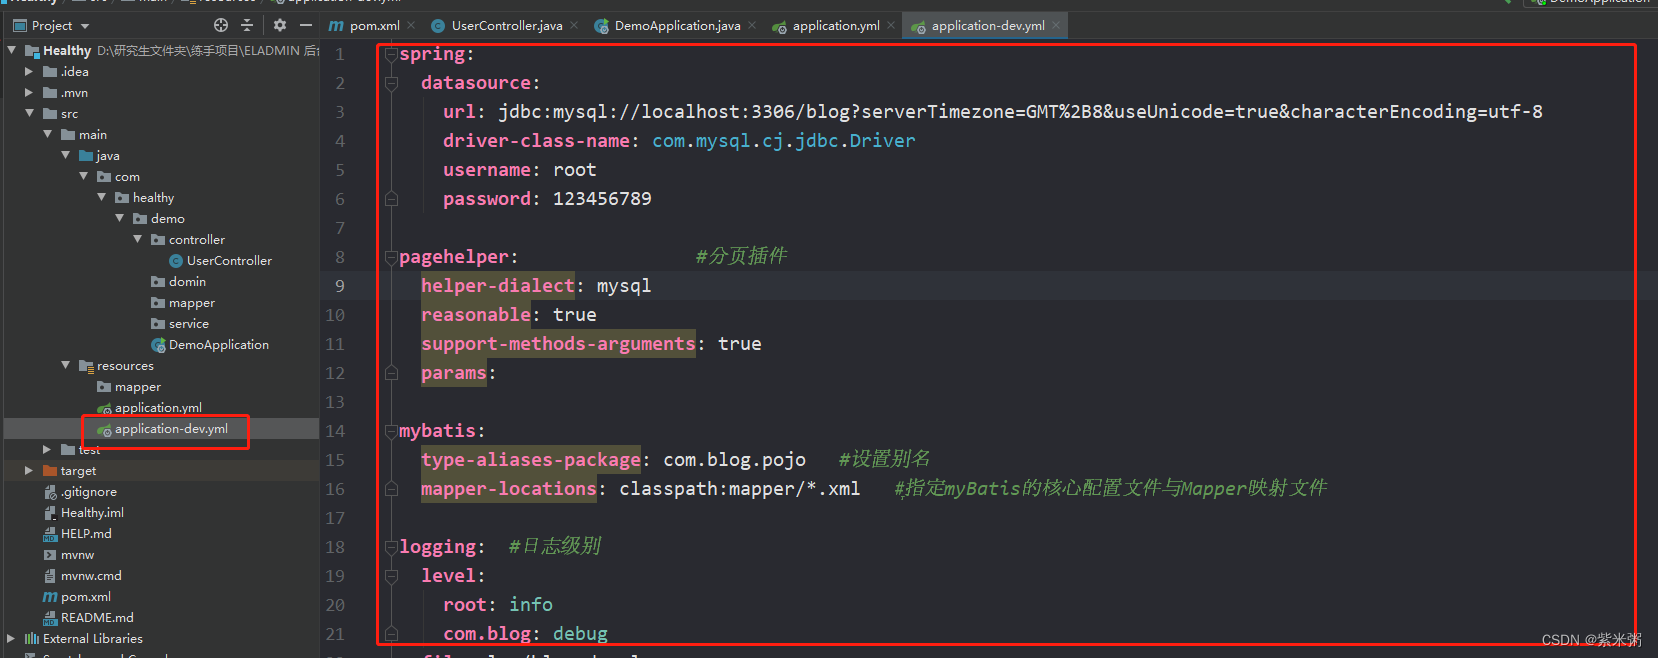
(2)配置application-dev.yml。
(a)注意路径问题:注意mapper-locations的路径要与实际的路径相对应,否则会出现mapper找不到的问题。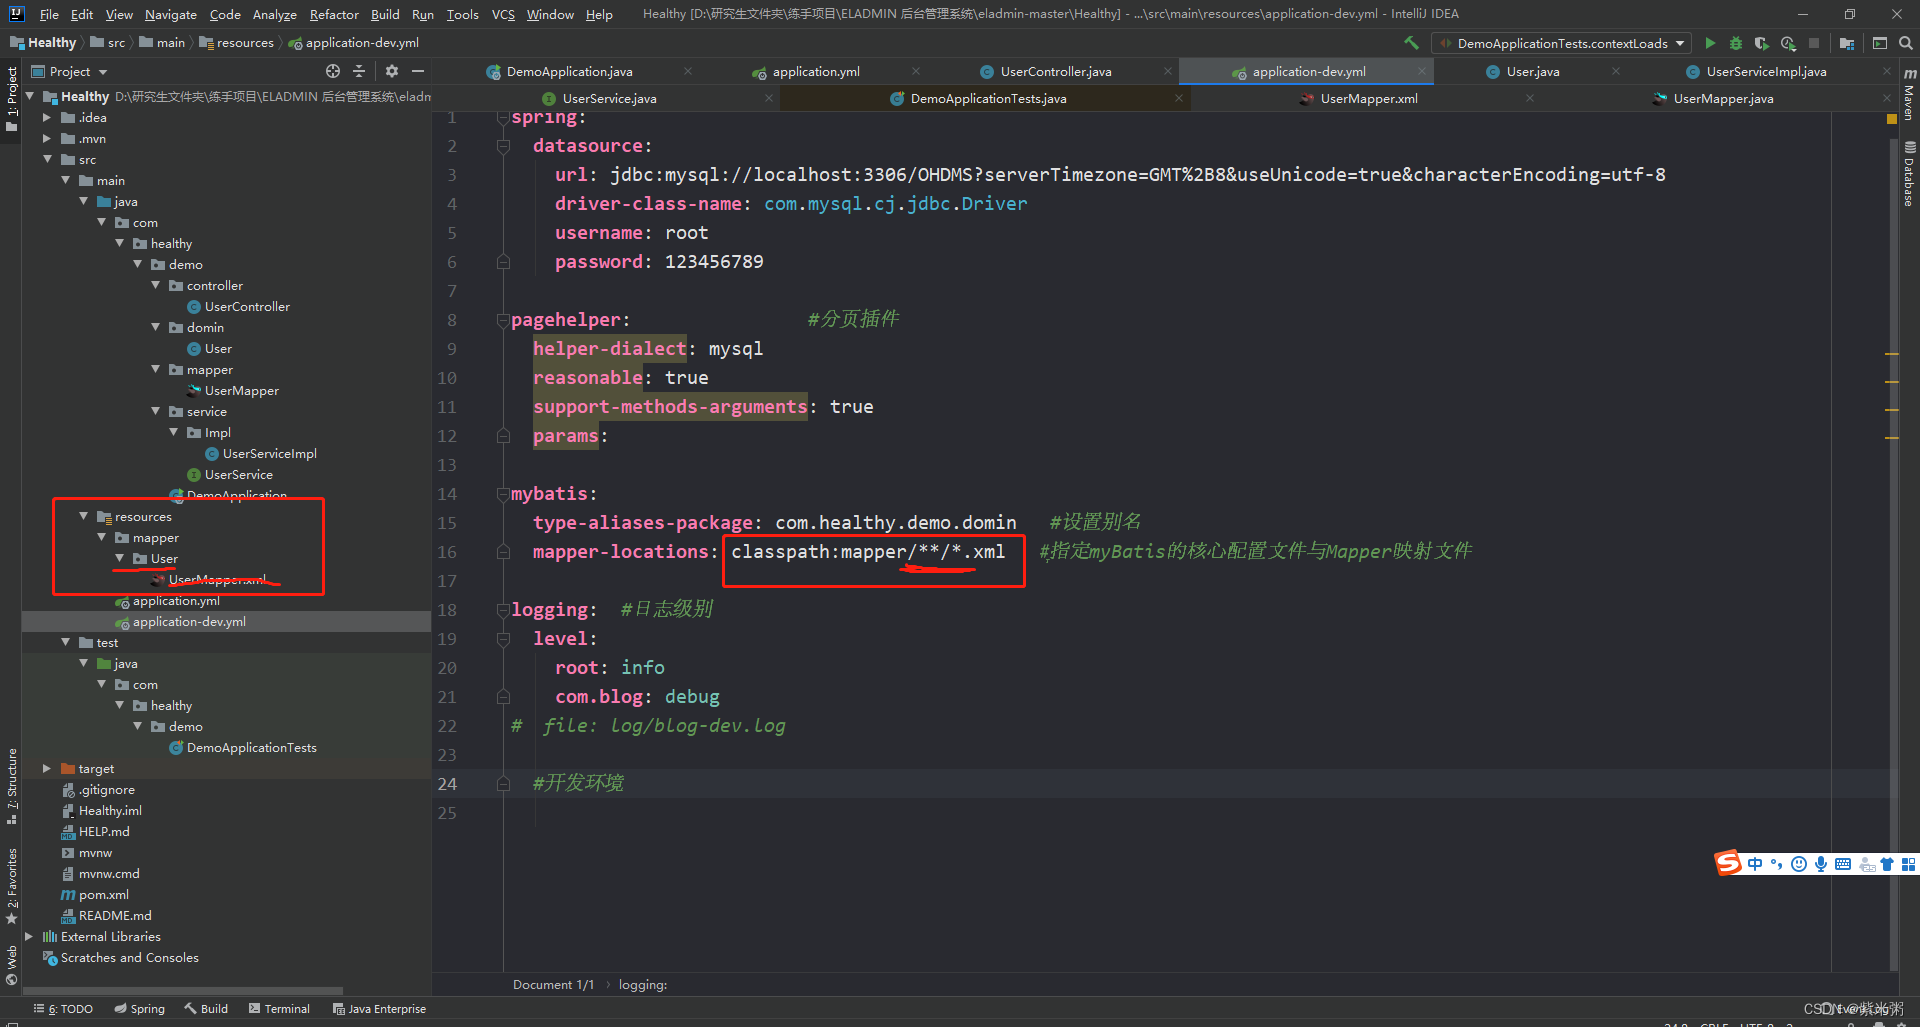
spring:datasource:url: jdbc:mysql://localhost:3306/OHDMS?serverTimezone=GMT%2B8&useUnicode=true&characterEncoding=utf-8driver-class-name: com.mysql.cj.jdbc.Driverusername: rootpassword: 123456789pagehelper: #分页插件helper-dialect: mysqlreasonable: truesupport-methods-arguments: trueparams:mybatis:type-aliases-package: com.blog.pojo #设置别名mapper-locations: classpath:mapper/*/*.xml #ָ指定myBatis的核心配置文件与Mapper映射文件logging: #日志级别level:root: infocom.blog: debugfile: log/blog-dev.log#开发环境(3)配置application.dev
三、Mybatis测试:
1、Domin创建实体类
(1)首先在pom.xml中添加LomBok的依赖。
org.projectlombok lombok true (2)其次在实体类中添加注解:
package com.healthy.demo.domin;
import lombok.AllArgsConstructor;
import lombok.Data;
import lombok.NoArgsConstructor;
import java.util.Date;//@Data注解的主要作用是提高代码的简洁,使用这个注解可以省去实体类中大量的get()、 set()、 toString()等方法。
@Data
//@AllArgsConstructor:添加一个含所有属性的构造函数
@AllArgsConstructor
//@NoArgsConstructor:添加一个无参构造函数
@NoArgsConstructor
public class User {private Long id;private String password;private String userName;private String trueName;private Integer gender;private Integer age;private Date birthday;private Date createTime;private String identity;private Integer phonenumber;private Integer emergencyCcontact;private String picture;}
2、接下来依次是mapper、service、配置mapper的xml文件。在这里需要注意每一层都要加相应的注解
(1)mapper层(@Repository、@Mapper)
package com.healthy.demo.mapper;import com.healthy.demo.domin.User;
import org.apache.ibatis.annotations.Mapper;
import org.springframework.jmx.export.annotation.ManagedOperation;
import org.springframework.stereotype.Repository;/*** @author */@Repository
@Mapper
public interface UserMapper {/*** 根据用户ID查询用户信息* @param id* @return com.healthy.demo.mapper.UserMapper*/public User selectUser(Integer id);
}(2)service层:为了更好的面向接口开发,在这里我也是定义了service的接口和接口实现类。(只在实现类中添加@Service注解即可)
UserService 接口:
package com.healthy.demo.service;import com.healthy.demo.domin.User;/*** @author */public interface UserService {/*** 根据用户ID查询用户信息* @param userId* @return*/public User selectUser(Integer userId);
}
UserServiceImpl 接口实现类:
package com.healthy.demo.service.Impl;import com.healthy.demo.domin.User;
import com.healthy.demo.mapper.UserMapper;
import com.healthy.demo.service.UserService;
import org.springframework.beans.factory.annotation.Autowired;
import org.springframework.stereotype.Service;/*** @author */
@Service
public class UserServiceImpl implements UserService {@Autowiredprivate UserMapper userMapper;@Overridepublic User selectUser(Integer userId) {return userMapper.selectUser(userId);}
}
(3)xml文件:
3、测试Mybatis是否能够查询数据:
(1)找到SpringBoot的测试类,编写方法然后进行查询,如果能够查询到数据,说明Mybatis已经配置完毕了!!!
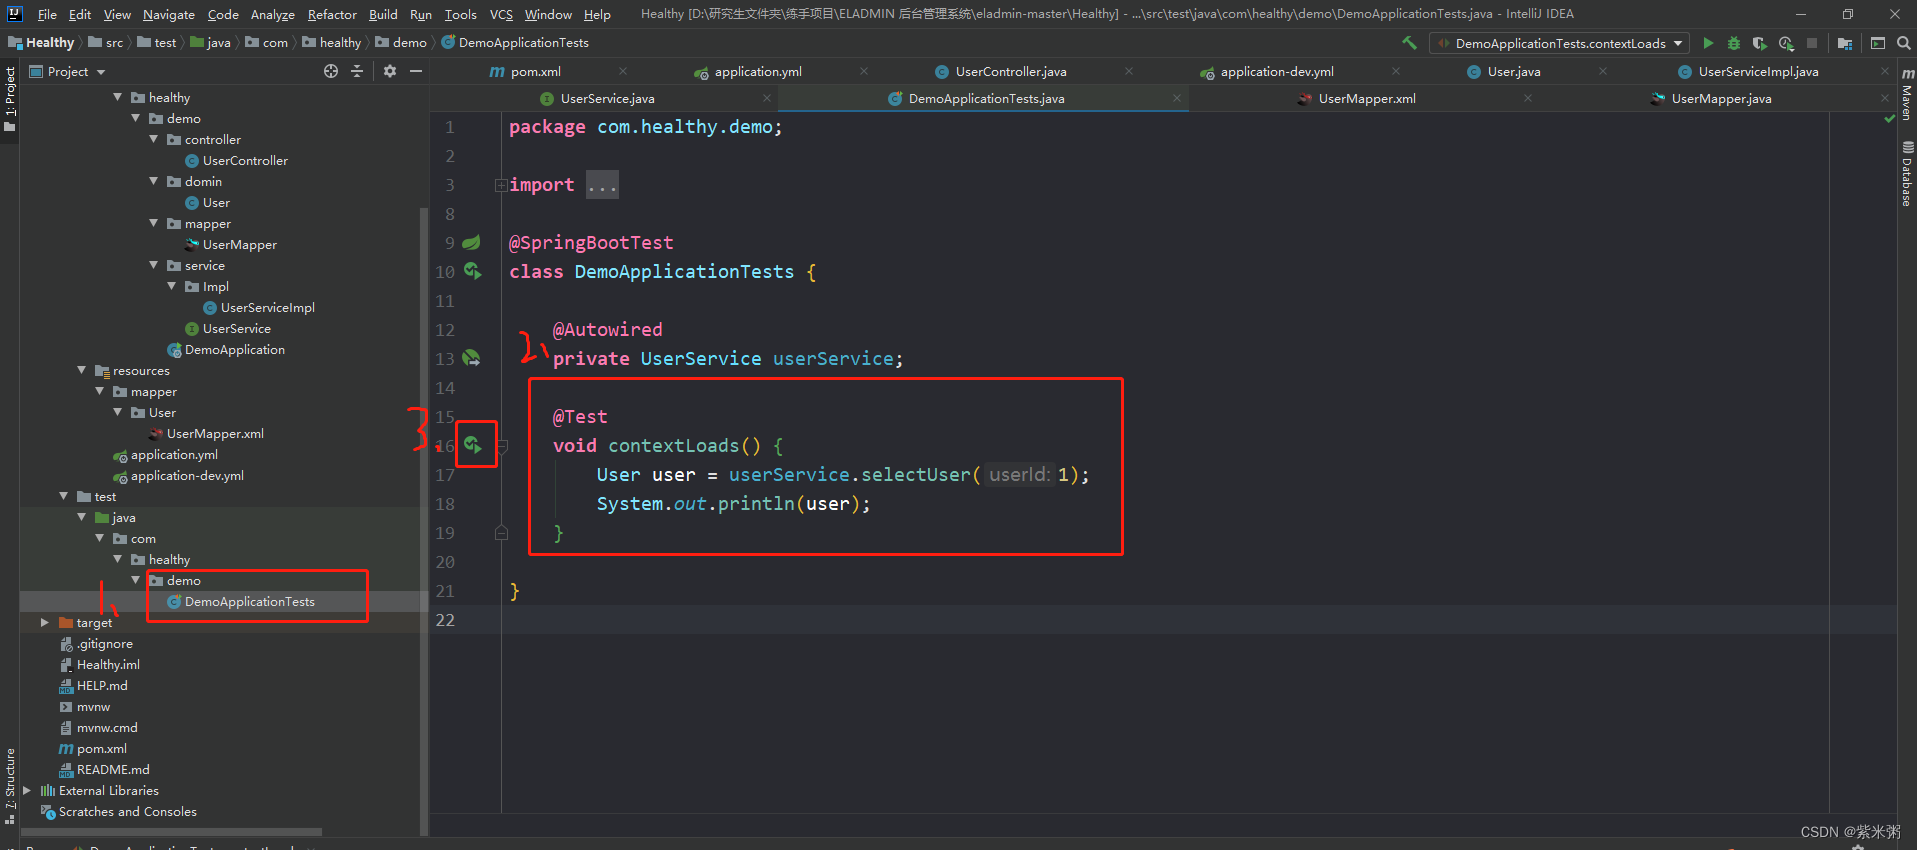
package com.healthy.demo;import com.healthy.demo.domin.User;
import com.healthy.demo.service.UserService;
import org.junit.jupiter.api.Test;
import org.springframework.beans.factory.annotation.Autowired;
import org.springframework.boot.test.context.SpringBootTest;@SpringBootTest
class DemoApplicationTests {@Autowiredprivate UserService userService;@Testvoid contextLoads() {User user = userService.selectUser(1);System.out.println(user);}}
(2)查询结果:
至此,如果你能查询到这行数据,那么你已经进行简单开发了,接下来我准备把我本科毕业设计重新修改成SpringBoot+Vue+Mybatis进行二次开发,如果你有兴趣,那就关注我一下吧!!